Managing and viewing MySQL / MariaDB data using the terminal can be cumbersome. So we always have the help of various tools that allow us to do this process quickly and easily. Thanks to this tutorial, you will learn how to install MyWebSQL on Ubuntu 20.04, and with a modern graphical interface, you will be able to manage a database quickly.
Introducing to MyWebSQL
MyWebSQL is an open-source PHP application that allows you to quickly and easily manage an instance of a database manager. Unlike PHPMyAdmin which only supports MySQL / MariaDB, MyWebSQL also supports SQLite and PostgreSQL so the possibilities within the application are many.
The application is a fast, intuitive, developer-friendly user interface, so many developers will not have to waste time to find what they need.
Moreover, being a web application it is compatible with all major web browsers on the market. Also, you can install it on almost any system. So this is not a problem either.
Install MyWebSQL on Ubuntu 20.04
Step 1: Install LAMP on Ubuntu 20.04 and prepare MariaDB
As it is an application created with PHP and web technology, we can install it on a web server like Apache or Nginx. In this case, we will choose Apache because it is easier and because it is very popular. So, you need to install LAMP on Ubuntu 20.04 as well as other PHP modules and packages needed to complete the post.
To do this, run the following command
sudo apt install apache2 mariadb-server php libapache2-mod-php php php php-common php-mbstring php-gd php-intl php-curl php-xml php-mysql php-pgsql php-mysql php-bcmath php-bcmath unzip wget
As I told you, in that command is LAMP, the necessary PHP modules, and other packages.
Don’t forget to open ports 80 and 443 so Apache can work.
Now that it is installed, the next thing to do is to secure the MariaDB installation with the mysql_secure_installation script.
sudo mysql_secure_installation
In this script, you have to define a password for the root user
Change root password Y
After this, you will be asked some configuration questions that you can answer Y to all of them without any problem.
Remove anonymous users? Y
Disallow root login remotely? Y
Remove test database and access to it?  Y
Reload privilege tables now? Y
Now you have to enter the MariaDB shell and set privileges on a new user other than root. This is optional but it is convenient to use MyWebSQL without problems from the beginning.
sudo mysql -u root -p
and inside the shell, run
USE mysql;
GRANT ALL PRIVILEGES ON *.* TO 'angelo'@'localhost' IDENTIFIED BY 'Angelo12.,';
FLUSH PRIVILEGES;
Then log out.
exit;
Now we have the system ready for MyWebSQL.
Step 2: Download and install MyWebSQL on Ubuntu 20.04
After all the above processes, we can install MyWebSQL. To achieve this goal we will use the wget command
cd /tmp/
wget https://newcontinuum.dl.sourceforge.net/project/mywebsql/stable/mywebsql-3.7.zip
Now unzip the downloaded package into the Apache root directory.
sudo unzip mywebsql-3.7.zip -d /var/www/html
By doing the above step, the folder is left as if the root user owns it. This will cause problems running it. Now set the owner of the folder to www-data which is the name of the Apache user. Also, set the correct permissions on it.
sudo chown -R www-data:www-data /var/www/html/mywebsql/
sudo chmod -R 775 /var/www/html/mywebsql/
Optional: Create a new virtual host for MyWebSQL
For Apache to better process MyWebSQL, then the next step is to create a new Virtual Host. However, if you are using MyWebSQL locally then you can skip this step.
sudo nano /etc/apache2/sites-available/websql.conf
And add the following content
<VirtualHost *:80>
     ServerAdmin admin@your_domain.com
     DocumentRoot /var/www/html/mywebsql
     ServerName your-domain.com

     <Directory /var/www/html/mywebsql>
          Options FollowSymlinks
          AllowOverride All
          Require all granted
     </Directory>

     ErrorLog ${APACHE_LOG_DIR}/your-domain.com_error.log
     CustomLog ${APACHE_LOG_DIR}/your-domain.com_access.log combined

</VirtualHost>
Remember that the value of the ServerName refers to your domain.
Enable the new virtualhost and enable the Apache rewrite module.
sudo ln -s /etc/apache2/sites-available/wordpress.conf /etc/apache2/sites-enabled/websql.conf
sudo a2enmod rewrite
sudo systemctl restart apache2
Optional: Secure the installation with Let’s Encrypt
If MyWebSQL is on a server with internet access, then it must be secured with Let’s Encrypt certificates.
To do this, you need to have a valid domain and install these packages.
sudo apt install certbot python3-certbot-apache
With these packages installed, we can generate and install the certificates using this command
sudo certbot --apache -d [your-domain]
In the process you will be asked for an email and if you agree with the license terms.
When finished you can restart Apache
sudo systemctl restart apache2
Using MyWebSQL on Ubuntu 20.04
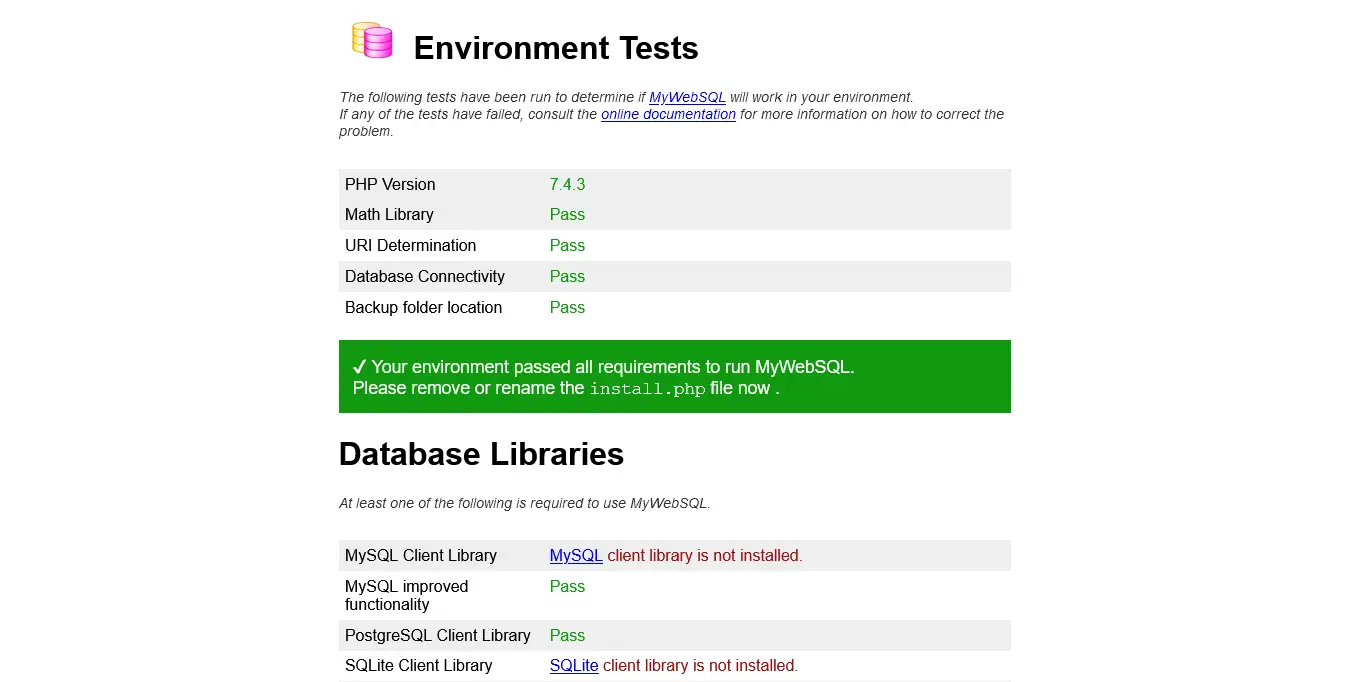
Now we can use MyWebSQL without any problems. Open a web browser of your choice. If you installed MyWebSQL on a local server then access http://localhost/mywebsql/install.php but if you installed it on a public server you can access it via https://yourdomain/install.php.
There you will see the following screen where the program will determine if the installation process has been successful. If so, you will see a message on the screen indicating that you need to delete or rename the install.php file.
You can now access the MyWebSQL login screen by using http://localhost/mywebsql/ or https://yourdomain/.
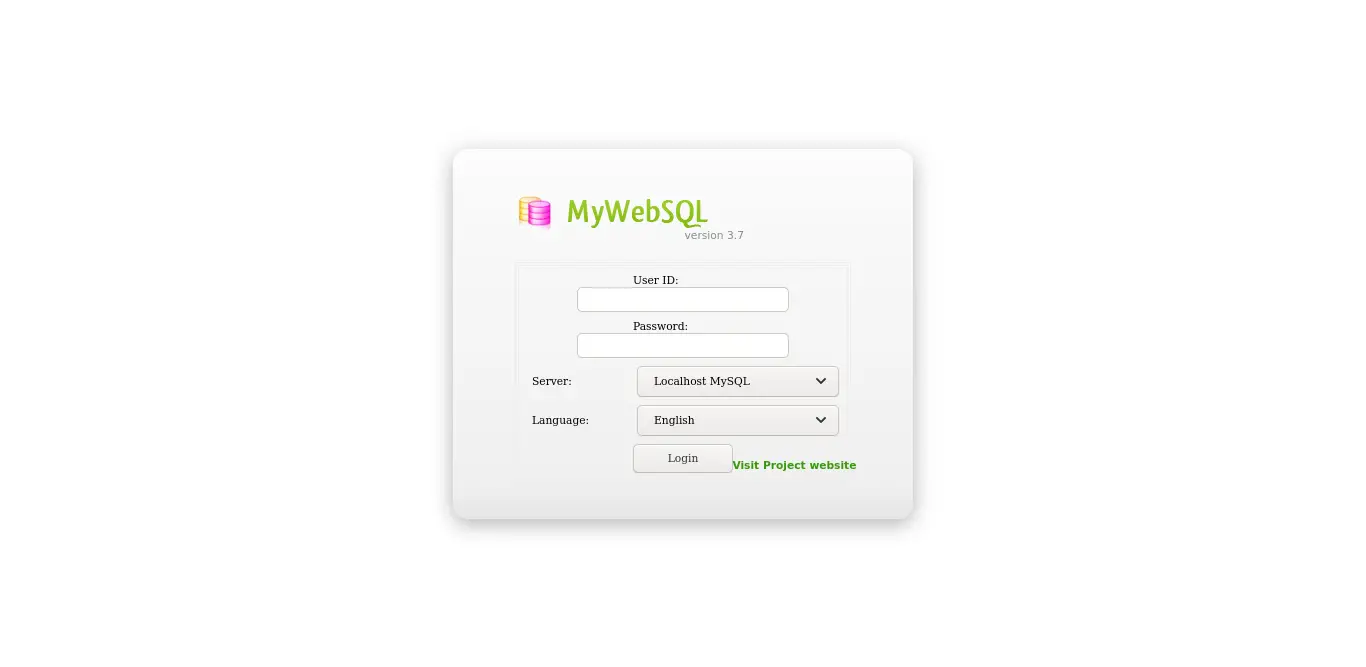
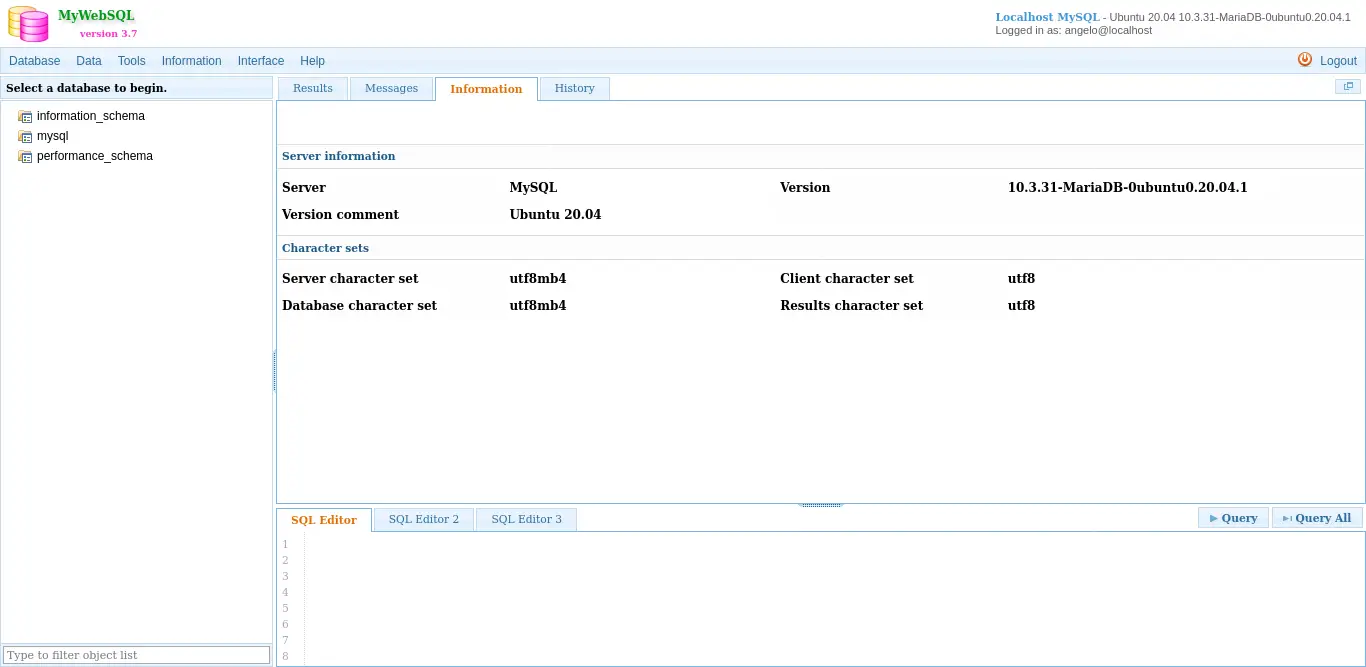
Log in and you will be able to use the application.
Conclusion
MyWebSQL is intended to be a tool to help us when we have to manage data from MySQL / MariaDB or other database managers supported by the application. In this post, we have shown you how to install it on a system like Ubuntu 20.04 step by step.
Please share our post and help us to grow.