LMDE stands for “Linux Mint Debian Edition.” It is a Linux distribution based on Debian, which is known for its stability and reliability. The main idea of the Linux Mint developers in creating this distribution is to experiment that in case Ubuntu ceases to exist, they can use Debian as a base and continue their project. Today, you will learn how to install LMDE on your PC.
Therefore, LMDE is designed to provide a user experience similar to other editions of Linux Mint but with the underlying Debian architecture.
This brings some advantages, such as full compatibility with Debian making you can use a very robust system as if it were for a novice; also, in LMDE you will have a Rolling Release-like development environment where you can continuously have security and package updates.
In addition, LMDE offers a higher level of customization and control compared to Ubuntu-based editions.
What’s new in LMDE 6
This new version includes many new features inherited from Debian 12, but also some very particular ones. Let’s see:
- Based on Debian 12: This makes that it includes kernel 6.1 LTS, system 252. Many improvements have been added to the security of the system, like the incorporation of new tools and updates of important packages like programming languages, web servers and others.
- Debian 12 supports for newer hardware, has been improved with the inclusion of proprietary drivers by default. Most of the drivers have also been updated.
- Cinnamon 5.8: not all the new features come from Debian 12, but the development team also includes its flagship product: Cinnamon. In this version, you will have an improved dark mode, bug fixes, performance and visual improvements.
- Installer improvements: Now installing LMDE is even easier with a new installer powered by GParted for working with partitions.
- All Linux Mint components have also been updated, such as the update manager or the software store.
- Full integration with Flatpak: The Debian package base is gigantic, but you can always fall back on Flatpak in case something is missing. Well, LMDE includes flatpak by default and does so by integrating it with the desktop.
Get LMDE 6
From the project website, you can get many links to download this version. Either as a direct download through the many mirrors that LMDE has or using torrent.
Then, you will have to burn it to a USB drive to have it ready to use on your computer.
Install LMDE 6 step by step
In this test environment, I will use a virtual machine, but the process is the same on a real computer. However, doing this method, can help you to test without damaging anything. Especially useful if you are just starting with Linux.
First steps to install LMDE 6
As soon as the installer starts, you will see the distribution’s presentation menu. There you have several options available, but the one you have to choose is Start LMDE.
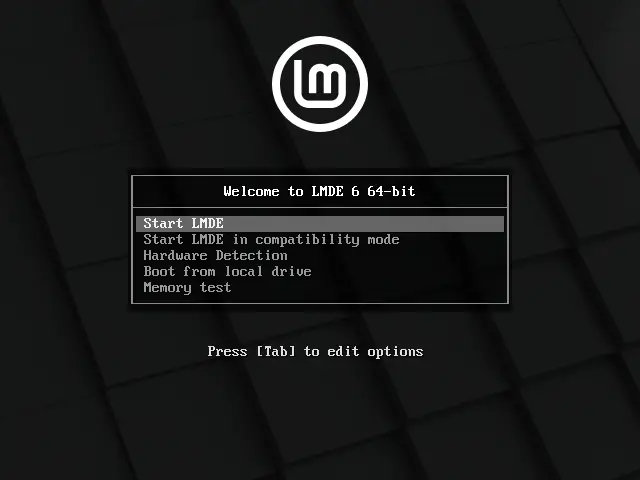
This option will start LMDE in live mode. So when it finishes loading, you will get a test desktop.

You can test it, open some applications and take a tour through the whole distribution. This will do two things: the first is to know what the distribution is like and not get any surprises; the second is to verify that all your hardware works flawlessly.
When you have decided, you can click on the desktop icon Install Linux Mint to start the installer.
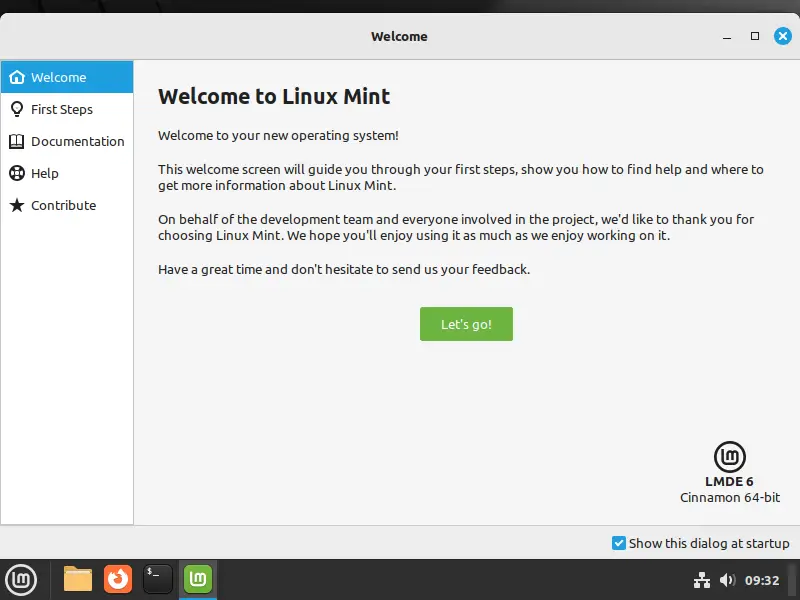
As soon as you do so, you will see a welcome screen. Then, you will be able to decide the installation language.
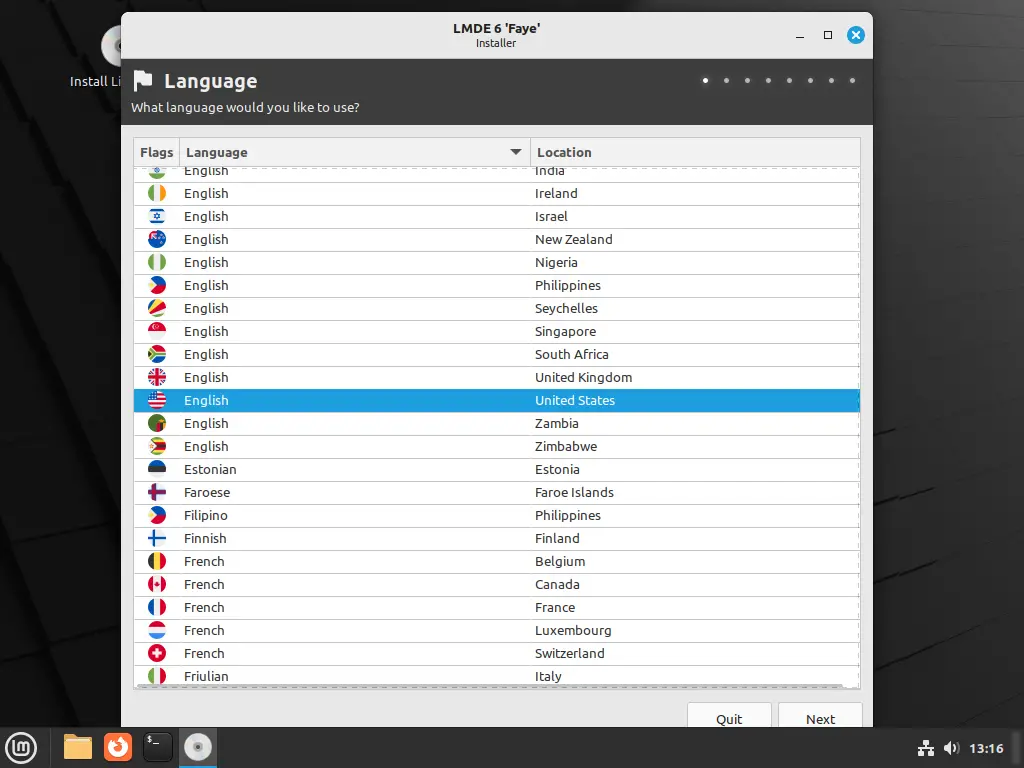
LMDE supports many languages, so it is almost impossible not to find yours or the one you want.
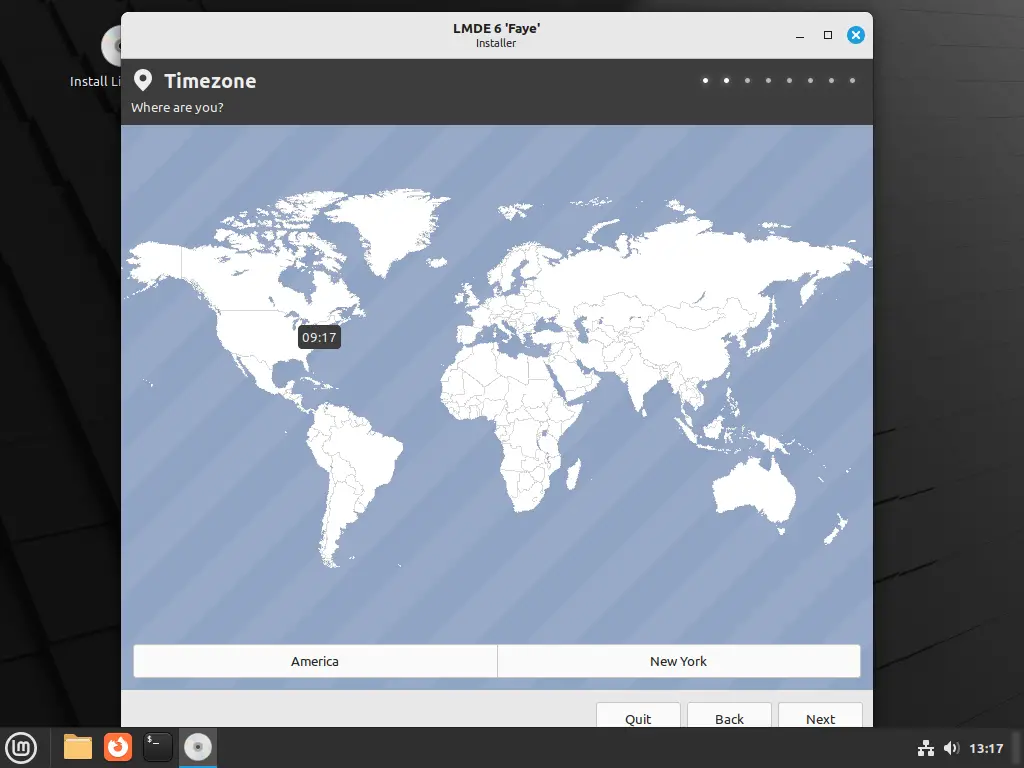
Thereafter, you can select the Timezone according to your location. This value can be changed later, but choose the most suitable one because it has direct influence on system variables like formatting and so on.
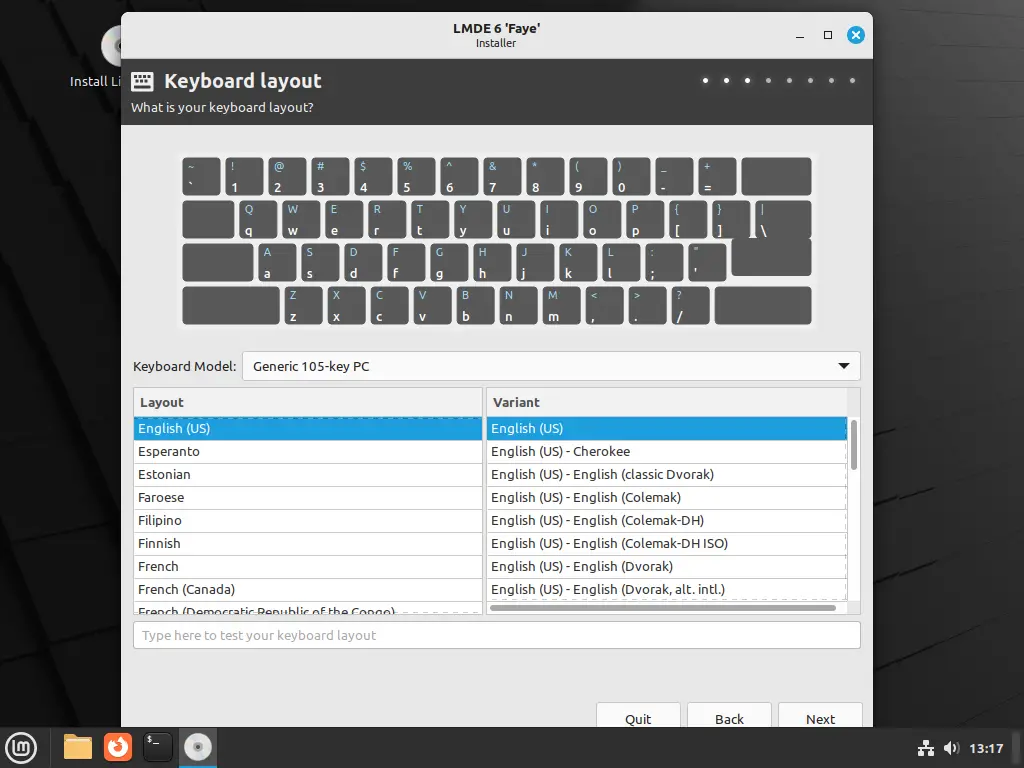
Then you can pick the keyboard layout you have. As with the language, there are too many, and it is unlikely that you will not find yours.
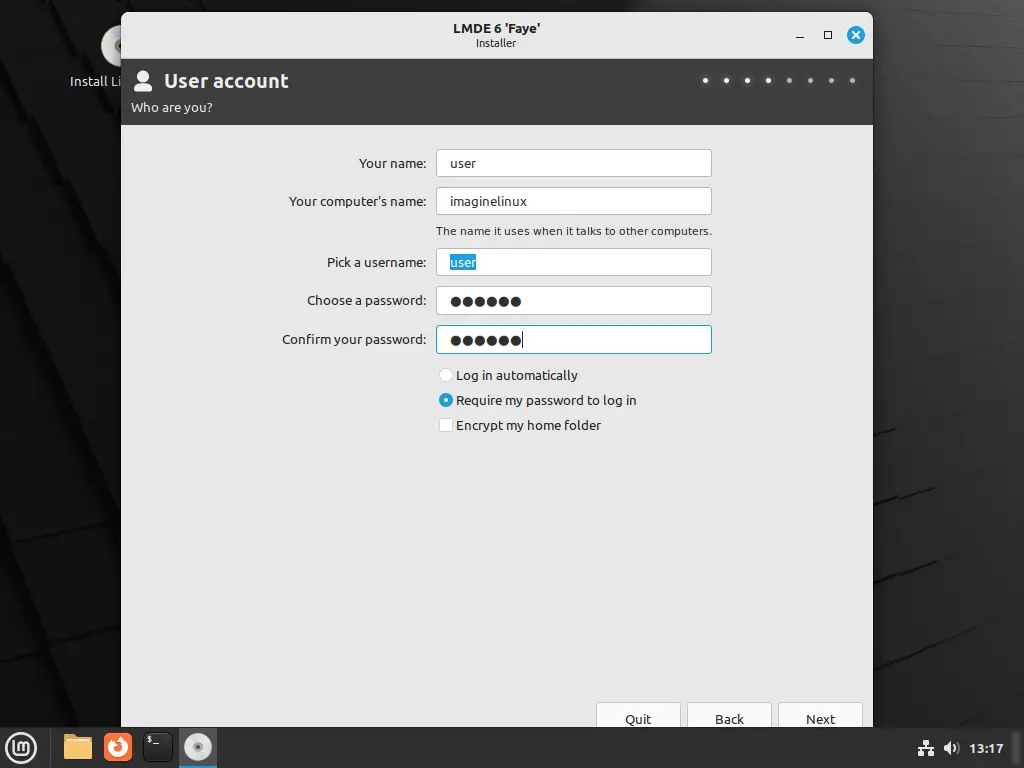
Next, it is time to create the regular system user. On this screen you will have to enter your name, your username, your password and select how you want to log in and if you would like to encrypt your home folder.
Working with the disks to install LMDE
Now it’s time for the most delicate part of an installation, and that is working with the disks. Although, delicate does not mean difficult.
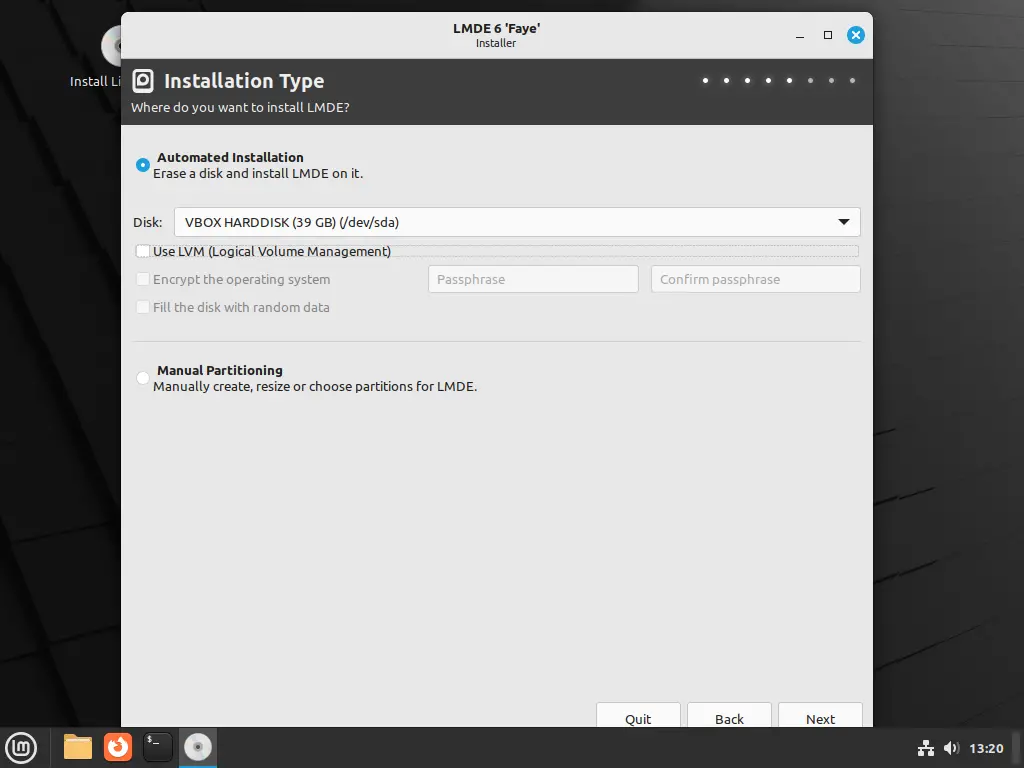
The first option the installer gives us is to erase the entire disk and install LMDE. This removes other systems and automatically defines the partitions and their sizes to install LMDE.
This option is interesting if you don’t mind losing the information on the disk, and you are determined to use LMDE as the only system on the computer.
The other option is to select Manual Partitioning and thus have more control over the partition size and options.
When you open it, you will see a screen similar to this one. Remember that it depends on each hard disk and its partition layout.
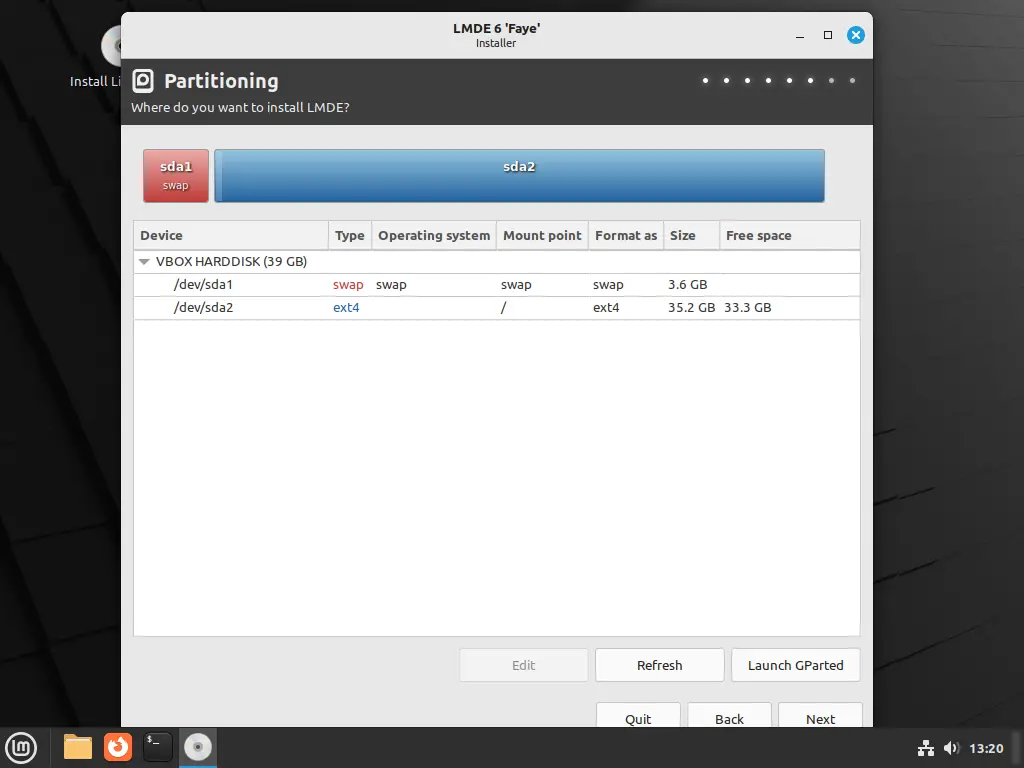
The important thing to know is that you need at least two partitions for LMDE. The first one is where the system will be and must have a mount point / and the file system can be ext4 (recommended) or other; the second partition is the swap to help the system to be more fluid. The size can vary according to the RAM.
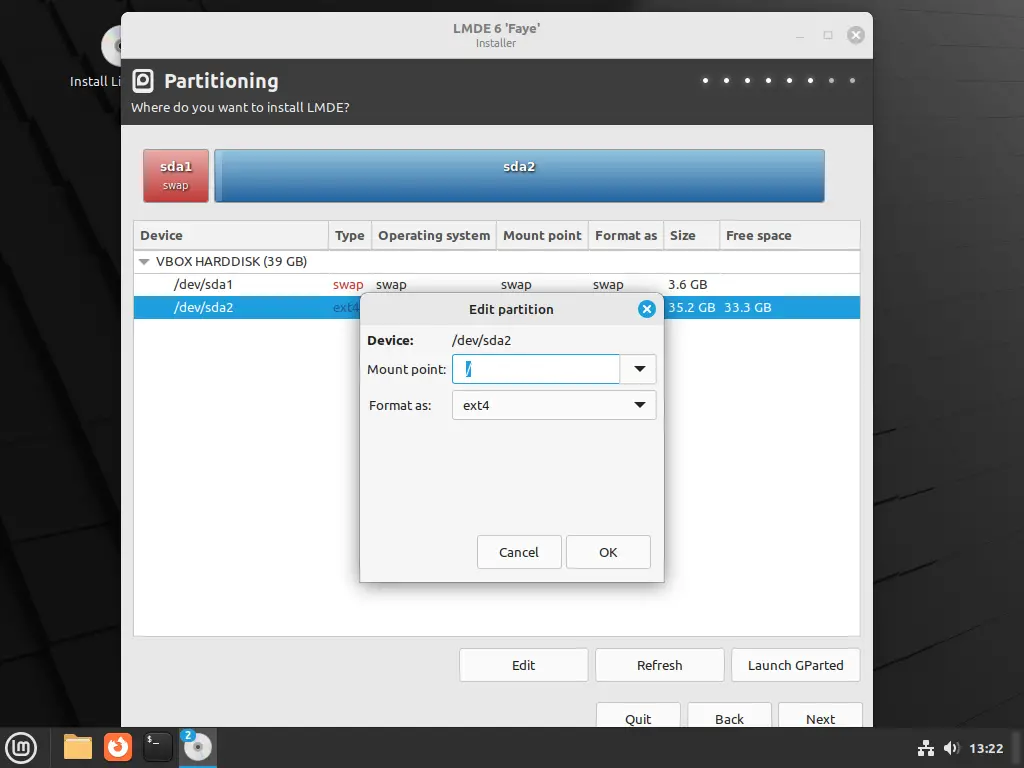
If you select a partition and right click on it, you can edit it.
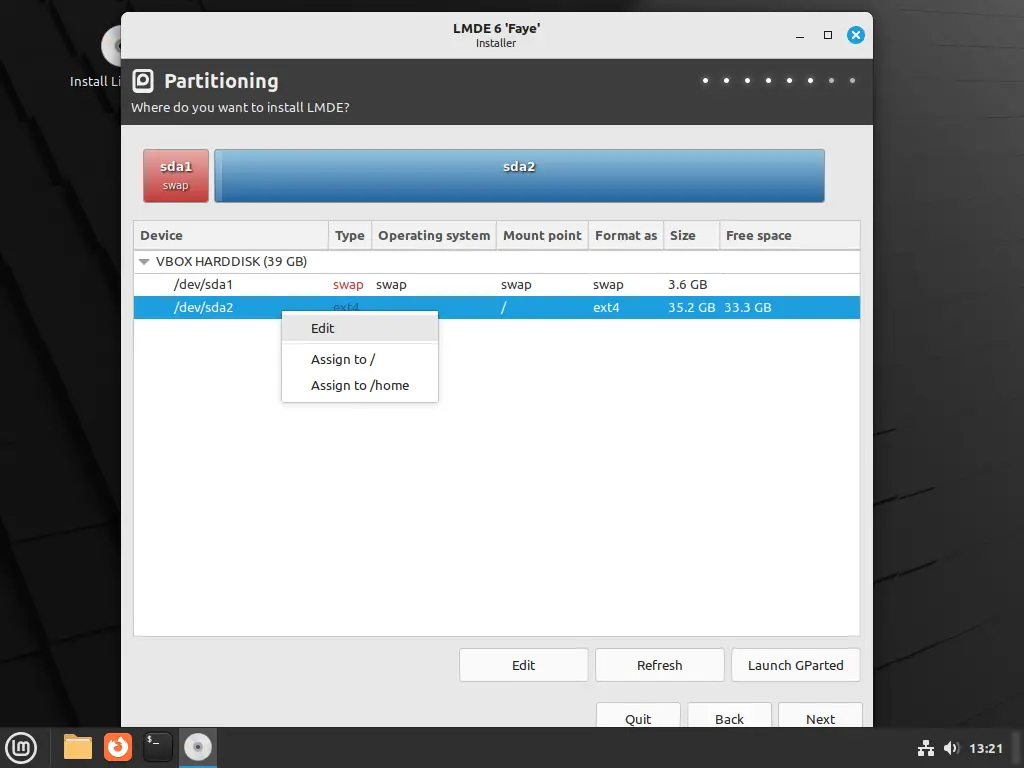
When you click on Edit you will see a screen where you can set the mount location and format it with a file system.
If you would like to work with the partitions directly (create, delete, or resize) you will have to choose the Launch GParted button at the bottom.
Working with partitions (II)
When you open GParted you will see a screen like this
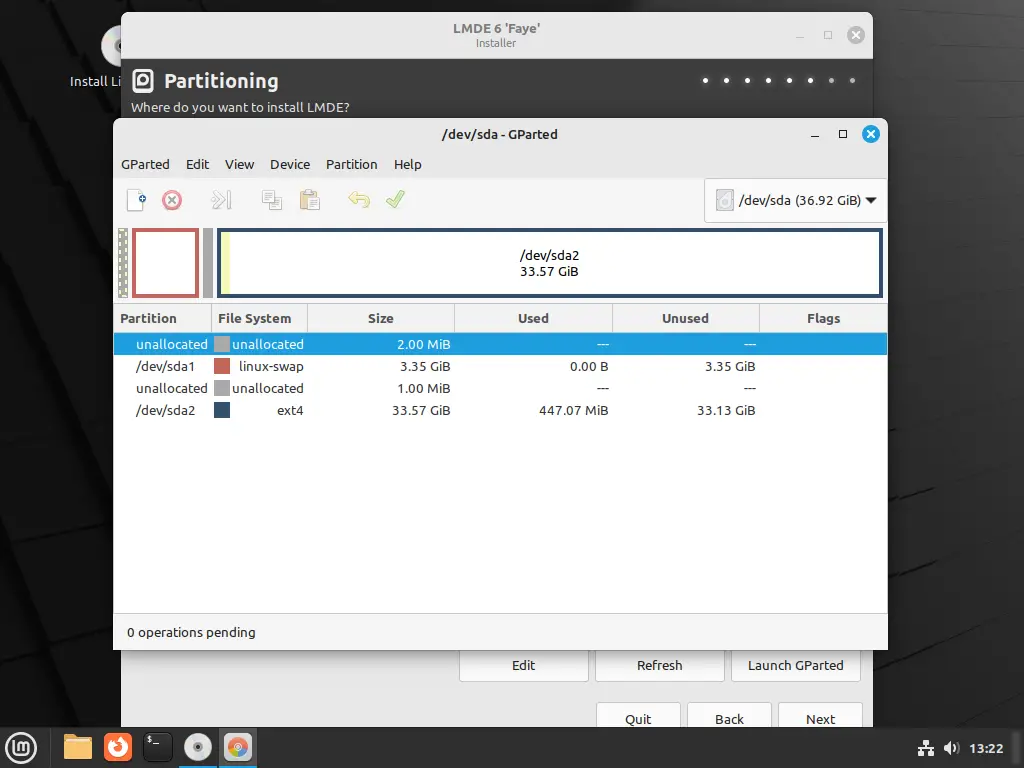
There you will focus on partition management. If you have a system installed, one option is to remove some partition size and in the space that is generated, install the system.
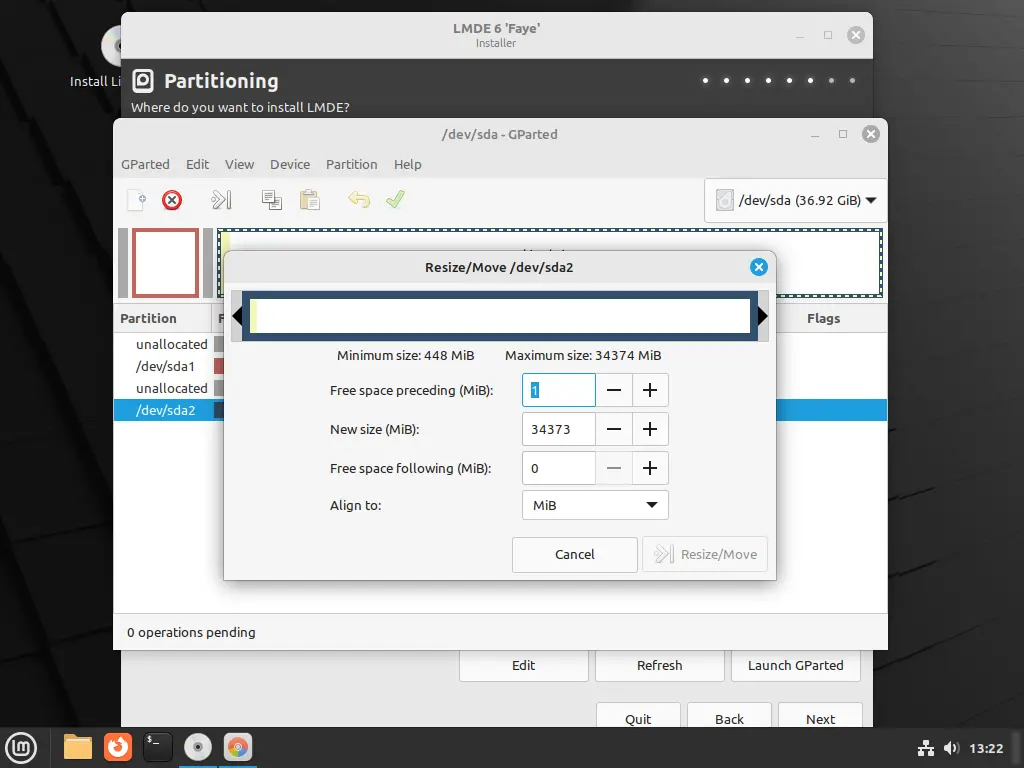
For example, take a partition and right click on it and look for the Resize/Move option and set a new size.
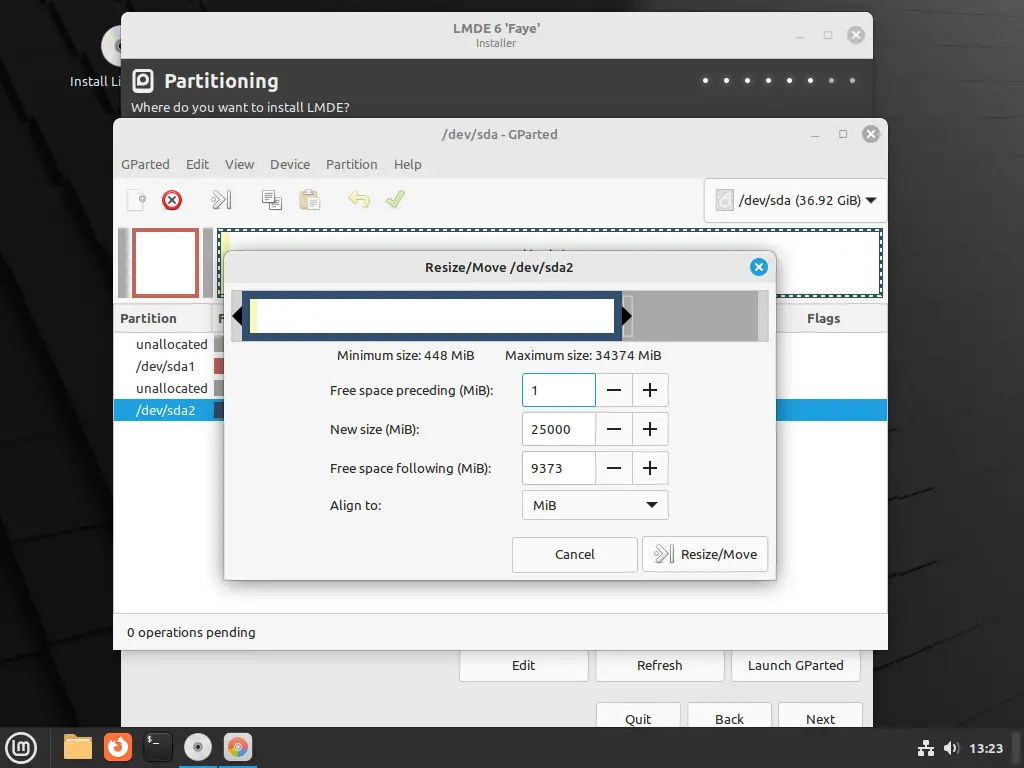
From the remaining space, just click on it and in the New option create the new partition and format it with EXT4.
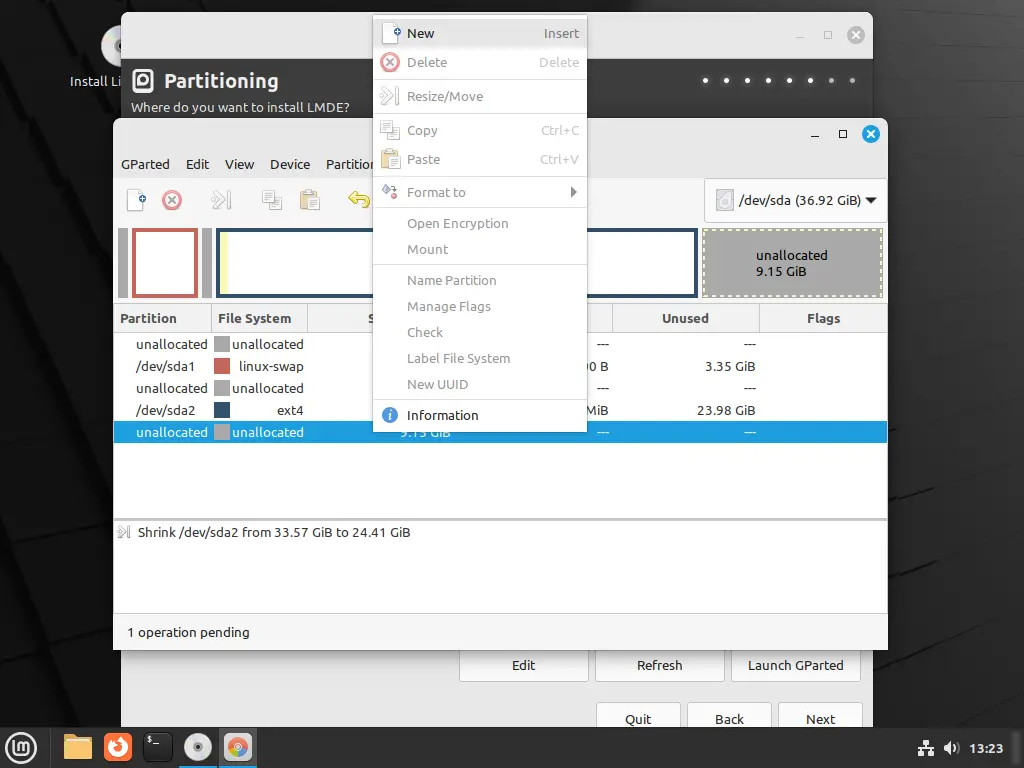
Then you can select it as system partition. Finally apply all the changes.
Continuing with the installation
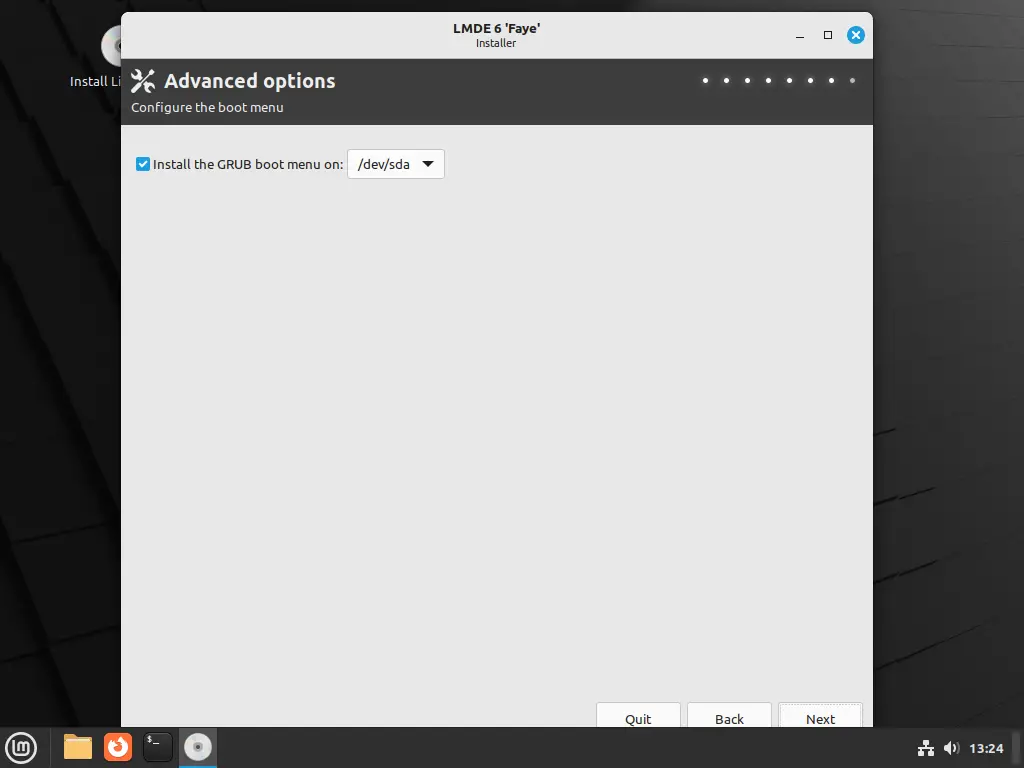
When you have finished defining the partitions, it is time to install the GRUB Boot Menu. To achieve this, choose the disk device and click Next.
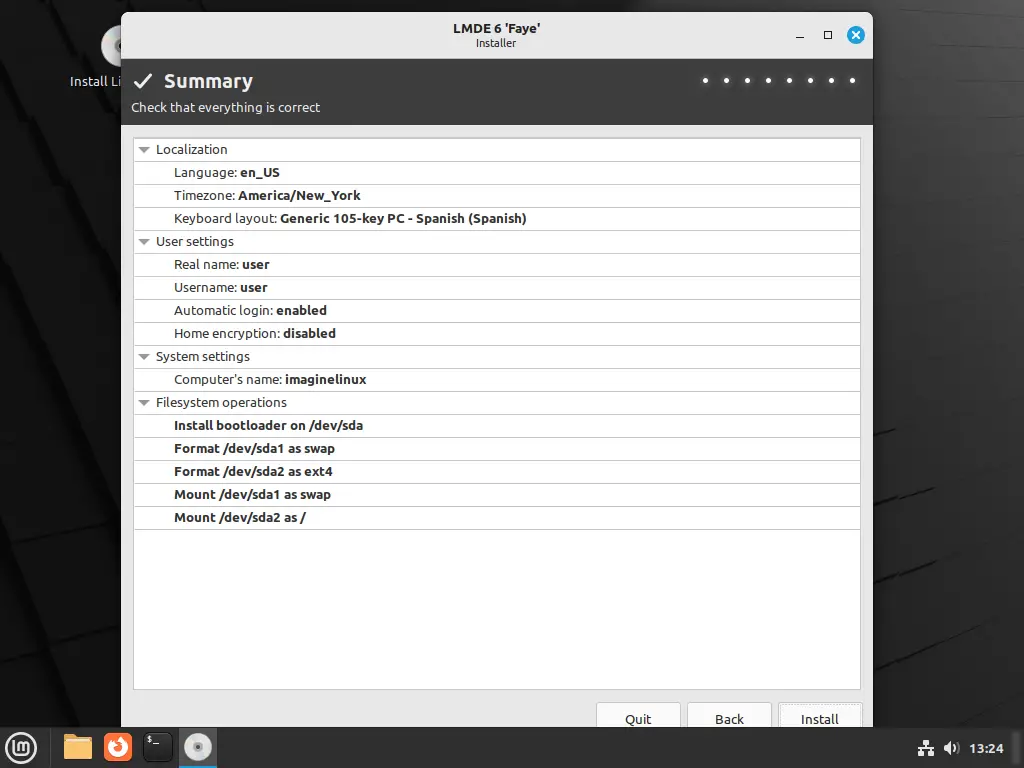
Finally you will see a summary of the installation. It is time to take a last look at it because the next step is to start the installation.
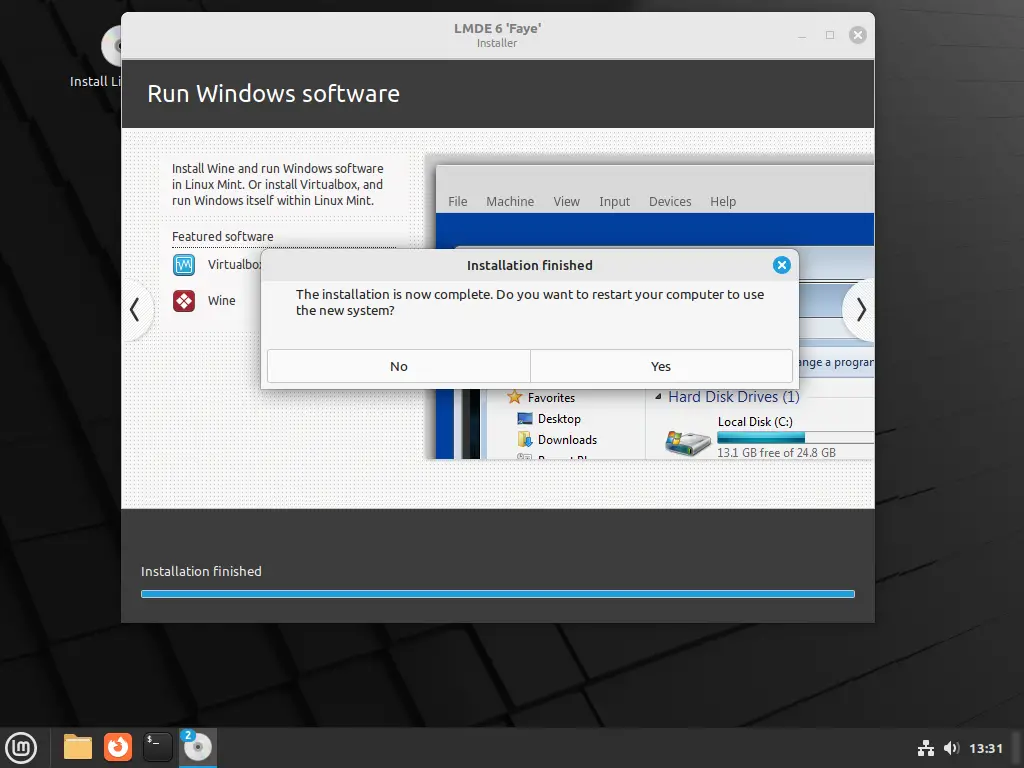
Be patient, the process won’t take long, but it will take a few minutes. When it is finished, you will see a screen where you will be told that it is finished, and you will be asked to restart the system to enjoy it.
At startup, you will have your brand new LMDE 6 on your computer.
Conclusion
Overall, LMDE is a good choice for users who prefer the stability of Debian and want to have a rolling release model for their Linux distribution. It provides a user-friendly experience while offering flexibility and control.
Now you know how to install it, you have to try it yourself to get all its benefits.