XAMPP is an easy-to-install web development distribution for developers on the local machine. It provides Apache, MariaDB, PHP, and PERL which are required for web development. You can install all these tools independently, but it is not easy.
XAMPP makes your job easy. It bundles all of them together. On top of it, it is free, open-source, and includes Apache 2.4.38, MariaDB 10.1.38, PHP 7.3.2, Perl 5.16.3, and other supporting tools.
In this article, we will show you how to install XAMPP on Linux.
Install XAMPP on Linux
Below are the step-by-step instructions
1. Download XAMPP for Linux installer
XAMPP is cross-platform which means it is available for Windows, Linux, and Mac OS. Visit the official download page. This page is updated frequently with the latest version download information. At the time of writing this article XAMPP – 5.6.40, 7.1.26, 7.2.15 & 7.3.2 versions are available.
The codebase is maintained on SourceForge Site. So visit the SourceForge site. Here you will find the code for all supported operating systems and versions. Click the download link to download the respective Linux Version.
2. Change installer permission
Open the terminal and go to the directory where the file is downloaded. The XAMPP installer is by default read-only. You need to change the permissions of the installer using chmod command as shown below.
chmod 755 xampp-linux-x64-7.3.2-0-installer.run
3. Run the installer to Start Installation
Next, run the installer using the below command.
sudo ./xampp-linux-x64-7.3.2-0-installer.run
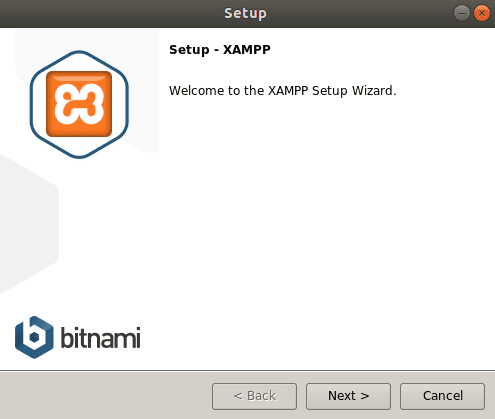
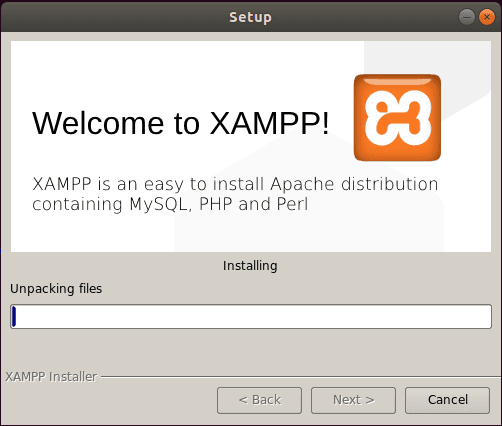
This starts the XAMPP installation process. This is the wizard-driven installation. Setup/Installer present screen to display information or get inputs from the user. You just need to click the Next and install button.
Welcome to the XAMPP Setup Wizard is the first screen click the Next button.
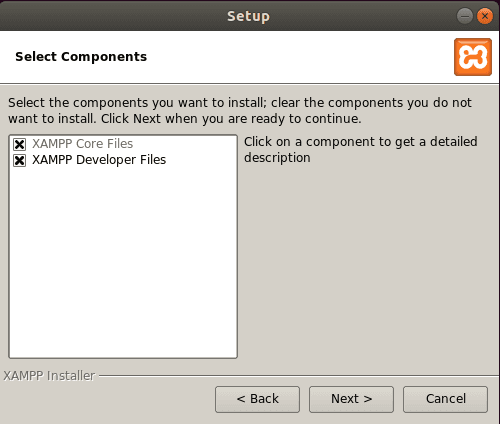
4. Select Components
The next screen shows you which component to install. You can clear the component if you do not want to install it. Let it be the default, do not change anything. Click Next.
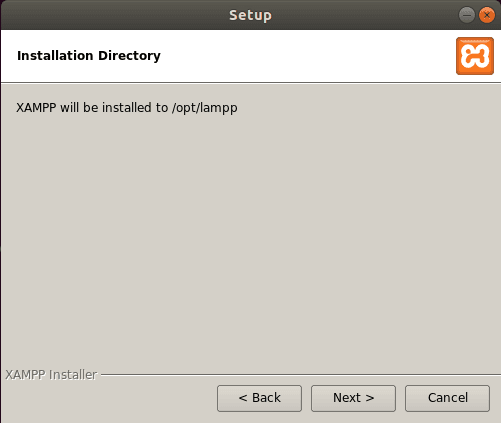
5. Installation Directory
The next screen shows the installation directory. XAMPP is installed under /opt/lampp/ directory. There is no option to change it, just click Next.
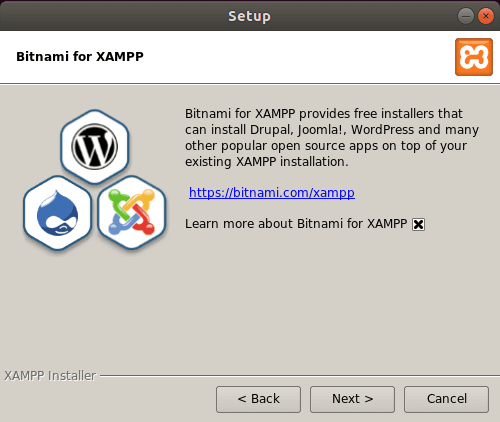
Bitnami for XAMMP provides a free installer for WordPress, Drupal, Joomla, and many other open sources CMS. If you want to explore it, just select/unselect the option.
That’s it and you are ready to install. Just hit Next.
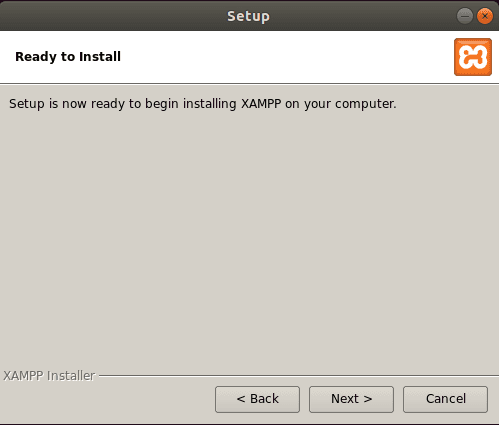
This starts the installation and you could see the progress bar.
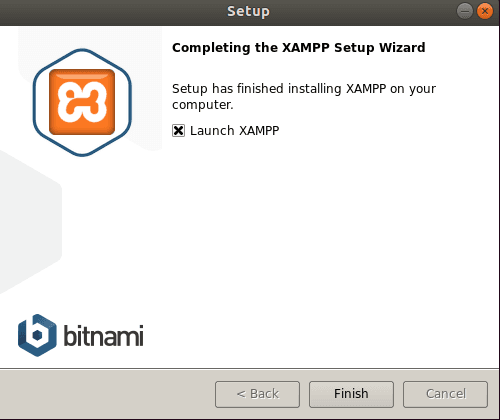
6. Completing the XAMPP Setup Wizard
It completes within seconds and setup confirms you back with the below message. You have the option to launch it from here.
That’s all.
Starting XAMPP
To start XAMPP simply call this command:
sudo /opt/lampp/lampp start
There is a graphical control panel is also available.
cd /opt/lampp
sudo ./manager-linux.run (or manager-linux-x64.run)
To stop XAMPP simply call this command:
sudo /opt/lampp/lampp stop
Open Chrome or any other browser and enter http://localhost to check if XAMPP started or not.
Linux FAQ – https://www.apachefriends.org/faq_linux.html
Autostart XAMPP when Linux System Boots up
To start XAMPP when Linux Boots up follow the below procedure.
Debian, Ubuntu.
sudo ln -s /opt/lampp/lampp /etc/init.d/lampp
sudo update-rc.d lampp start 80 2 3 4 5 . stop 30 0 1 6 .
RedHat, Fedora, CentOS. If your Linux distro uses “chkconfig” tool to install the services you can run the following commands:
sudo ln -s /opt/lampp/lampp /etc/init.d/lampp
sudo chkconfig --add lampp
SUSE
sudo ln -s /opt/lampp/lampp /etc/init.d/lampp
sudo chkconfig lampp 2345
The main XAMPP configuration files are located as follows:
- Apache configuration file: /opt/lampp/etc/httpd.conf, /opt/lampp/etc/extra/httpd-xampp.conf
- PHP configuration file: /opt/lampp/etc/php.ini
- MySQL configuration file: /opt/lampp/etc/my.cnf
- ProFTPD configuration file: /opt/lampp/etc/proftpd.conf
That’s all.
Summary
This guide provides you a step-by-step instructions on how to install XAMPP, an easy-to-use, cross-platform web server solution, on Linux.
By following these steps, users can set up a local development environment with Apache, MySQL, PHP, and other essential components, streamlining the process of creating, testing, and deploying web applications.