FileZilla is an open-source, fast, and reliable cross-platform FTP, FTPS, and sFTP client and server solution. It is written in C++ and available with source code. The paid pro version supports additional protocol like Amazon S3, Google Cloud Storage, WebDAV, Backblaze B2, Dropbox, Microsoft OneDrive, Google Drive, Microsoft Azure Blob and File Storage, etc
Features,
- Supports FTP, FTP over SSL/TLS (FTPS) and SSH File Transfer Protocol (SFTP)
- Cross-platform available for Windows, Linux, *BSD, Mac OS X and more
- Easy to set up and use, Available in many languages
- Support IPv6, HTTP/1.1, SOCKS5, and FTP-Proxy support
- Supports resume and transfer of large files >4GB
- Tabbed user interface, Powerful Site Manager, transfer queue
- Bookmarks, Drag & drop support, Configurable transfer speed limits
- Filename filters, Directory comparison, Remote file editing, Synchronized directory browsing, Logging to file, Remote file search
- Network configuration wizard, Keep-alive
Check this official feature list for further information.
(How to) Install FileZilla
There are two methods to install FileZilla on Ubuntu, first, using apt-get command and second using the Ubuntu Software Package Manager.
Ubuntu is fast, secure and one of the most widely used Linux Distros. We are going to use an 18.04 version to explains the installation steps.
Note:- These steps should work on 16.04,20.04 Ubuntu versions as well.
1. Install FileZilla using Commands(Terminal) on Ubuntu
Login to Ubuntu and open the terminal window and enter the below apt-get commands. The apt-get command provides a fast and easy way to install any software from a terminal prompt. It does take care of all dependencies as well while installing.
Below are the steps to install FileZilla on Ubuntu via the command line.
First, refresh the package index and update the repository using the command.
$ sudo apt-get update
Now, let’s search the repository.
$ apt-cache search filezilla
Run below command to install Filezilla.
$ sudo apt-get install filezilla
Just type filezilla on the terminal to launch the application when the installation is complete.
$ filezilla
2. Install FileZilla using Software Manager in Ubuntu(Graphical Method)
This is a graphical method where you don’t have to run any command.
Open Applications -> Ubuntu Software and Search for FileZilla in the search box as shown below.
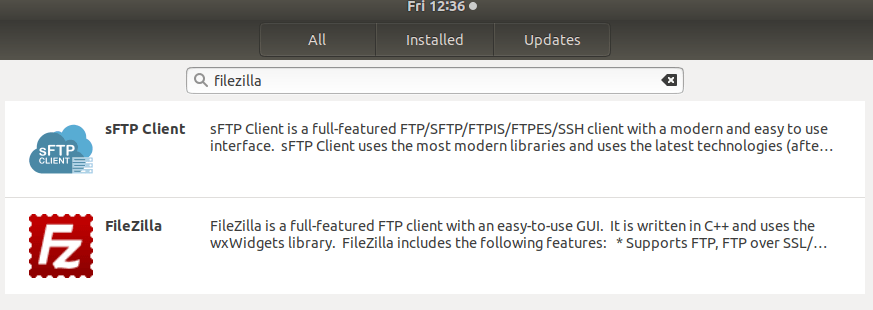
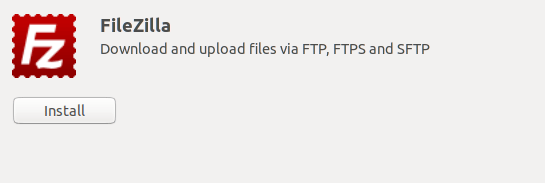
Select FileZilla- Full-featured FTP client. This opens below windows which shows information about the app. Click the Install button.
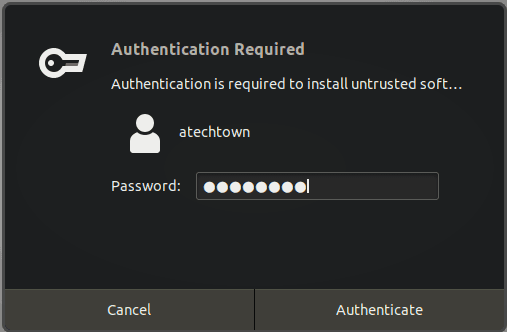
Enter the password in the next windows. Make sure you are an admin on the system.
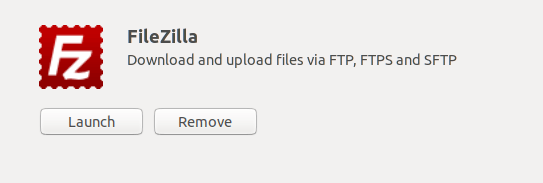
The app gets downloaded from the default repository and installed on the system. Use the Launch and Remove button to start and remove the program.
Using FileZilla
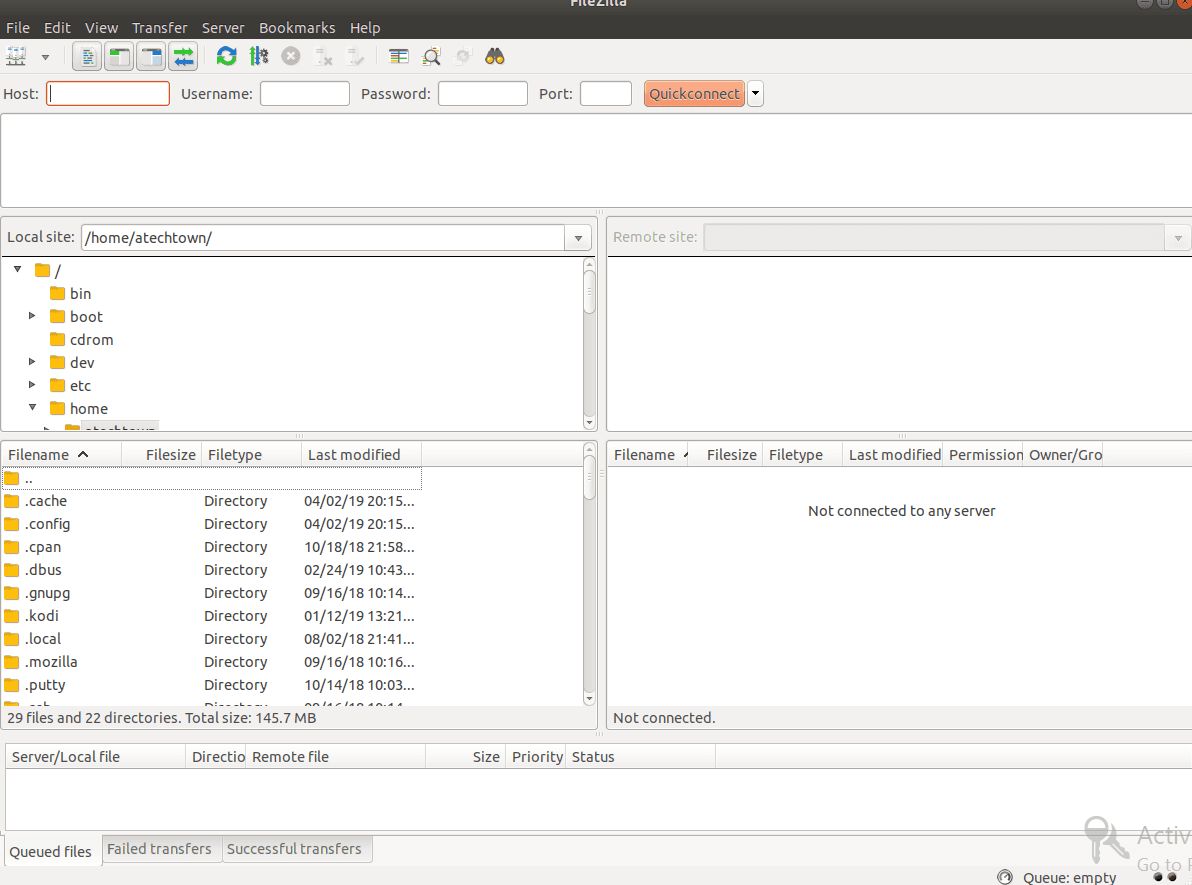
Below is the default dashboard for FileZilla.
Enter host, username, password, and port information. Click the Quickconnect button to connect remote host. Now, use drag and drop to move files from local site to remote site.
Remove Filezilla from Ubuntu
You can simply search the FileZilla app in Ubuntu Software and click on the remove button or use the below command on the terminal to completely remove FileZilla from your Ubuntu system.
sudo apt-get purge --auto-remove filezilla
Summary
This guide outlines the steps to install FileZilla, a powerful and widely-used FTP client, on Ubuntu. By following the instructions, users can easily set up FileZilla to manage and transfer files between their local system and remote servers, enhancing their workflow and file management capabilities.
I hope you found this article useful. Please share and subscribe.
I hope you liked the article.
Please see also.