GParted is a free partition editor for graphically managing your disk partitions. Using GParted you can resize, copy, and move partitions without data loss to make space for other systems or attempt to recover data. This can be done either on a hard disk or on memory sticks.
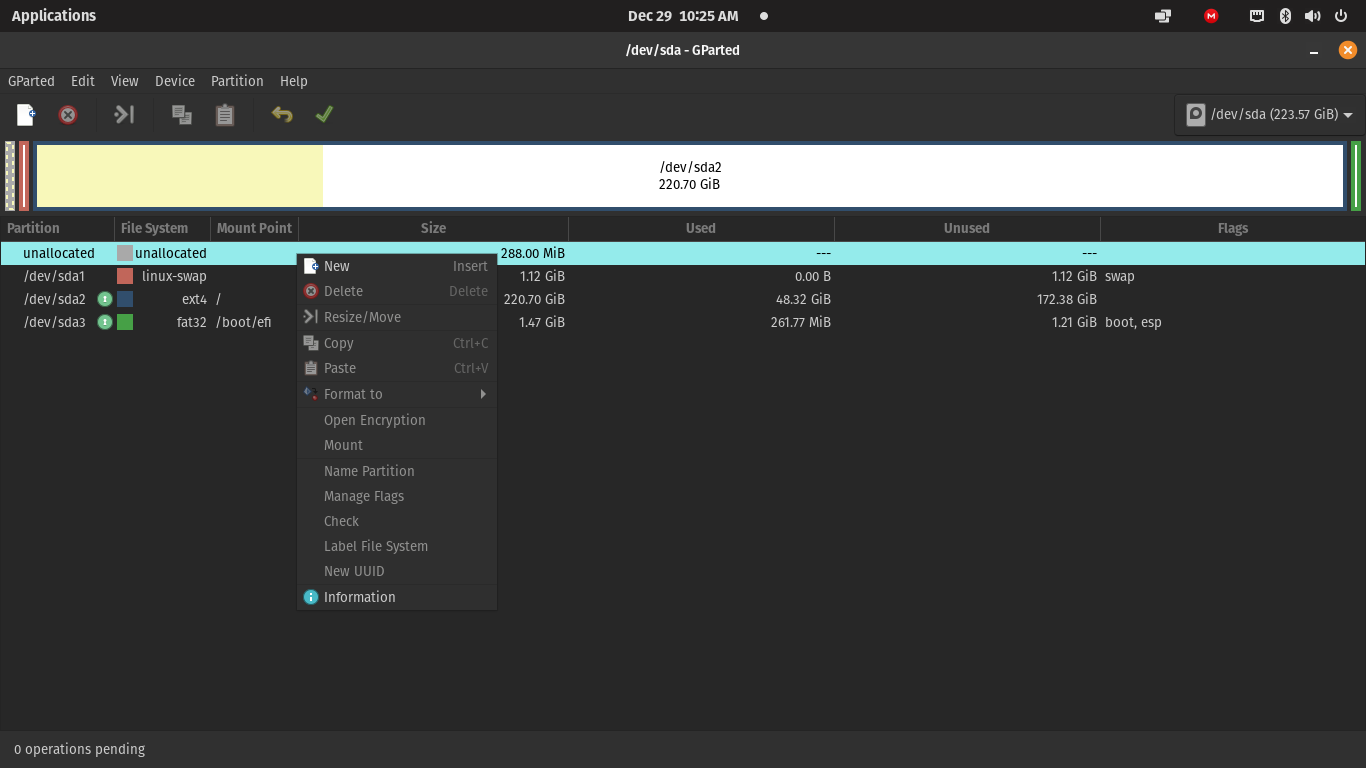
Perform actions with partitions such as:
- Create or delete
- Resize or move
- Check
- Label
- Set new UUID
It can also handle many file systems such as EXT3, EXT4, FAT, FAT32, XFS, BTRFS, NFTS, LINUX SWAP and many more.
GParted can be used on x86 and x86-64 based computers running Linux, although it is intended for GNOME-based desktops, the reality is that it can work fine on any distribution. As for memory consumption, there are no problems because it only requires 350 MB.
As you can imagine, GParted is open source and free, so there is no trick to use it on almost any system.
Install GParted on Ubuntu
In almost every Linux distribution package repository out there, GParted is included. And naturally, Ubuntu is no exception to the rule.
So, open a terminal and update the system
sudo apt update
sudo apt upgrade
Then, you can search for the gparted package inside the official repositories.
sudo apt show gpartedYou will get an on-screen output like this
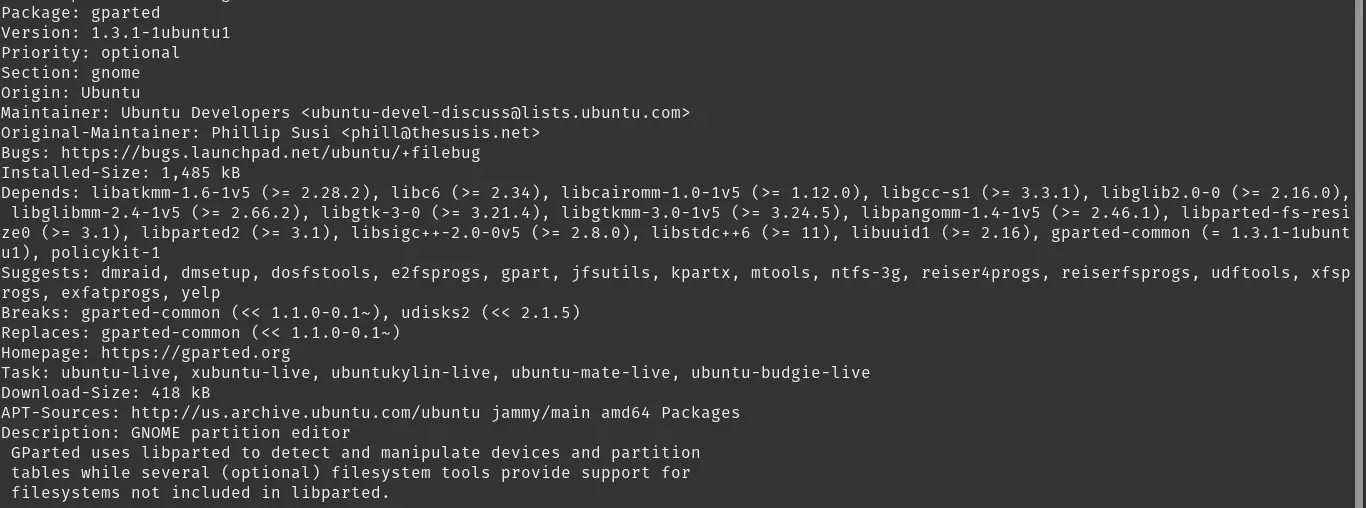
Now that you know what the package is about and how much space it takes up, you can install it by running
sudo apt install gpartedAt the end of the process, you will be able to run it from the main menu.
How to use GParted on Ubuntu
GParted requires root permissions, so once you run it, you will have to enter the password of a user with sudo or root permissions.
As soon as you open it, you will have this graphical interface at your disposal.
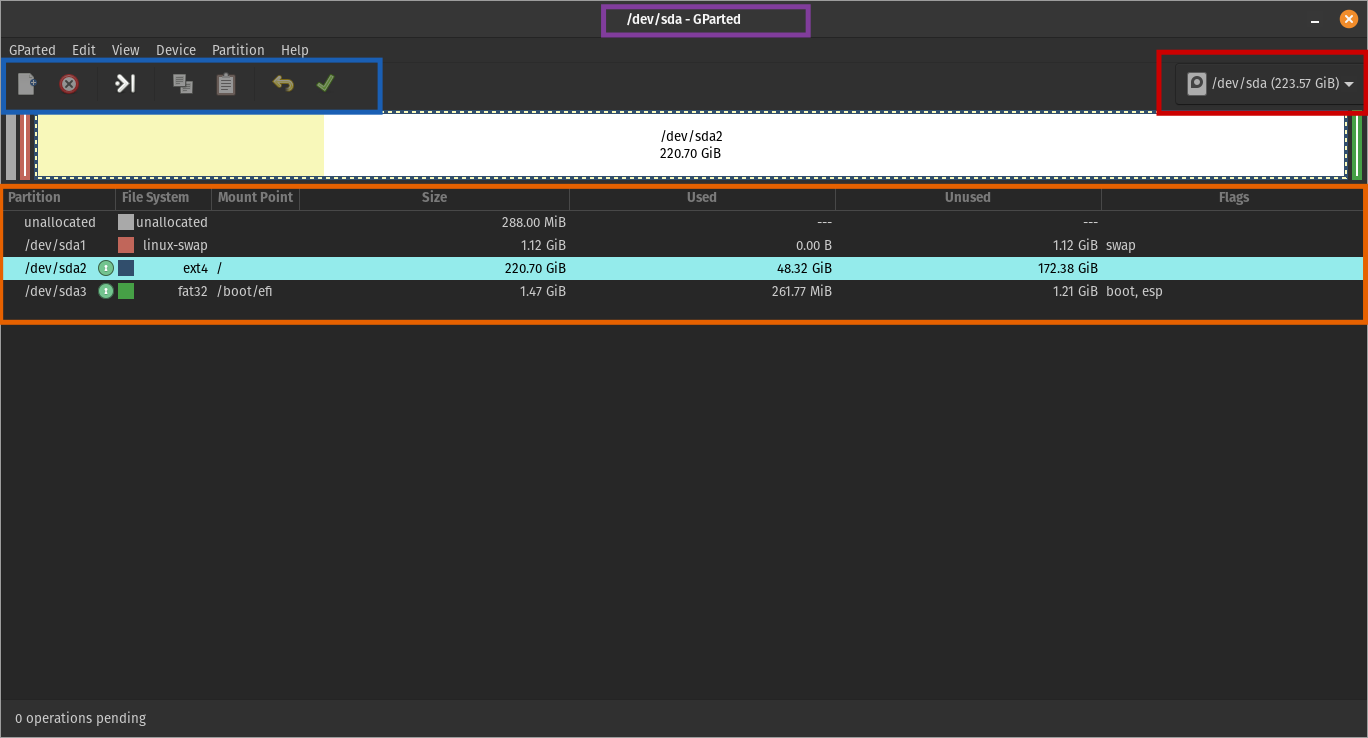
It’s actually simple, but I’ll break it down a bit. In the red box, there is the information about the active disk. As I told you before, GParted can handle hard disks or external memories, so if it is recognized by the system, you will be able to change the disk there.
At the top, in the purple box, is the title bar, and it shows the hard disk from which the system is booting. In this case, it is /dev/sda/.
In the blue box is the toolbar. Here the important thing is the cancel and apply buttons. When you make a proposal of changes, and you want to cancel it, you will have to press the button with the X that is the cancel button; but if you would like to apply the changes, then press the green check button.
In the brown box, you will be able to see the information about the partitions of the active disk. There, you will be able to right-click the mouse to perform the desired operations. Another way to do it is from the menu bar.
Note: Before doing operations on partitions, you will have to unmount it. Also check well the changes because many of them are irreversible.
Uninstall GParted
In case you would rather not use it anymore, the most advisable thing to do is to remove it from the system. To achieve this, just run.
sudo apt remove gpartedThis way, you can quickly and easily remove it from the system and save some disk space.
Conclusion
Disk manipulation tools have to be powerful enough to be able to perform complex operations, but easy enough to avoid problems in the process. Well, this combination is achieved by GParted because being powerful, it is also easy to install and use.
I hope you liked this post, and you can share it with all your friends and help us to grow.