A server can contain many important business applications. These applications can help us to deploy even a support ticket system to better manage the technical service of a company. Today, you will learn how to install osTicket on Ubuntu 20.04.
What is osTicket?
According to the osTicket website, we get this definition:
osTicket is a widely used and trusted open source support ticketing system. It easily scales and streamlines your customer service and drastically improves your customers’ experience.
So, this application is geared towards businesses and organizations to streamline the entire support process in each of these organizations.
It is an open-source tool created in PHP. This means that you can install it on almost any Linux server. In addition to this, it requires a database driver, so you can use MariaDB. The immediate consequence of this is that there can be a separation between the data and the application.
Preparing the system for OsTicket on Ubuntu 20.04
Being a web application, we have to install a LAMP server. The only catch is that Ubuntu 20.04 includes PHP 7.4 in its official repositories, but osTicker requires at least PHP 8.
So let’s get to work.
Once you’re on the server via SSH, update it
sudo apt update
sudo apt upgrade
Then add Ondrej’s repository to be able to install PHP 8
sudo add-apt-repository ppa:ondrej/php
sudo apt update
Then, you can install Apache, PHP 8 and its necessary modules and MariaDB as database manager.
sudo apt install apache2 mariadb-server libapache2-mod-php php8.1 php8.1 php8.1-common php8.1-gmp php8.1-curl php8.1-mbstring php8.1-xmlrpc php8.1-mysql php8.1-gd php8. 1-bcmath php8.1-xml php8.1-cli php8.1-cli php-pear php8.1-zip php8.1-sqlite3 php8.1-snmp php-db graphviz php8.1-curl php8.1-ldap dbconfig-common php-imap php-intl php-apcu wget unzipWith this, we can continue.
Now, configure MariaDB. You can do this with the mysql_secure_installation script.
sudo mysql_secure_installationYou will be prompted to enter a password
Enter current password for root (enter for none):As it does not exist, press ENTER. You can then create your own.
Change the root password [Y/n]
New password:
Re-enter new password:
Password updated successfully!
Reloading privilege tables...
... Success!
Then, you will be asked some configuration questions that you have to answer AND.
Remove anonymous users? [Y/n] Y
Disallow root login remotely? [Y/n] Y
Remove test database and access to it? [Y/n] Y
Reload privilege tables now? [Y/n] Y
Now we can create the new database and the new MariaDB user for Osticket.
Access to the MariaDB console:
sudo mysql -u root -pThen, execute these commands to create the new database, the new user with its permissions:
CREATE DATABASE ostic;
GRANT ALL ON ostic.* TO 'user' IDENTIFIED BY 'pass';
FLUSH PRIVILEGES;
And exit the console:
exit;Download and install OsTicket on Ubuntu 20.04
With the environment ready, we can now download the latest stable version of OSTicket.
Create a folder that will contain the OsTicket files
sudo mkdir -p /var/www/osticketMake Apache the owner of the folder:
sudo chown -R www-data:www-data /var/www/osticketAnd assign appropriate permissions to it:
sudo chmod 777 -R /var/www/osticketNow navigate to the /tmp/ folder to download from there.
cd /tmp
wget https://github.com/osTicket/osTicket/releases/download/v1.16.2/osTicket-v1.16.2.zip
Next, unzip the file.
unzip osTicket-v1.16.2.zipMove the resulting folder to the folder you created.
sudo mv upload /var/www/osticketAccess this folder:
cd /var/www/osticketAnd copy the initial OsTicket configuration file.
sudo cp upload/include/ost-sampleconfig.php upload/include/ost-config.php upload/include/ost-config.phpThe next step is to create a new VirtualHost for OsTicket
sudo nano /etc/apache2/sites-available/osticket.confAnd add the following
<VirtualHost *:80>
ServerAdmin admin@your_domain.com
DocumentRoot /var/www/osticket/upload
ServerName osticket.imaginelinux.com

<Directory /var/www/osticket/upload>
     Options FollowSymlinks
     AllowOverride All
     Require all granted
</Directory>
ErrorLog ${APACHE_LOG_DIR}/osticket.imaginelinux.com_error.log
CustomLog ${APACHE_LOG_DIR}/osticket.imaginelinux.com_access.log combined
</VirtualHost>
Replace ServerName with your domain name and the rest of the settings you want.
Save the changes and close the editor.
Then enable the new configuration.
sudo ln -s /etc/apache2/sites-available/osticket.conf /etc/apache2/sites-enabled/osticket.confThe rewrite module
sudo a2enmod rewriteAnd to commit and apply the changes, restart Apache.
sudo systemctl restart apache2Now we can complete the installation.
Completing Osticket installation
Now login to your domain to start the installation. You will see this screen.
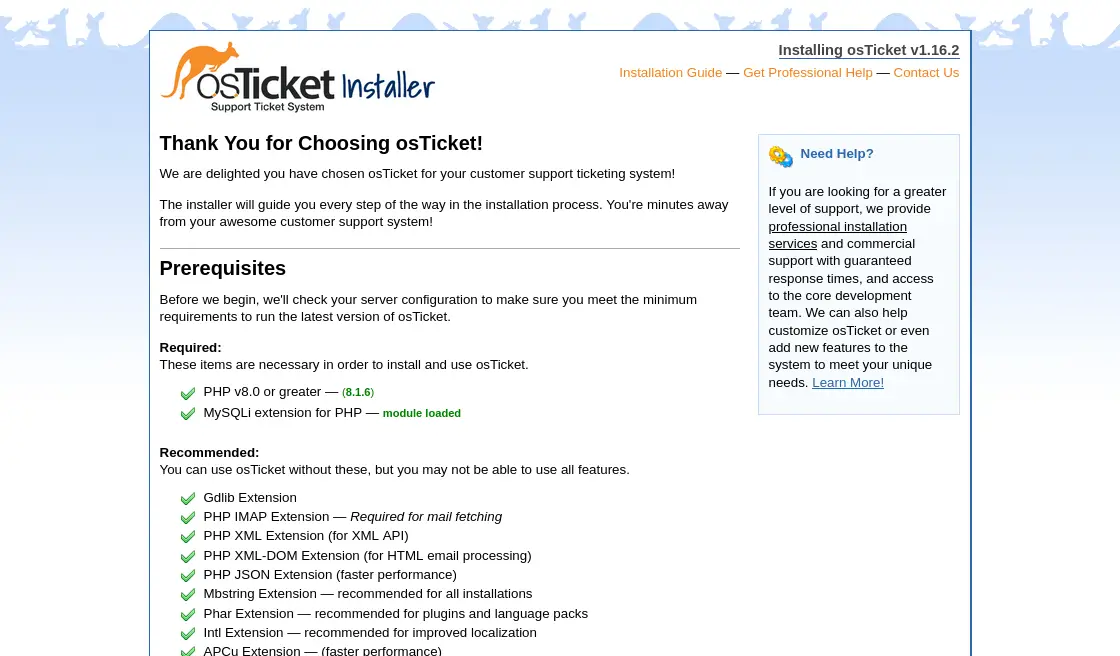
There you will notice that the server meets all the system requirements.
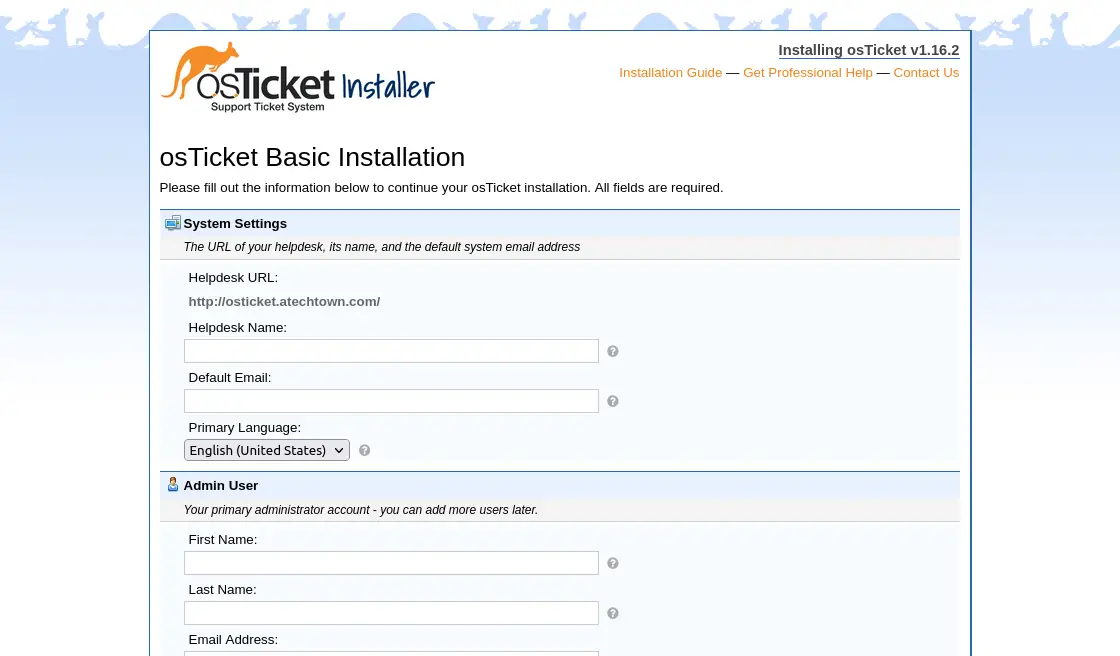
You will then need to configure the installation by creating the admin user and system options.
Then, you will see a message congratulating you and giving you the links to access the dashboard.
Conclusion
OsTicket is an important tool for many companies to provide a better technical service. In this post, you learned step by step how to install it on an Ubuntu 20.04 server.
I hope you liked this post and help us to spread it.