If you have a personal computer, there is probably only a need for one user. However, if it is a shared computer either at home or at work or at the educational level, there will be several users. It is not good for all users to be administrators, but there are always cases where making a User an Administrator on Ubuntu is required.
Ubuntu and almost any Linux distribution are multi-user systems, which means that you can create many users and thus better manage the use of the system. However, these users can be regular users or administrators.
Regular users are those who can use the system, but cannot change anything about it, such as settings or options. By changes, I also mean install, uninstall or update packages.
Let’s say this user can only use the system as the administrator left it. Sure, he can change the theme, some power options and so on, but not key system elements.
To change key elements of the system, a user must be an administrator. By administrator, we mean that he/she has superuser privileges to use them when required. This user can update the system and change key configuration components. So, it is important to know very well who they will be.
As I said beforehand, if you have a personal computer, you are already a system administrator. But imagine that in a corporate environment there are several users, and you need one of them to be an administrator as well.
Make a User an Administrator on Ubuntu
To make this post, we have two basic options. One is to do it from the Ubuntu GUI. This method is ideal for those who don’t want to mess with the terminal or simply feel more comfortable with it.
The other option is to use the terminal, which, on the other hand, is faster and more flexible because you can include those commands in configuration scripts.
Let’s go to
Method 1: Make a User an Administrator on Ubuntu using the GUI
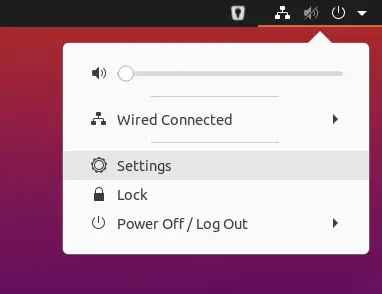
The first method is simple to follow. It is to do it using the system options. To achieve this, open them from the main menu or from the session menu in the right-hand corner.
The next step is to access the Users section on the far left.
Once you access that section, you will see a screen similar to this one where the users that the system has are listed.
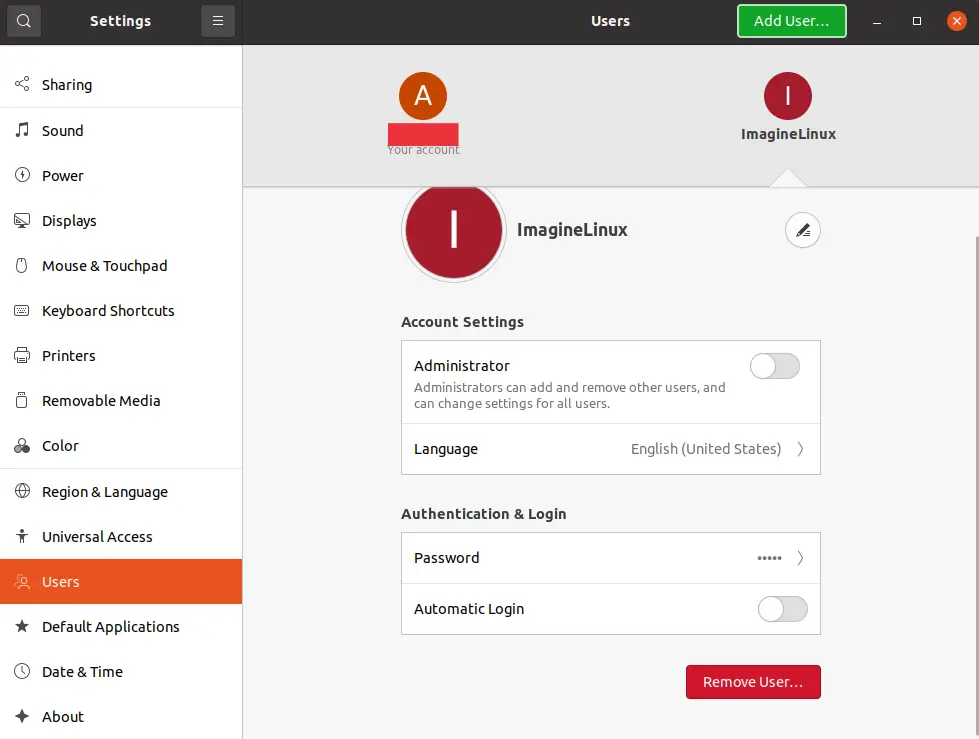
As you can see, the user ImagineLinux does not have administrator privileges, and the system itself tells you that.
To make the change, just click on the button. You will immediately notice the change.
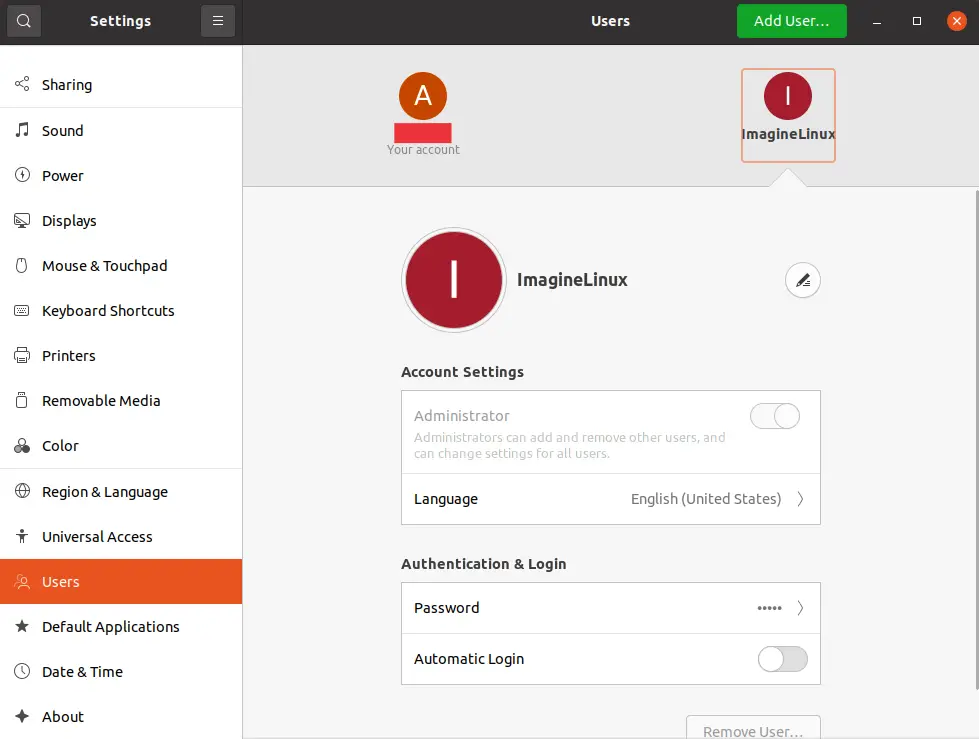
You can now close the options, and you are done.
Method 2: Using the terminal to make a user an Administrator on Ubuntu
In the case of the terminal, the process is actually simpler and more straightforward. Because all we have to do is to add the regular or standard user to one of the system groups with administrator privileges as sudo.
So, open a terminal from the main menu or by pressing the CTRL + ALT + T keys.
Once you have done this, you can use the usermod command, which modifies some user options. Remember that for this, the current user must have sudo privileges. If it is the user installed by the system, then there is nothing to worry about.
Anyway, the command in question is:
sudo usermod -aG sudo [user]Continuing with the example, it would look like this
sudo usermod -aG sudo ImagineLinuxThis is how easy it is to do it via terminal.
Conclusion
User management is vital for us to be able to use the operating system better. In this sense, you can create many users in the system and each of them with certain characteristics to do their job.
I hope you liked this post, and you can share it with the rest of your friends.