Installing and configuring Samba in Ubuntu 20.04 is a typical task of a sysadmin. However, it is also useful when we have several computers within the same network as in a house. That’s why after reading this post, you will learn how to install and configure Samba to share files on a network.
Samba is a free implementation of the Microsoft Windows file-sharing protocol (formerly called SMB, recently renamed to CIFS) for UNIX-like systems.
That is, with Samba we can share files between computers on a network. This protocol is very mature and is quite simple to configure.
Install Samba on Ubuntu 20.04
Samba is an implementation for Unix. Therefore it is available for many Linux distributions. And Ubuntu 20.04 is not the exception.
So, Samba is present in the official Ubuntu repositories so the installation becomes easy.
Start a terminal or SSH session and run the following commands:
sudo apt update
sudo apt install samba
With this, you will be installed. To start the service and make it start together with the system, execute these commands:
sudo systemctl start smbd
sudo systemctl enable smbd
To check the status of the service you can run:
sudo systemctl status smbd
This way it will be installed, but it is missing configuration.
Configuring Samba on Ubuntu 20.04
By default, the Samba configuration file is /etc/samba/smb.conf. It is a well-documented file that just by reading it we will know how to manipulate.
First, make a backup of the file. This is recommended because if something bad happens we can always reverse the changes.
sudo cp /etc/samba/smb.conf{,.bak}
In this post, you will learn how to configure Samba for a public and a private folder. In both cases, it will be hosted on a server with IP address 192.168.1.43
Configure Samba and a public folder
Public folders have one advantage and that is that we can enable guest or anonymous access. This is not always recommended but there are cases where it can be quite useful.
First, create the folder with the name you want in the chosen path.
sudo mkdir -p /var/public/
Now it is necessary to indicate the owner of the folder. As we want it to be a public folder, we will tell the system that it does not have an owner and that it does not belong to a system group either;
sudo chown -R nobody:nogroup /var/public
Then assign the corresponding permissions. In this case, we will give you read and write permissions.
sudo chmod -R 0777 /var/public
sudo chgrp sambashare /var/public
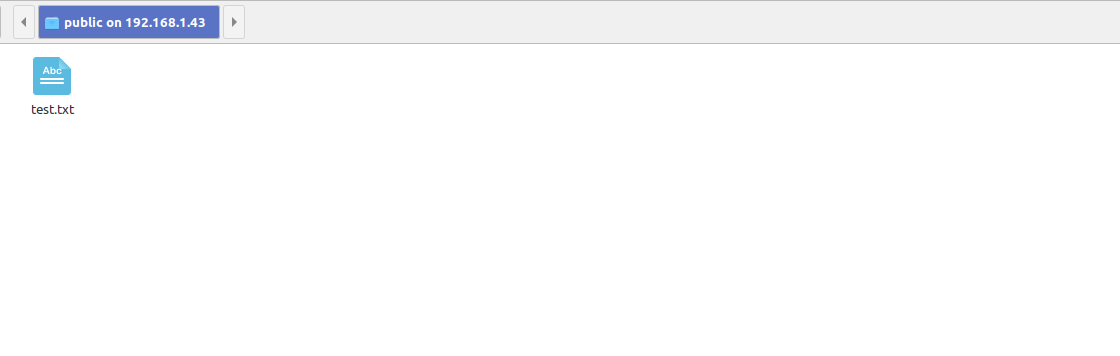
Then, create a test file. This will serve to demonstrate that you are in the remote folder.
sudo touch /var/public/test.txt
And now yes, we have to configure Samba through the configuration file.
sudo nano /etc/samba/smb.conf
The first thing we have to do is verify that in the field Workgroup this WORKGROUP is the default. You can change this, but then you have to be sure to do it on each computer. So leave it as it is.
At the end of the file add the following:
[public]
   path = /var/public
   browseable = yes
   guest ok = yes
   guest only = yes
   read only = no
   force user = nobody
   force create mode = 0777
   force directory mode = 0777
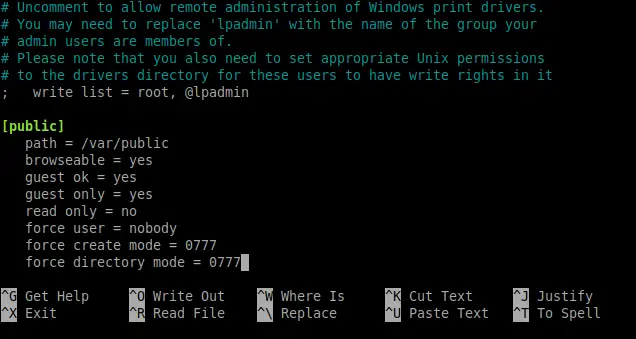
In these values, we are indicating the path of the folder, and we set the options. That you can navigate within it, enable read and write, accept the guest user, and so on.
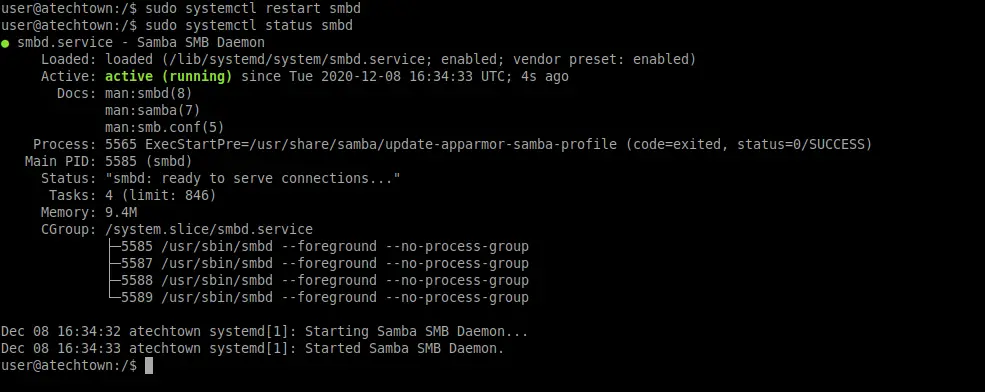
Save the changes and to apply the changes, restart Samba and check the service status.
sudo systemctl restart smbd
sudo systemctl status smbd
Then open a file browser on your client computer and log in using the IP address.
Or by adding the name of the server to the hosts file of each client. In the case of Linux
sudo nano /etc/hosts
192.168.1.43 imaginelinux
Configuring Samba for a private folder
Now it is time to create a new private folder so that access is not public.
First, create in the system a group dedicated to Samba.
sudo addgroup samba
Output:
Adding group 'samba' (GID 1002) …
Donate.
Remember that you can change the name samba for another one you specify.
Then add the current user to the newly created group.
sudo usermod -aG samba user
Samba handles user passwords independently of the system so a samba password must be assigned to this user.
sudo smbpasswd -a user
Output:
New SMB password:
Retype new SMB password:
Added user user.
You can assign the same password that this user uses for login or another one.
Another alternative is to create a new system user and add it to the group created.
For example:
sudo useradd -m -s/bin/bash -G samba user2
And assign a new system password
sudo passwd user2
And then the Samba password.
sudo smbpasswd -a user2
Now what follows is to create the folder that we are going to share
sudo mkdir -p /smb/private
Feel free to change the folder name and location.
Then, change the owner to root and add it to the samba group.
sudo chown -R root:samba /smb/private
And assign the corresponding permissions
sudo chmod -R 0770 /smb/private
Now you have to add certain parameters to the samba configuration file.
sudo nano /etc/samba/smb.conf
And add the following
[Private]
path = /smb/private
valid users = @samba
guest ok = no
writable = yes
browsable = yes
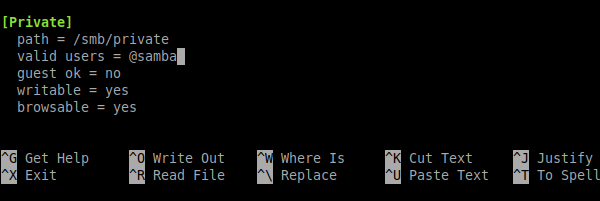
In this case, the configuration is quite similar but the presence of the valid users directive limits the availability of the folder to users belonging to the group we have created.
Save the changes and close the file.
To apply the changes, restart the Samba service
sudo systemctl restart smbd
And go back to your computer and try to access the folder
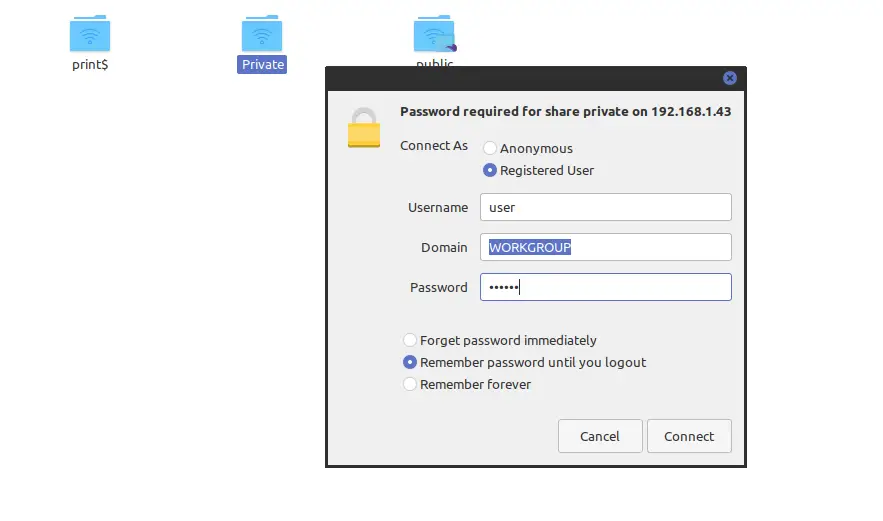
As you can see, the system skips a message indicating that you have to log in. When you do so, the folder will be available.
Conclusion
Samba is a very useful tool in business environments but also in small networks like a house. In this sense, the configuration in Ubuntu 20.04 is something within reach of many and thanks to this post you have learned how to do it.