In this post, you will learn how to enable SSH on Ubuntu 20.04 so that at the end of this post, you will be able to remotely access the computer.
SSH
SSH is one of the most common tools in the Linux world. Especially when we talk about servers and remote administration. In a few words, SSH (Secure Shell) is used to access remote machines, similar to the old Telnet, but securely because the connection is encrypted. This guarantees that everything we do in a session is secure.
Equally, SSH uses the TCP protocol for communication. This guarantees that the orders will reach their destination.
Whether you have a professional or a home server, it’s a good idea to know how to enable SSH on Ubuntu.
Enabling SSH on Ubuntu 20.04
Generally, Ubuntu’s modern facilities already have SSH by default. However, the package that allows us to make an SSH server which is the one we need to allow remote connections is not included.
So open a terminal and install the openssh package
sudo apt install openssh-server
When the installation is complete, SSH will be enabled by the default port 22. Using the systemctl command we can make a check of the SSH status:
sudo systemctl status sshd
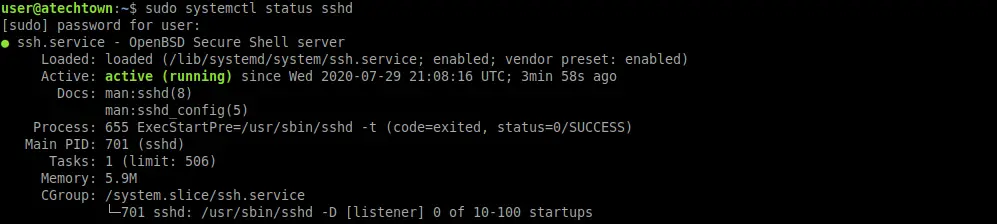
According to this screen output, SSH is active and ready to use.
However, to further protect the connection, SSH must be configured by modifying the SSH configuration file.
Configuring SSH on Ubuntu 20.04
SSH is ready, but some security adjustments should be made. The SSH configuration file is /etc/ssh/sshd_config
So, open it with the nano text editor and you will see content similar to this.
sudo nano /et/ssh/sshd_config
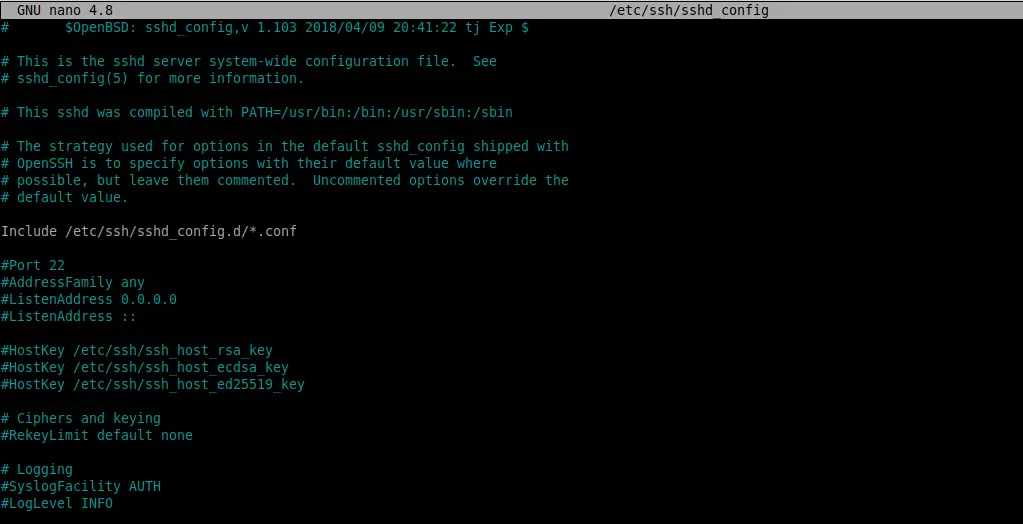
The file is very well documented, it’s quite easy to follow. As I mentioned before, the default port is 22. A good security measure is to change it to whatever you want.
Port 1234
You can also restrict access to a set of IP addresses.
ListenAddress 0.0.0.0
Change 0.0.0.0 to the value of the IP you want.
It is also recommended to disable root access to SSH.
PermitRootLogin no
Or the number of authentication attempts:
MaxAuthTries 3
You can even limit the number of sessions that can be run at the same time:
MaxSessions 4
When you finish your changes, save the file and close the editor.
To apply the changes, restart the SSH.
sudo systemctl restart ssh
Now the SSH server is ready to use. To connect and make use of SSH, on the client computer with some Linux distribution, execute the following command:
ssh [remote-user]@[hostname-or-ip-address]
For example:
ssh user@188.22.12.33
You will be asked for the user’s password and that’s it.
Now you can have a remote terminal and remotely manage a computer.
Conclusion
Using a secure remote terminal is one of the most commonly used utilities on servers. This allows us to remotely manage these computers over a network. SSH is a veteran and secure implementation that allows us to do this without problems. However, we must first make some configurations to enable it.
In conclusion, you have learned to enable SSH on Ubuntu 20.04 as you have seen it is simple and available to everyone.