Security is a fundamental aspect of every sysadmin’s job. Especially if you have public websites or web applications hosted with Nginx on your server. That’s why today we present you this post, where you will learn how to deploy ModSecurity with Nginx in Ubuntu 20.04.
mod_security is an Apache security module, it acts as a web application firewall (WAF) and its job is to filter and block suspicious HTTP requests. This makes it possible to prevent brute force attacks and so on.
Although it is an Apache module, we can install and deploy it for Nginx. That’s the reason for our post.
Let’s get started.
Some considerations
Before we start, we need to know a few things. It is recommended that the server does not have many applications installed. Even if we are on a fresh installation, much better. This is also why it is recommended that we don’t have nginx installed on the system.
In addition to this, we need to use sudo or the root account.
Installing the latest stable version of Nginx on Ubuntu 20.04
It is recommended to install Mod_security using the latest version of Nginx. To do so, we have to install it using the ondrej PPA for Ubuntu 20.04.
Update the server completely
sudo apt update
sudo apt upgrade
Then add the repository
sudo add-apt-repository ppa:ondrej/nginx-mainlineRefresh APT.
sudo apt updateFinally, install Nginx by running
sudo apt install nginx-core nginx-common nginx nginx nginx-fullNext, you can check the version of Nginx by running
nginx -VThe next step is to enable the source code repository of the PPA we enabled. This is necessary because we will be downloading the Nginx source code later.
To achieve this, open the repository configuration file
sudo nano /etc/apt/sources.list.d/ondrej-ubuntu-nginx-mainline-*.listAnd look for the line
#deb-src http://ppa.launchpad.net/ondrej/nginx-mainline/ubuntu/ focal mainRemove the # at the beginning. It will look like this:
deb-src http://ppa.launchpad.net/ondrej/nginx-mainline/ubuntu/ focal mainSave the changes and close the editor. Finally, refresh APT.
sudo apt updateDownload the Nginx source package using APT
First, let’s set the /usr/local/src/ folder to belong to the regular system user.
sudo chown user:user /usr/local/src/` -R And now create the folder where the sources will be.
mkdir -p /usr/local/src/nginxAccess it
cd /usr/local/src/nginx/From here install the dpkg-dev package
sudo apt install dpkg-devAnd download the Nginx source files
apt source nginxIf you run the ls command, you will see something similar to this
ls
Install libmodsecurity3
Now we need to install the modsecurity library. It is available in the official Ubuntu 20.04 repositories. However, it is recommended to compile it from source.
To achieve this, install Git in Ubuntu 20.04
sudo apt install gitThen clone the Mod_security repository
git clone --depth 1 -b v3/master --single-branch https://github.com/SpiderLabs/ModSecurity /usr/local/src/ModSecurity/You will get an output screen like this
Cloning into '/usr/local/src/ModSecurity'...
remote: Enumerating objects: 840, done.
remote: Counting objects: 100% (840/840), done.
remote: Compressing objects: 100% (808/808), done.
remote: Total 840 (delta 496), reused 119 (delta 24), pack-reused 0
Receiving objects: 100% (840/840), 762.19 KiB | 978.00 KiB/s, done.
Resolving deltas: 100% (496/496), done.
Then access the folder where it was downloaded.
cd /usr/local/src/ModSecurity/Thereafter, you have to install all the dependencies needed for the compilation.
sudo apt install gcc make build-essential autoconf automake libtool libcurl4-openssl-dev liblua5.3-dev libfuzzy-dev ssdeep gettext pkg-config libpcre3 libpcre3-dev libxml2 libxml2-dev libcurl4 libgeoip-dev libyajl-dev doxygenAnd run these commands to refresh the necessary modules
git submodule init
git submodule update
Now it remains to compile it
./build.sh
./configure
During the execution of these commands, you will get the following error
fatal: No names found, cannot describe anything.Ignore it
Now we have to compile it using make.
make -j2If you have more CPU Cores, you can replace 2 by the number of cores you want to be used in the process. The more, the shorter the time required.
When finished, we have to install it.
sudo make installInstall ModSecurity with Nginx
This connector that we are going to install is the one in charge of linking the previous library with Nginx. So let’s go for it.
Clone the repository to have the latest version available.
git clone --depth 1 https://github.com/SpiderLabs/ModSecurity-nginx.git /usr/local/src/ModSecurity-nginx/Access the folder where the Nginx sources are located.
cd /usr/local/src/nginx/nginx/nginx-1.21.6/And from there install the Nginx dependencies.
sudo apt build-dep nginxNext install the uuid-dev package
sudo apt install uuid-devNow configure it to generate the connector.
./configure --with-compat --add-dynamic-module=/usr/local/src/ModSecurity-nginxCompile and generate the module
make modulesAnd copy it to the folder where the Nginx modules are located
sudo cp objs/ngx_http_http_modsecurity_module.so /usr/share/nginx/modules/Thereafter, you need to load it to Nginx. To achieve this, edit the Nginx configuration file.
sudo nano /etc/nginx/nginx.confAnd add the following to the beginning of the file before the http section
sudo nano /etc/nginx/nginx.confThen in the http{ section add the following
http{
modsecurity on;
modsecurity_rules_file /etc/nginx/modsec/main.conf;
Save your changes and close the editor.
Now you have to create the folder where the module configuration will work.
sudo mkdir /etc/nginx/modsec/Copy the recommended configuration to this folder to apply it.
sudo cp /usr/local/src/ModSecurity/modsecurity.conf-recommended /etc/nginx/modsec/modsecurity.confNow edit this configuration file
sudo nano /etc/nginx/modsec/modsecurity.confThere, look for the line
SecRuleEngine DetectionOnly lineAnd replace it with
SecRuleEngine OnAlso look for
SecAuditLogParts ABIJDEFHZAnd replace it with this
SecAuditLogParts ABCEFHJJKZAlso search for SecResponseBodyAccess and set it to Off.
SecResponseBodyAccess OffSave the changes and close the editor.
Now create the file /etc/nginx/modsec/main.conf.
sudo nano /etc/nginx/modsec/main.confThen add the following line
Include /etc/nginx/modsec/modsecurity.confYou need to copy the unicode mapping file as well
sudo cp /usr/local/src/ModSecurity/unicode.mapping /etc/nginx/modsec/To apply all changes, you have to restart Nginx.
sudo systemctl restart nginxWith this, the installation is complete, but we have to add some rules.
Enable OWASP rules
Even though we already have mod_security on the system, it’s no good if we don’t have some rules defined. So let’s install a set of community-maintained rules that can be a great starting point.
Download them using wget
wget https://github.com/coreruleset/coreruleset/archive/v3.3.0.tar.gzUnzip the archive
tar xvf v3.3.0.tar.gzNow move the generated directory to /etc/nginx/modsec/ folder
sudo mv coreruleset-3.3.0/ /etc/nginx/modsec/`.Now enable the sample configuration by renaming it to
sudo mv /etc/nginx/modsec/coreruleset-3.3.0/crs-setup.conf.example /etc/nginx/modsec/coreruleset-3.3.0/crs-setup.confIn the configuration file, we have to enable these rules.
sudo nano /etc/nginx/modsec/main.confAdd these lines to the file
Include /etc/nginx/modsec/coreruleset-3.3.0/crs-setup.conf
Include /etc/nginx/modsec/coreruleset-3.3.0/rules/*.conf
Save the changes and close the editor.
To finish and apply all the changes, you need to restart Nginx.
sudo systemctl restart nginxYou can check the status of Nginx
sudo systemctl status nginx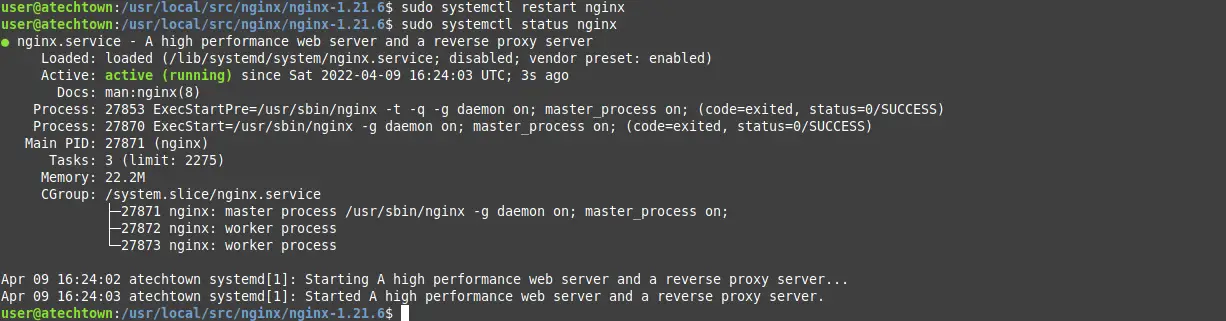
This is enough.
One last thing…
Before we say goodbye, if you upgrade Nginx using APT as usual, it will cause Mod_security to fail, and you will lose all your work. So, I recommend you use this command
sudo apt-mark hold nginxThis way, APT will not update it.
ModSecurity with Nginx – Conclusion
Website security is not something to be taken lightly, that’s why there are tools like mod_security, and today you have learned how to install it.
That’s it! thank you very much.