Throughout this post, we will take you to step by step to install Nginx with PHP-FPM on Debian 11.
Before we start, it is necessary to explain what Nginx and PHP-FPM are to get a better understanding of the process.
Nginx is an open-source HTTP web server that stands out for being very fast and efficient. In addition, Nginx is ready to be used as a reverse proxy. In this mode, it is used to balance the load between back-end servers, as well as to be used as a cache on a slower back-end server.
One of the main advantages of using Nginx is that it processes tens of thousands of simultaneous connections in a compact, multi-core CPU process. This is why it is so lightweight, efficient, and above all robust.
Unlike Apache, Nginx does not have a module to support PHP. So we have to resort to PHP-FPM for full support. So, PHP-FPM is the most popular alternative implementation of PHP FastCGI, and although it is used for high-traffic websites, we can use it to add PHP support to an Nginx server.
In this post, you will learn how to install them so that you have a lightweight web server with good PHP support.
Install Nginx with PHP-FPM on Debian 11
Step 1: Install Nginx on Debian 11
The first thing to do is to install Nginx on Debian 11. The advantage of this application is that it is present in the official repositories of many Linux distributions. So, installing it won’t be a problem.
Open an SSH connection to your server and when you are inside, update the system completely.
sudo apt update
sudo apt upgrade
Now you can install Nginx from the official repositories like this
sudo apt install nginx
You can check the status of Nginx to see if the installation was successful.
sudo systemctl status nginx
● nginx.service - A high performance web server and a reverse proxy server
     Loaded: loaded (/lib/systemd/system/nginx.service; enabled; vendor preset: enabled)
     Active: active (running) since Mon 2021-10-11 21:39:55 CEST; 9s ago
       Docs: man:nginx(8)
    Process: 1821 ExecStartPre=/usr/sbin/nginx -t -q -g daemon on; master_process on; (code=exited, status=0/SUCCESS)
    Process: 1822 ExecStart=/usr/sbin/nginx -g daemon on; master_process on; (code=exited, status=0/SUCCESS)
   Main PID: 2011 (nginx)
      Tasks: 2 (limit: 2276)
     Memory: 5.3M
        CPU: 42ms
     CGroup: /system.slice/nginx.service
             ├─2011 nginx: master process /usr/sbin/nginx -g daemon on; master_process on;
             └─2014 nginx: worker process

Oct 11 21:39:55 imaginelinux systemd[1]: Starting A high performance web server and a reverse proxy server...
Oct 11 21:39:55 imaginelinux systemd[1]: nginx.service: Failed to parse PID from file /run/nginx.pid: Invalid argument
Oct 11 21:39:55 imaginelinux systemd[1]: Started A high performance web server and a reverse proxy server.
Then you have to open the ports in the firewall for Nginx to work. This can be done by running
sudo ufw allow 80/tcp
sudo ufw allow 443/tcp
This way, when you open a web browser and go to http://your-server-ip or http://your-domain you will see the following screen
This indicates that Nginx is running correctly.
Remember that Nginx is also a system service that you can manage via the systemctl command so you can start it as follows
sudo systemctl start nginx
Stop it
sudo systemctl stop nginx
Or restart it
sudo systemctl restart nginx
With Nginx running, we can then start playing with PHP-FPM.
Step 2: Install and Configure PHP-FPM
PHP-FPM is an implementation that PHP itself makes. So installing it also installs the language. So, to install PHP and PHP-FPM just run the following command
sudo apt install php php-fpm
This is enough, but it is then necessary to create a new configuration file for our site with PHP.
sudo nano /etc/nginx/sites-available/test.conf
And add the following
server {
    listen 80;
    server_name your_domain;
    root /var/www/test;

    index index.html index.htm index.php;

    location / {
        try_files $uri $uri/ =404;
    }

    location ~ \.php$ {
        include snippets/fastcgi-php.conf;
        fastcgi_pass unix:/var/run/php/php7.4-fpm.sock;
     }

    location ~ /\.ht {
        deny all;
    }

}
First, the name of the file, you can change it, I have chosen test for an example. Then, you have to change the server_name directive to your domain name. The root directive refers to the location of the site on the hard disk that we will now create.
Create the site folder
sudo mkdir -p /var/www/test/
And inside it, a PHP file for the demo.
sudo nano /var/www/test/test.php
Add some PHP code like the phpinfo method.
<?php
phpinfo();
?>
Then, enable the new configuration.
sudo ln -s /etc/nginx/sites-available/test.conf /etc/nginx/sites-enabled/
And restart Nginx
sudo systemctl restart nginx
So, open a web browser and go to http://your-domain/test.php and you will see the following
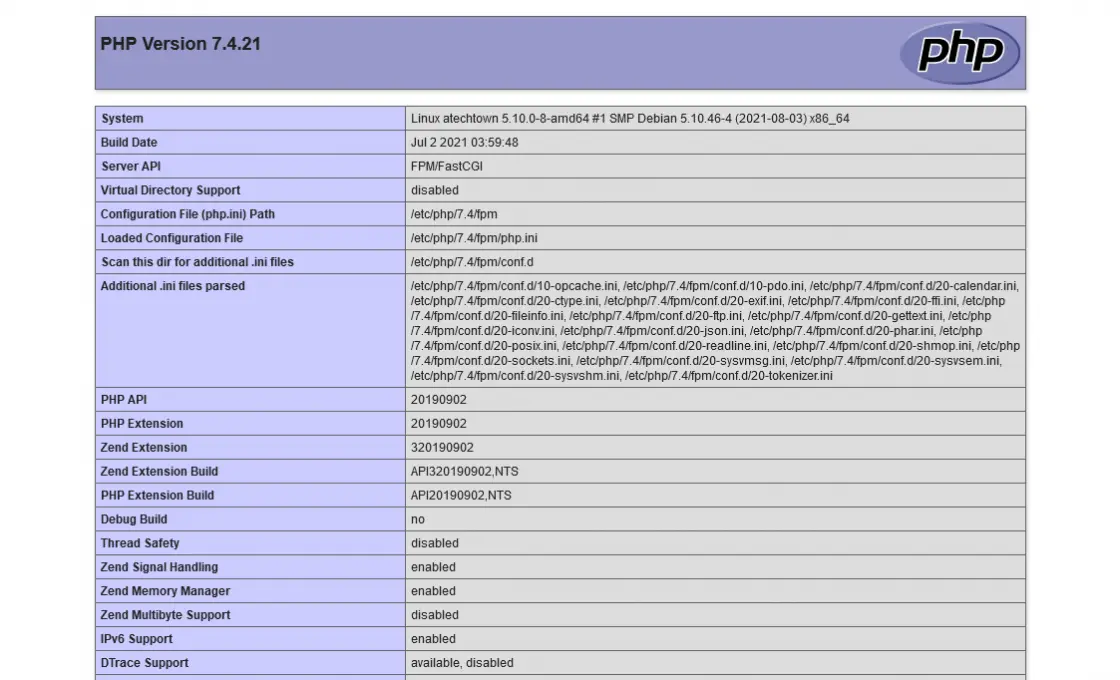
So, we now have Nginx with PHP-FPM on Debian 11 installed.
Conclusion
In this post, you have learned how to install Nginx with PHP-FPM on Debian 11 through a series of steps and configurations that are easy to apply and that will allow you to have PHP support in Nginx.
So, help us grow and leave us a comment, Also if the post has helped you, share it with others.