Monitoring Linux services is a basic task for a Linux professional. However, doing it effectively also requires tools that help the process. That’s why today I’m going to help you install Monit on Ubuntu 20.04, so you can monitor services comfortably.
What is Monit?
Monit is an application that allows us to monitor the services of our Linux system. In addition to this, we can analyze and monitor processes. It is quite light and fast, and it is also open source. This way we won’t have any problems running it on our system.
Thanks to Monit, we will be able to know when a service is malfunctioning. This prevents issues and helps us to better manage the server.
Another feature of Monit is that you can use it to monitor files, directories, and file systems on localhost for changes or issues.
Finally, Monit can be used to monitor general system resources on localhost such as overall CPU usage, Memory, and Load Average.
So let’s go for it.
Install Monit on Ubuntu 20.04
Monit is extremely well-supported on Linux, and it shows because it is present in the official repositories of many Linux distributions. This is also the case for Ubuntu 20.04.
So let’s get started. Connect to your server via SSH and update the system completely.
sudo apt update
sudo apt upgrade
Then, you can run the following command to install Monit.
sudo apt install monitSince it’s a lightweight program, the installation doesn’t take long.
Managing the Monit service
As soon as the installation is finished, you can start the Monit service with the following command
sudo systemctl start monitIt is recommended that you start it along with the system. To do so, run.
sudo systemctl enable monitWhen you make any changes to the Monit settings, you will have to restart Monit to apply the changes.
sudo systemctl restart monitFinally, you can check the status of the service with the command
sudo systemctl status monit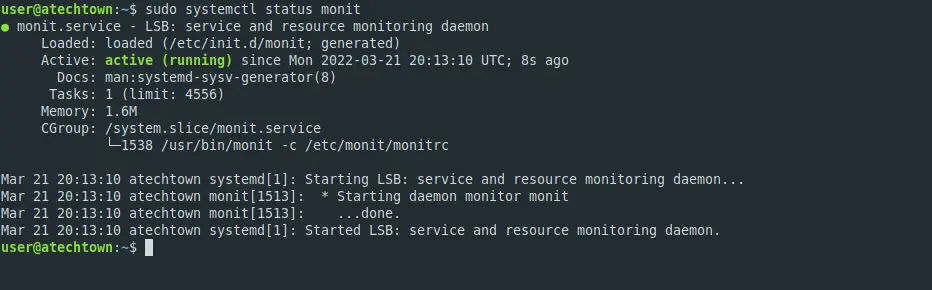
This way you can check how everything is going with Monit.
Allow web access to Monit
By default, the Monit web interface is not enabled for access. So, we need to enable it by editing the configuration file.
First, let’s do a backup.
sudo cp /etc/monit/monitrc /etc/monit/monitrc.bakNow edit it
sudo nano /etc/monit/monitrcAnd enable the web interface by leaving this section like this. Replace pss with a better password.
set httpd port 2812 and
allow admin:pss
As an example, I leave you the image.

Save the changes and close the editor.
Check the syntax of the configuration file to make sure there is no error.
sudo monit -tIf there is no error, you will see this output
Control file syntax OKRestart the service
sudo systemctl restart monitYou can also check the status of Monit with this other command
sudo monit status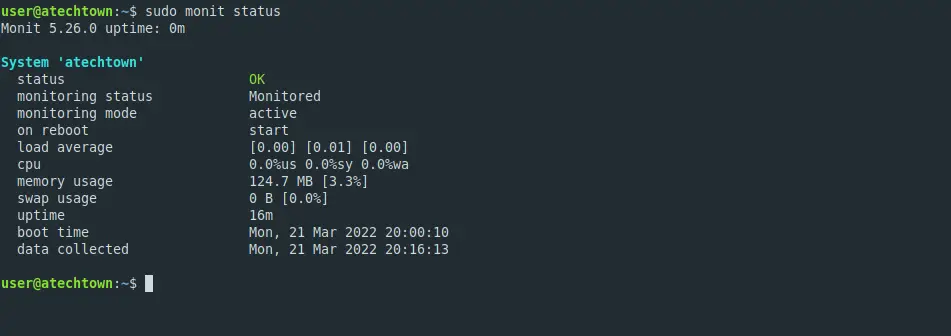
Monitoring services with Monit
For this example, I am going to install Nginx and MariaDB.
sudo apt install nginx mariadb-serverMonit includes configuration files for Nginx and MariaDB. So let’s enable it as follows:
sudo ln -s /etc/monit/conf-available/nginx /etc/monit/conf-enabled/
sudo ln -s /etc/monit/conf-available/mysql /etc/monit/conf-enabled/
Restart the service
sudo systemctl restart monitVerify that these services will be monitored.
sudo monit summary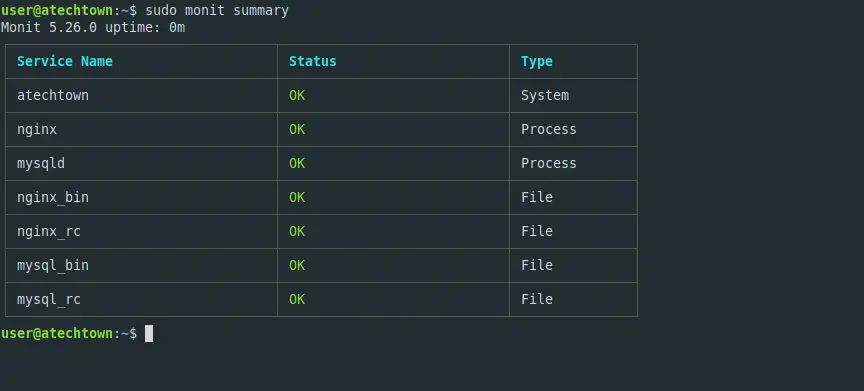
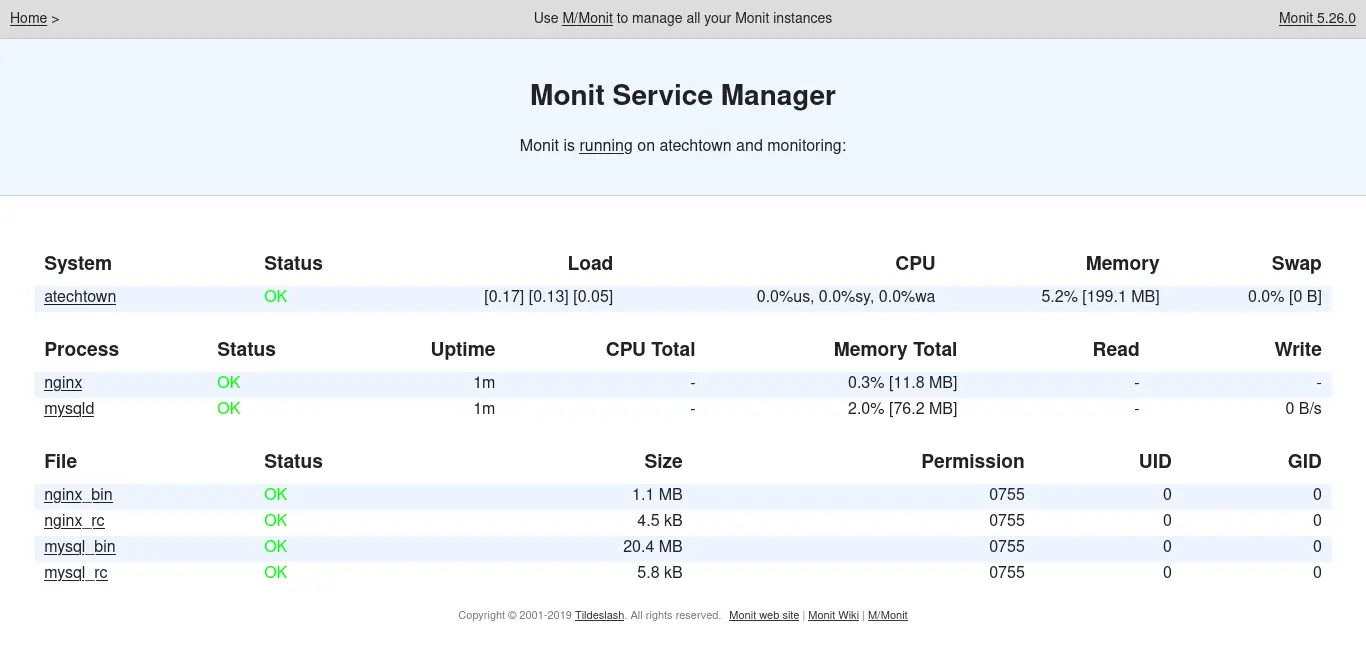
Finally go to http://your-server:2812 so that after logging in, you will see the main Monit screen.
Conclusion
In this post, you learned how to install and configure Monit to monitor services on Linux. As you have noticed, it is easy to use and this is convenient for many projects.
Share our post and help us to grow.