Compilers are essential for any programming language. Without them, we would not be able to examine our code and thus obtain the binaries that we can run on our systems. Regarding C language, there is a compiler called GCC which is directly related to GNU and comes by default in almost any Linux distribution but not in its most recent version. That’s why today you will learn how to install the latest version of GCC on Ubuntu 20.04.
Is it important to have the latest stable version of GCC?
The answer to this question will depend on the individual user. The reality is that although there are distributions like Ubuntu 20.04 that include good versions of software, over time we may miss some modern features.
Another significant issue is that developers use recent versions of compilers so that they don’t miss out on new features and can get the most out of their applications.
So, in short, it all depends on the user and their needs, but it is always good to learn how to install the latest version of GCC to take advantage of the improvements it brings.
Install Homebrew on Ubuntu 20.04
While it is true that we can install the latest stable version of GCC by compiling the source code for it ourselves, it is best to do so using Homebrew.
Homebrew is an alternative package manager that uses formulas created in Ruby to compile applications and get recent versions easily.
First we have to install Homebrew, then. Open a terminal and update the system.
sudo apt update
sudo apt upgrade
Next, install some packages needed for Homebrew to work.
sudo apt install build-essential procps curl file git
Reading package lists... Done
Building dependency tree
Reading state information... Done
curl is already the newest version (7.68.0-1ubuntu2.7).
git is already the newest version (1:2.25.1-1ubuntu3.2).
procps is already the newest version (2:3.3.16-1ubuntu2.3).
The following additional packages will be installed:
  binutils binutils-common binutils-x86-64-linux-gnu cpp cpp-9 dpkg-dev fakeroot g++ g++-9 gcc gcc-9 gcc-9-base libalgorithm-diff-perl libalgorithm-diff-xs-perl
  libalgorithm-merge-perl libasan5 libatomic1 libbinutils libc-dev-bin libc6-dev libcc1-0 libcrypt-dev libctf-nobfd0 libctf0 libdpkg-perl libfakeroot
  libfile-fcntllock-perl libgcc-9-dev libgomp1 libisl22 libitm1 liblsan0 libmagic-mgc libmagic1 libmpc3 libquadmath0 libstdc++-9-dev libtsan0 libubsan1 linux-libc-dev
  make manpages-dev
Suggested packages:
  binutils-doc cpp-doc gcc-9-locales debian-keyring g++-multilib g++-9-multilib gcc-9-doc gcc-multilib autoconf automake libtool flex bison gdb gcc-doc gcc-9-multilib
  glibc-doc bzr libstdc++-9-doc make-doc
The following NEW packages will be installed:
  binutils binutils-common binutils-x86-64-linux-gnu build-essential cpp cpp-9 dpkg-dev fakeroot file g++ g++-9 gcc gcc-9 gcc-9-base libalgorithm-diff-perl
  libalgorithm-diff-xs-perl libalgorithm-merge-perl libasan5 libatomic1 libbinutils libc-dev-bin libc6-dev libcc1-0 libcrypt-dev libctf-nobfd0 libctf0 libdpkg-perl
  libfakeroot libfile-fcntllock-perl libgcc-9-dev libgomp1 libisl22 libitm1 liblsan0 libmagic-mgc libmagic1 libmpc3 libquadmath0 libstdc++-9-dev libtsan0 libubsan1
  linux-libc-dev make manpages-dev
0 upgraded, 44 newly installed, 0 to remove and 7 not upgraded.
Need to get 45.7 MB of archives.
After this operation, 209 MB of additional disk space will be used.
Do you want to continue? [Y/n]
Thereafter, download and run the Homebrew installation script.
/bin/bash -c "$(curl -fsSL https://raw.githubusercontent.com/Homebrew/install/HEAD/install.sh)"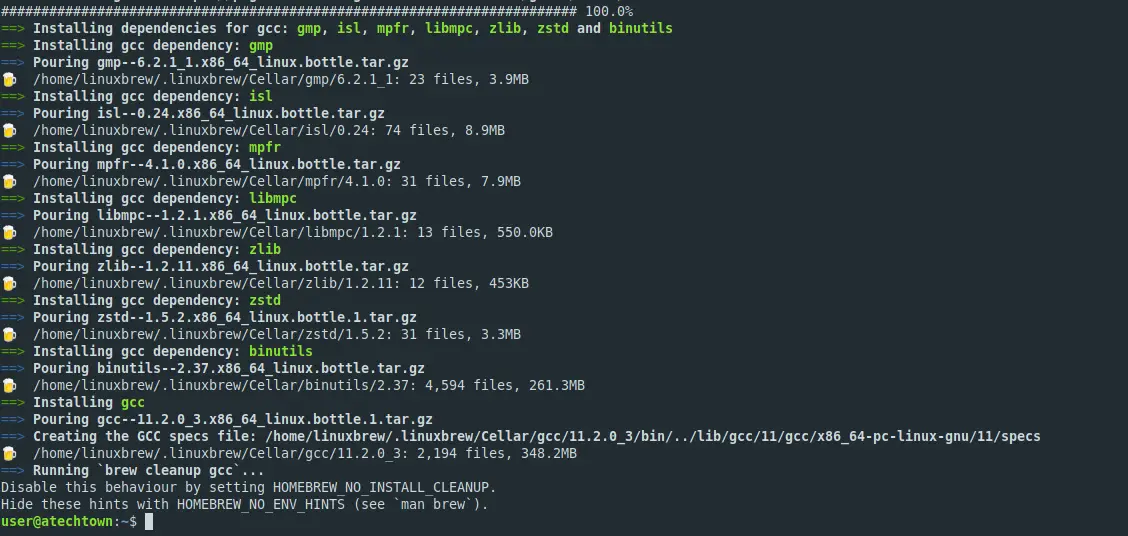
You will be prompted for a few options in the installation, but it shouldn’t be too complicated for you.
After the whole command finishes executing, you have to run these commands one by one to make the environment fully recognize Homebrew
test -d ~/.linuxbrew && eval "$(~/.linuxbrew/bin/brew shellenv)"
test -d /home/linuxbrew/.linuxbrew && eval "$(/home/linuxbrew/.linuxbrew/bin/brew shellenv)"
test -r ~/.bash_profile && echo "eval "$($(brew --prefix)/bin/brew shellenv)\"" >>~~/.bash_profile
echo "eval "$($(brew --prefix)/bin/brew shellenv)\"" >>~/.profile
To check that everything is OK, you can install hello which works as the Homebrew test.
brew install helloThen you can run it
helloIf you see a Hello World, then Homebrew is working properly.
Installing the latest version of GCC on Ubuntu 20.04
Now we can install the latest version of GCC without too much trouble by running the following command
brew install gccThis command will download the latest version of GCC, compile it and add it to the system PATH and everything is quick and easy.
One advantage of using Homebrew is that its packages do not interfere with the ones on the system. So to use this version of GCC, we will have to use gcc11 instead of gcc. For example,
gcc-11 --versionYou will get an output screen like this.
gcc-11 (Homebrew GCC 11.2.0_3) 11.2.0
Copyright (C) 2021 Free Software Foundation, Inc.
This is free software; see the source for copying conditions.  There is NO
warranty; not even for MERCHANTABILITY or FITNESS FOR A PARTICULAR PURPOSE.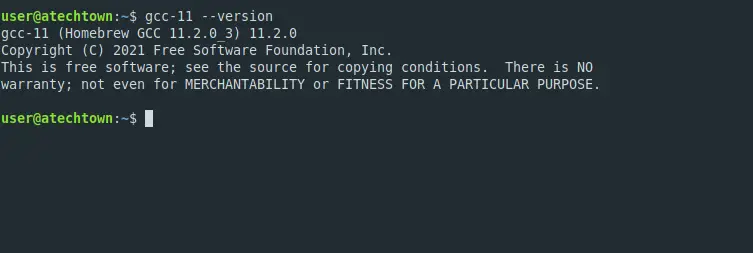
So now we can use it without any problems.
Conclusion
GCC is the C language compiler of the GNU project, so we can find it in all Linux distributions, as it is a vital component of the system. Today you have learned how to install the latest stable version thanks to Homebrew.
I hope you liked it and that it will be useful for you. Help us to grow by sharing this post.