Java is one of the most important programming languages ever created. And it is still very popular even though good solutions have been created, such as Rust, Python, and others. Knowing how to install it is basic to work with the language, but if you add to this a robust operating system like Linux Mint, then you can have an ideal combination. That’s why we’ve prepared the following post, so you can install Java on Linux Mint 20.3.
Java and Linux Mint
As we all know, Linux Mint is a Linux distribution based on Ubuntu that benefits from its development and repositories. This makes both distributions compatible at binary level but with very noticeable differences thanks to Cinnamon, the Linux Mint desktop environment.
Many developers have chosen it as their system because of its ease of use, software compatibility and stability. That’s why many prefer to start their Linux and Java journey using Linux Mint.
So let’s get to it.
Install Java on Linux Mint 20.3
First option: Install OpenJDK from the official repositories
OpenJDK is an open-source implementation of Java. It has very few differences with the Oracle version and is the recommended option for our system.
So to install it, just open a terminal and refresh the Linux Mint repositories.
sudo apt updateAnd then, run the following command
sudo apt install default-jdkThis will not only install the JRE needed to run applications, but will also install the JDK needed to create Java applications.
You can then test your changes by running the following command
java --versionSample Output:
openjdk 11.0.14.1 2022-02-08
OpenJDK Runtime Environment (build 11.0.14.1+1-Ubuntu-0ubuntu1.20.04)
OpenJDK 64-Bit Server VM (build 11.0.14.1+1-Ubuntu-0ubuntu1.20.04, mixed mode, sharing)
Second option: Installing Oracle Java on Linux Mint 20
For some things, mostly related to Android application programming, we need the Oracle version. This installation can be done manually or simply by using a package from the Linux Uprising people.
To achieve this, you can first download it by using wget.
wget https://launchpad.net/~linuxuprising/+archive/ubuntu/java/+files/oracle-java17-installer_17.0.1-1~linuxuprising5_amd64.debThereafter, you can install the package.
sudo apt install ./oracle-java17-installer_17.0.1-1~linuxuprising5_amd64.debThis will prompt you to accept the license agreements.
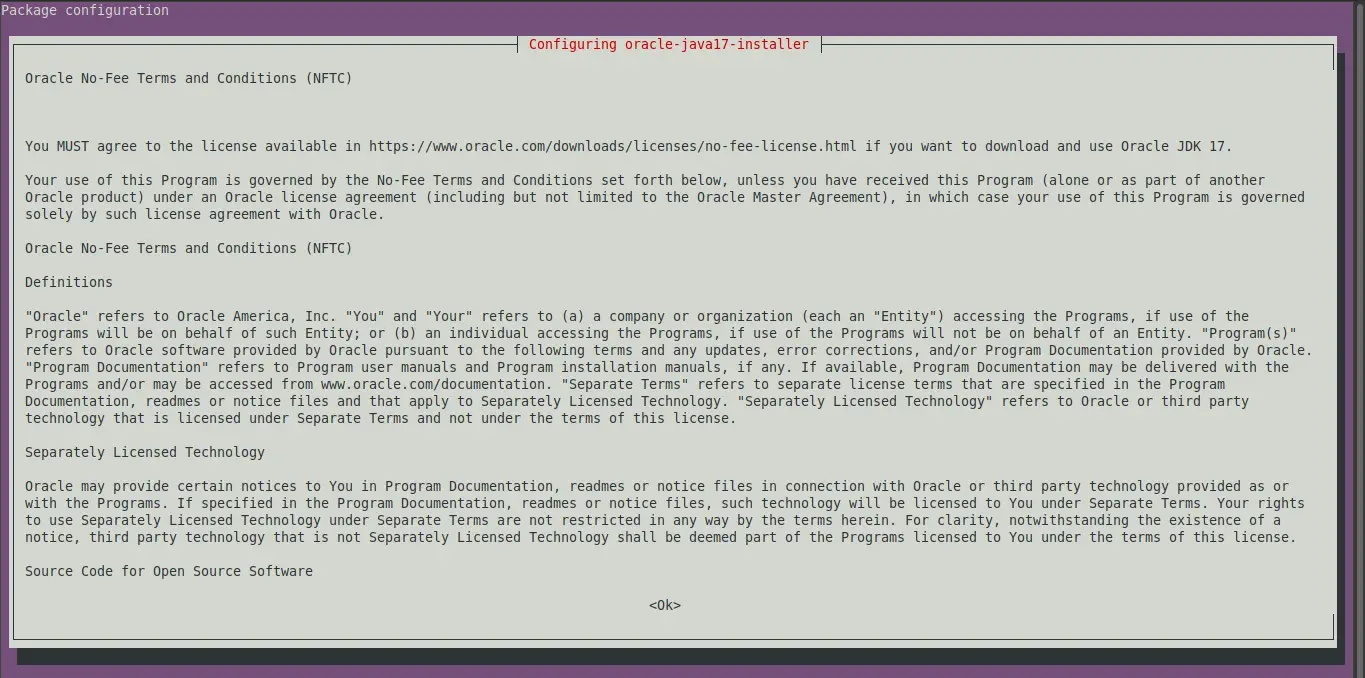
Then, it will start downloading and installing Java using the Oracle binaries.
At the end of the command line run, Oracle Java will be installed on the system.
Configuring Java on the system
If you have several versions of Java installed on the system, then we need to tell the system which is the default version. To achieve this, simply run the following command..
sudo update-alternatives --config javaYou will be shown a screen where you will see the different versions of Java.

Just choose the version that you want to be the default version on the system and the changes will be applied.
After this, you can configure the JAVA_HOME variable, which is used by many Java-dependent applications.
To do this in the above command, pay attention to the value of the path column of the default Java version you have decided.
Then, modify the /etc/environment file and add the following
JAVA_HOME="/usr/lib/jvm/java-11-openjdk-amd64"Save the changes and close the editor and apply the changes
source /etc/environment
Check the changes by displaying the value of that variable
echo $JAVA_HOMESample Output:
/usr/lib/jvm/java-11-openjdk-amd64This will configure Java on the system.
Conclusion
In this post, we learned how to install Java on Linux Mint. We have also learned how to configure it so that the projects you do with it are the best.
Thanks for reading, and please share our post.