The popularity of Python is soaring day by day. As per TIOBE, it just displaced JAVA to the second position. You just need a Text editor like Notepad++ to start learning Python programming. But, having an IDE would speed up the learning process.
So, in this post you will learn how to install PyCharm on Ubuntu 20.04 is this, maybe, the best IDE to develop in Python.
PyCharm
PyCharm is one of the best IDE available for Python. This JetBrains proprietary program has earned its reputation as the professional IDE for Python. It has three versions, professional, Community, and Educational.
Among the features of PyCharm is the auto-completion of code. In addition to the possibility of navigating within the same code. Of course, it includes a terminal and a debugger.
On the other hand, another outstanding feature of PyCharm is the ability to modify the code without compromising the execution of it. This makes it ideal for making changes without buying the results.
In addition to all this, there are a lot of plugins that add even more functionality to a great program. But not only functionality but also adds customization so that each programmer can feel the program as their own.
So, if you are a Python programmer or are initiated in the language, it can be very useful to have PyCharm installed.
Two different ways to install PyCharm on Ubuntu 20.04
Fortunately, there is no single way to install PyCharm on Ubuntu. This is one of the great advantages of Linux. That’s why today I’ll explain the two ways to do it.
Remember that it is not necessary to do both, but only to choose one of them. The one that best suits you and your team.
Using the Snap Package
We have talked about the Snap packages on the site and it is that PyCharm is available in this format.
The main advantage of this method is that it is quite easy to do and allows us to isolate the program inside our system. On the other hand, the upgrade process is made much easier.
So, open a terminal and run this single command:
sudo snap install pycharm-community --classic
After the download and installation are complete, it will be available from the main menu.
The downside of using Snap packages is that they are very large and this can be a problem on computers with limited space. Or even in places where the internet connection is unstable or slow.
PyCharm on Ubuntu 20.04 manually
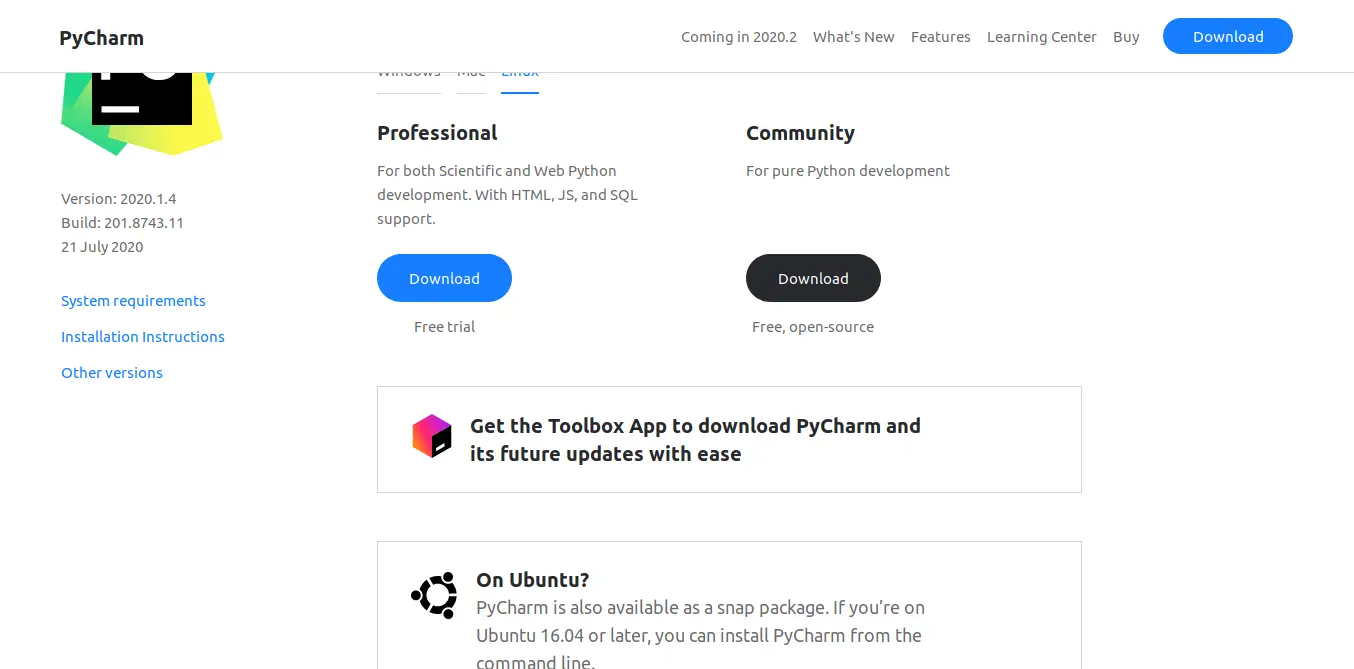
The other option is to download the program from the project website.
For this tutorial, I will download the community version:
Once you download the tar.gz file you can open a terminal and perform the installation faster.
First, decompress the file in a folder like /opt/ which is where it will be permanently located.
sudo tar xvzf Downloads/pycharm-community-2020.1.4.tar.gz -C /opt/
Note: at the time of writing this post, the latest stable version of PyCharm is 2020.1.4 so in the future, the command will change.
Once the PyCharm folder has been generated, you must run the installation wizard. You can do this by running the following command:
bash /opt/pycharm-community-2020.1.4/bin/pycharm.sh
The following window will be displayed:
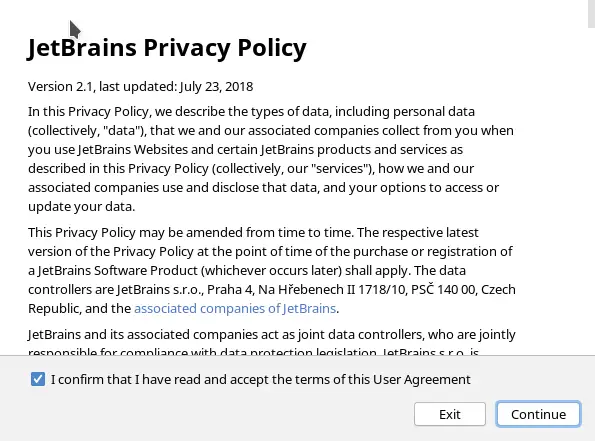
Once you have accepted the license terms, click on the Continue button.
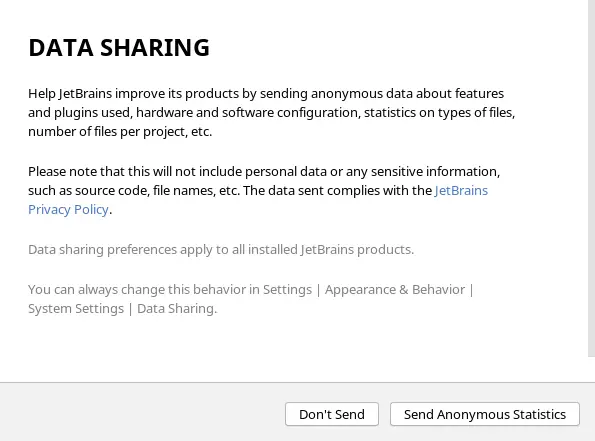
The installer will then ask you for permission to share your usage data anonymously. This will help the development of the application but is optional.
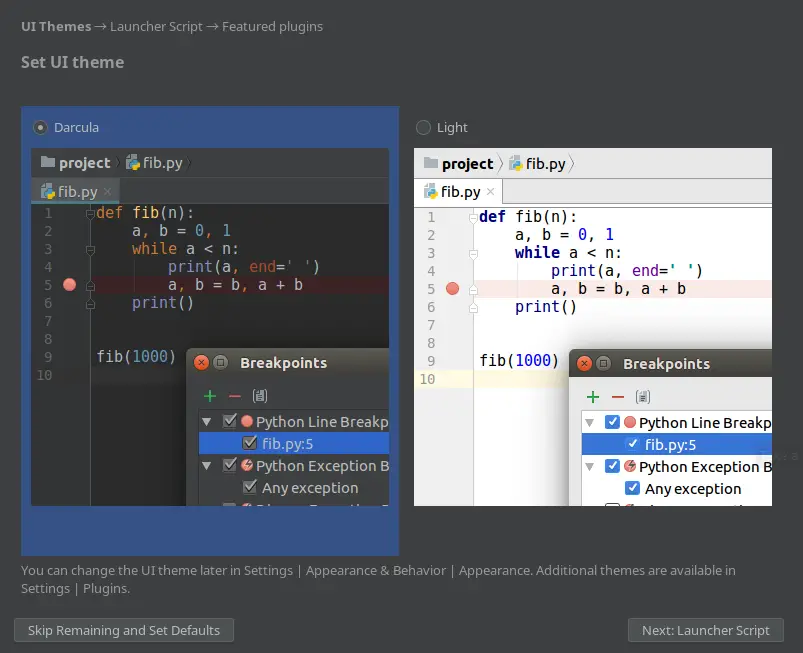
Then, you will be able to choose a theme for the program. In my case, I will choose Darcula theme.
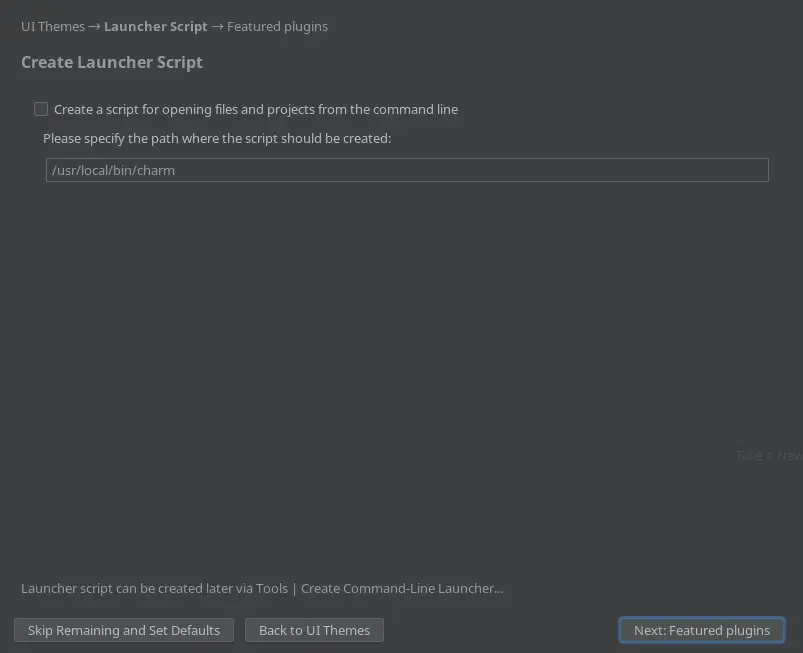
Then you can create a Launcher Script to open projects and files from the terminal.
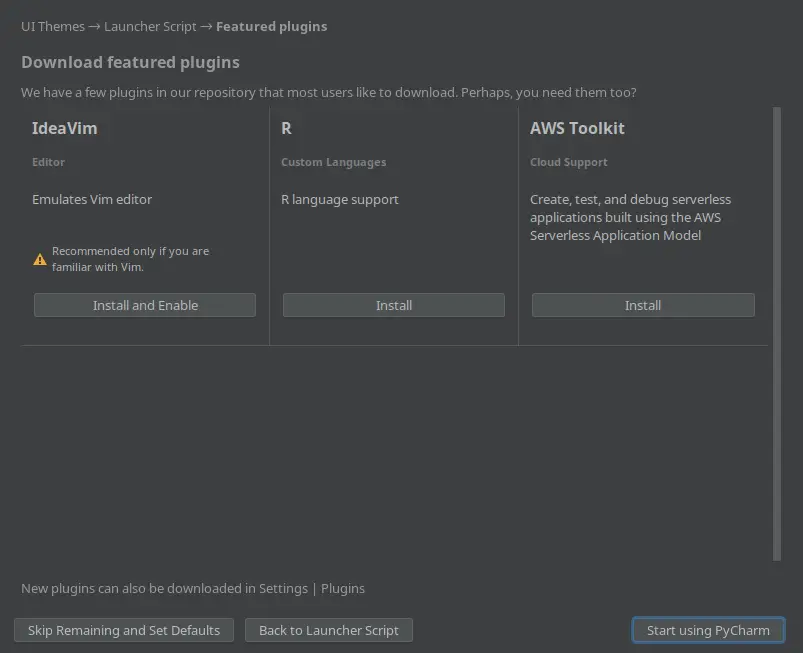
Also, you can download some popular plugins.
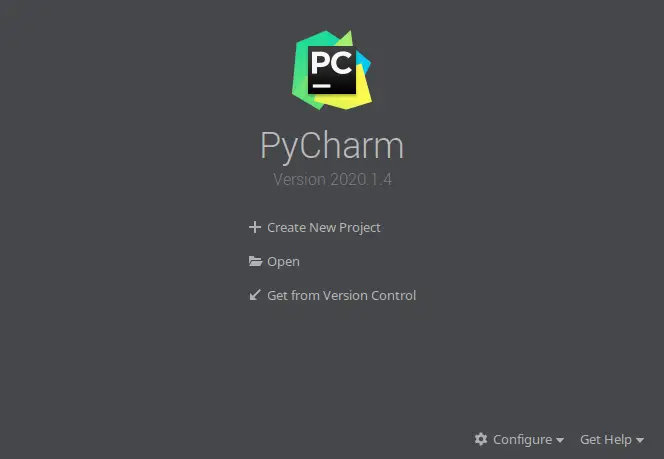
Clicking the Start using PyCharm button will complete the installation and start the program. In the end, you will see the initial screen.
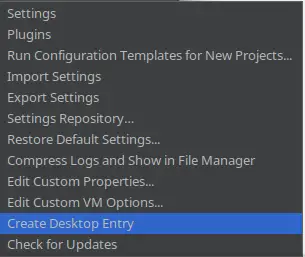
Click on Configure and a menu will appear where you will have to choose the Create Desktop Entry option so that you can run it from the main menu.
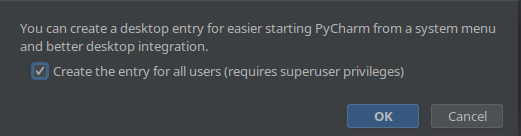
If you want to make it available to all users you can do so in the following window.
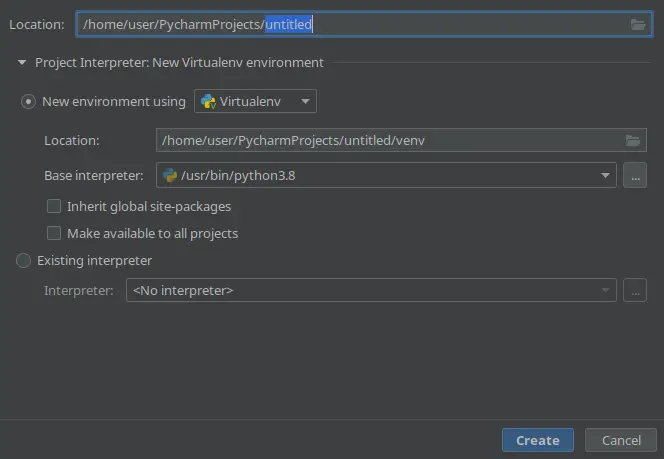
You can create a new project, and configure it to start working.
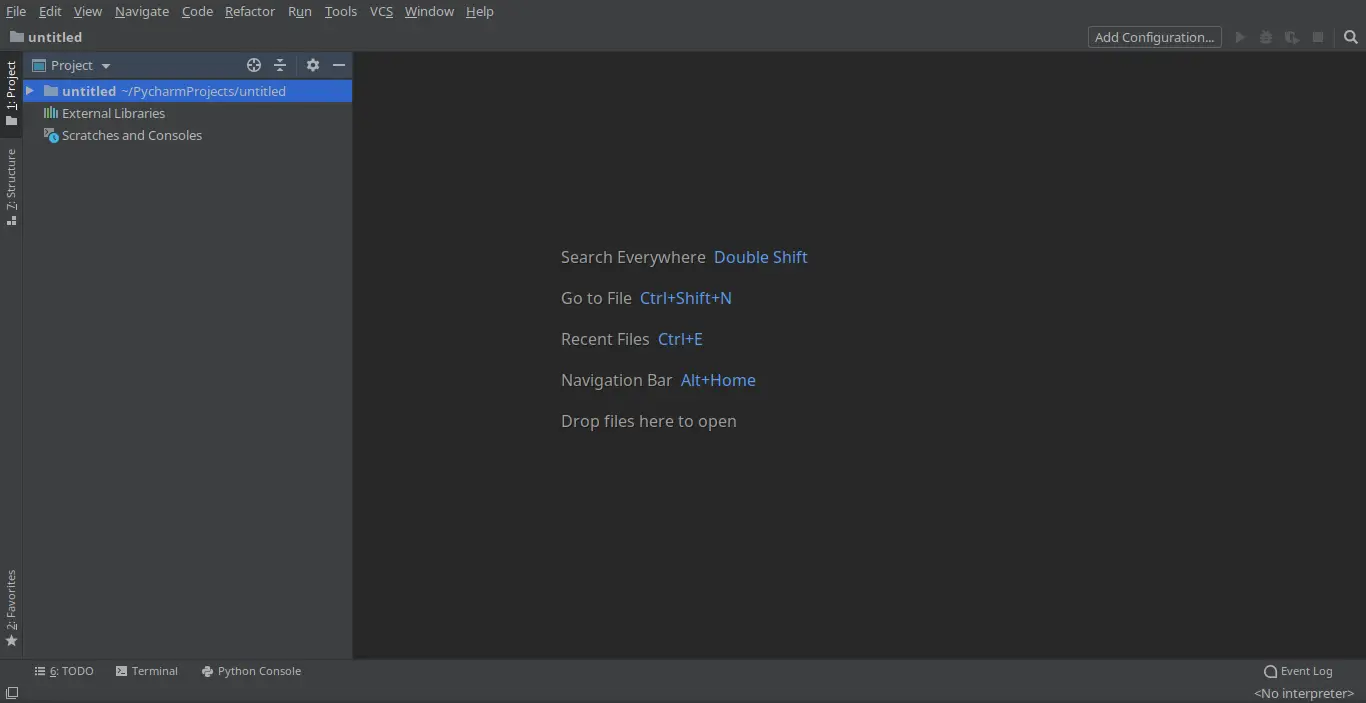
In the end, you will have the IDE ready for your projects.
Conclusion
A Python developer must always have an IDE that is in line with these new times. In this sense, for Python, it seems that the choice is easy with PyCharm.
In this post, you learned how to install it correctly in Ubuntu and even using several methods for it.