PPA stands for Personal Package Archive. It is nothing more than a repository or personal file store hosted on Launchpad. PPAs are created by individuals to develop and update packages for Linux.
There are many reasons to add a PPA to Ubuntu, a system where it can be done without issues. The reasons can be to install a program that is not included in the official repositories, or to access the latest stable version of a program.
The use of PPAs is not harmful, and you can avoid harmful PPAs with basic computer knowledge; however, it is best not to abuse and only add the necessary ones. Moreover, when you have already used them, you can remove them to maintain the health of the system.
Let’s go for it.
Ways to Remove PPAs Package Added in Ubuntu Linux
To perform this process, you can use either the graphical interface or the terminal. Either method is valid and will depend on your skill in using the system.
1. Using the graphical interface
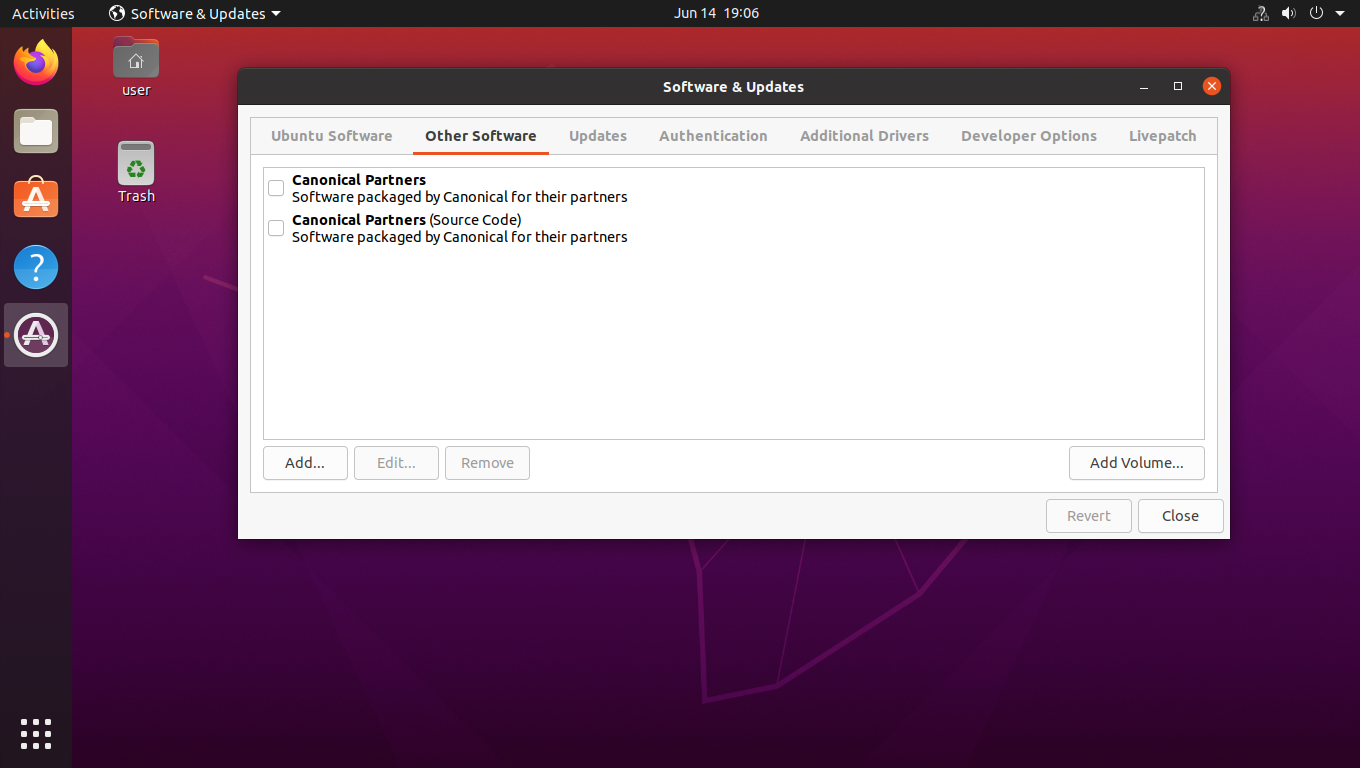
To remove PPA packages added to the system from the Ubuntu GUI, you need to open the main menu and look for Software & sources. It is not necessary to type it all, with a few letters it should already appear in the search.
Once it opens, you can access the Other Software tab, where you can see all the PPAs added to the system. Just select one and click on the Remove button. You will be prompted for a password and once you enter it, the process will start.

That’s it. The PPA is now removed.
2. From the terminal, we have several methods
Linux terminal is quite flexible and there are several ways to remove the PPA package from the system using the terminal. There are not too many differences between one and the other, and the choice is a mere formality.
First, there is the add-apt-repository command available with which you can quickly remove the PPA.
sudo apt-repository -r [PPA-name]Where you have to replace [PPA-name], with the name of the PPA you want to remove.
Another valid alternative is to do it by deleting the .list file that contains the repository information. Remember that when we add a PPA to the system, a new .list. entry is added to the /etc/apt/sources.list.d directory where the system repository information resides.
So, you can remove a PPA thanks to the rm command and knowing the file name.
sudo rm /etc/apt/sources.list.d/[ppa-name.list]This way, it is easy to remove a PPA package from the system.
Conclusion
PPAs are quite useful for increasing the number of packages that can be installed on the system. However, sometimes we should also remove some of them to prevent the system from suffering with too many repositories loaded on the system.
Today, you learned how to do it and also with several methods that you can use according to the circumstances.
I hope you liked this post, and help us to share it with all your friends.