Zabbix is one of the preferred tools for monitoring the resources of many computers on a network. That is why it has become indispensable for many sysadmins. So the goal of this post is for you to learn how to install Zabbix on Ubuntu 20.04.
For those who don’t know Zabbix is a system for monitoring the capacity, performance, and availability of servers, computers, applications, and databases. It also offers advanced monitoring, alerting, and visualization features all from a client-server architecture that allows us to separate the processes on each node.
Some of the main features of Zabbix are:
- High performance and monitoring capacity of devices (Servers, Hardware such as Printers, Routers).
- Centralized monitoring through a Web interface.
- Agents that can be installed on different operating systems such as Windows, Linux, BSD.
As you can imagine, Zabbix is used worldwide by many people and companies that rely on it.
Install Zabbix on Ubuntu 20.04
Step 1: Preparing the system
First, in the terminal update the distribution
sudo apt update
sudo apt upgrade
Now install Apache, MariaDB and PHP along with their modules with the following command:
sudo apt install apache2 mariadb-server php php-cgi php-common php-common libapache2-mod-php php-mbstring php-net-socket php-gd php-xml-util php-mysql php-bcmath
Set a new password for the MariaDB root user with the help of the command mysql_secure_installation.
You will be asked a series of questions that you have to answer AND to all of them,
Now, it is necessary to make some configurations in PHP. So, open the configuration file
sudo nano /etc/php/7.4/apache2/php.ini
And set these values:
max_execution_time = 300
max_input_time = 300
post_max_size = 16M
In the case of the nano text editor, you can use the key combination CTRL + W to search and save time.
Save the changes and then close the editor.
Now it is the turn of MariaDB. We need to create a database and a new user for Zabbix.
Open the MariaDB shell
sudo mysql -u root
And start to create the database, the user, and the password
CREATE DATABASE zabbix character set utf8 collate utf8_bin;
GRANT ALL PRIVILEGES ON zabbix.* TO 'zabbix'@'localhost' IDENTIFIED BY 'password';
FLUSH PRIVILEGES;
QUIT
Now, we can start downloading and installing Zabbix.
Step 2: Download and install the Zabbix package on Ubuntu 20.04
To install Zabbix you need to add the official repository of the application. To do this, there is a DEB package that we must download and install.
wget https://repo.zabbix.com/zabbix/5.4/ubuntu/pool/main/z/zabbix-release/zabbix-release_5.4-1+ubuntu20.04_all.deb
sudo dpkg -i zabbix-release_5.4-1+ubuntu20.04_all.deb
After that, refresh APT so that the repository information is already available.
sudo apt update
Now install Zabbix, the client, the web interface as well as the Apache and MariaDB plugins.
sudo apt install zabbix-server-mysql zabbix-frontend-php zabbix-apache-conf zabbix-sql-scripts zabbix-agent
Now switch to the root user
sudo su -
Then import the default database configuration into the created database.
zcat /usr/share/doc/zabbix-sql-scripts/mysql/schema.sql.gz | mysql -uzabbix -p zabbix
Return to the regular user
exit
And now set the database configuration in the Zabbix configuration file.
sudo nano /etc/zabbix/zabbix_server.conf
So, add the database criteria we have created:
DBName=zabbix
DBUser=zabbix
DBPassword=password
Save the changes and close the editor.
After that, restart the Apache and Zabbix services.
sudo systemctl restart zabbix-server apache2
Finally in the agent configuration, set the server hostname
sudo nano /etc/zabbix/zabbix_agentd.conf
Hostname=imaginelinux
Step 3: complete the installation
From a client computer, open a web browser and go to http://your-server/zabbix to start the installation.
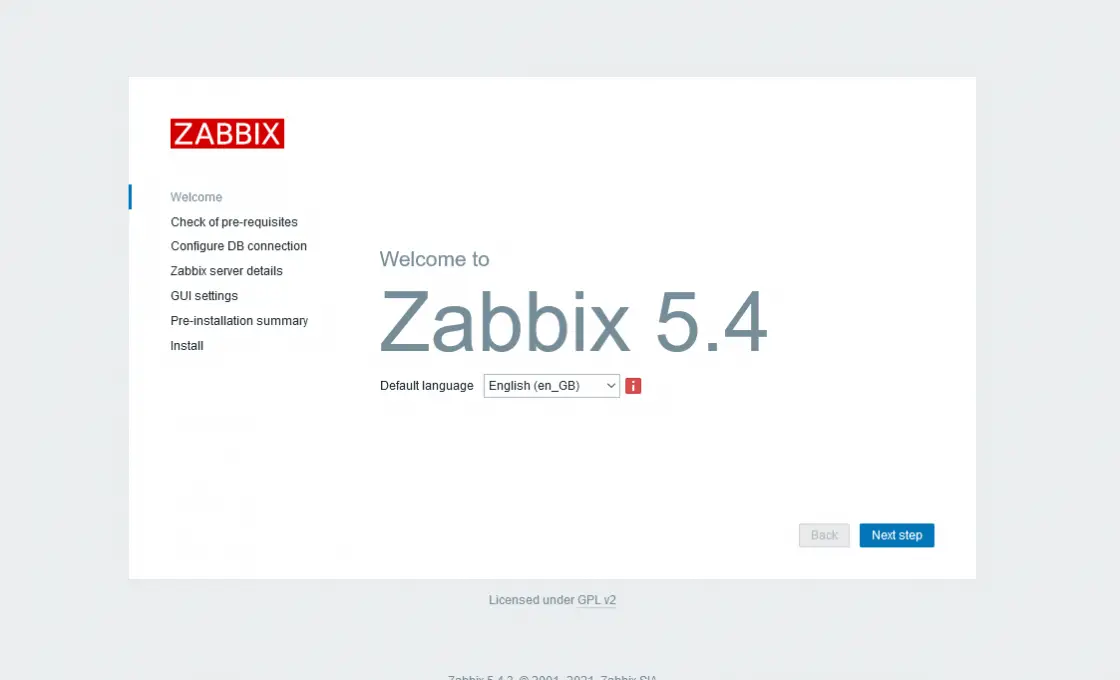
From here on the process is very simple. First, you will see the welcome screen.
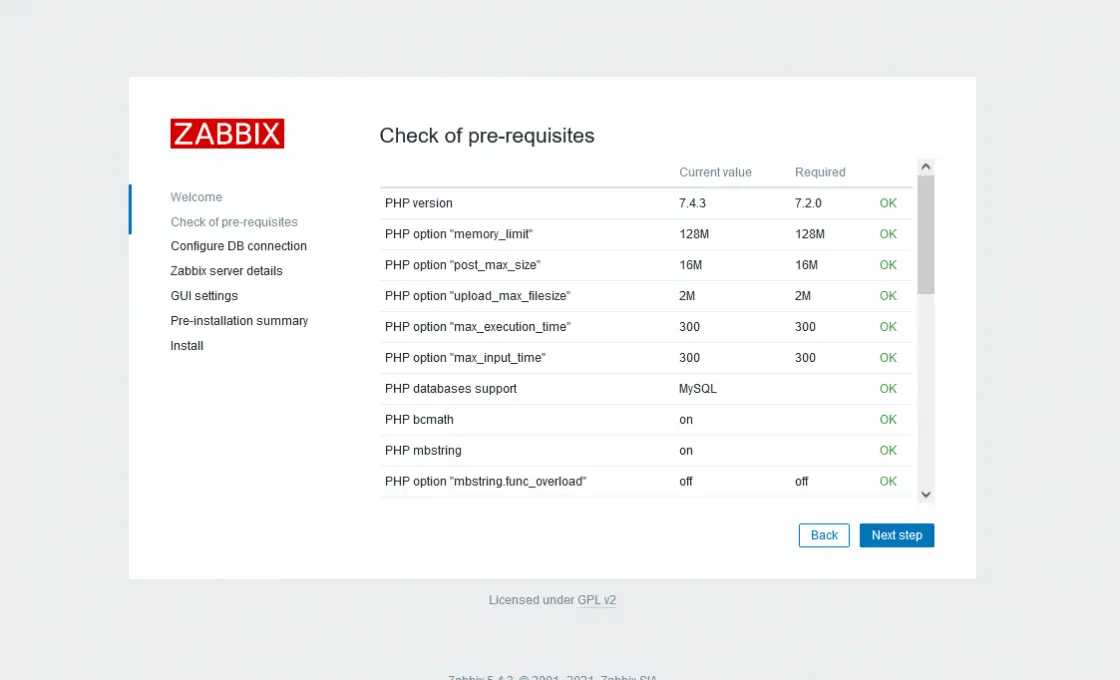
On the next screen, the installer will check your server to see if it meets the requirements.
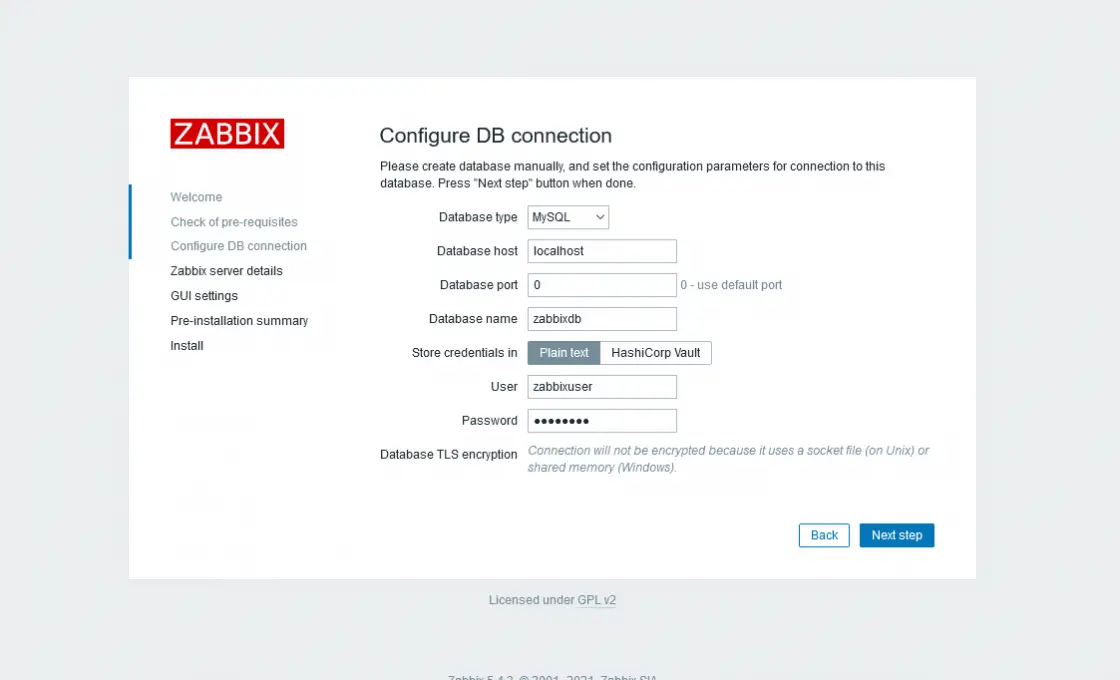
Then you have to add the database information.
On the Server Details screen, type the hostname of the server in the Name field.
A summary of the entire installation will be displayed.
Then the installation will start. When it finishes log in with the credentials Username admin and password zabbix you can change this later.
At the end, you will see the dashboard.
And that’s the end of the process. Congratulations Zabbix is installed on your server.
Conclusion
Zabbix is a benchmark in computer monitoring. Today you have learned how to install it on a server with Ubuntu 20.04. This way you can use it in your test environments.