Asterisk is a free and open-source software designed to create communications applications, such as IP telephony systems, VoIP gateways, conference servers, and other custom solutions for your company or organization.
So, you can guess why Asterisk is so popular and even more so in these pandemic times. As a result, Asterisk has become one of the most feature-rich, scalable and sophisticated communications servers available today.
So, let’s install it on our system.
Prepare the system to Install Asterisk on Ubuntu 20.04
Asterisk is available from the official Ubuntu repositories, but this way you will never get the latest stable version of it. So, you should do the procedure manually.
So, connect to your server and update it.
sudo apt update
sudo apt upgrade
Thereafter, enable the universe repository where some necessary packages will be.
Then, it is time to install several packages needed for downloading, compiling and installing Asterisk. In this command, you will notice that there are commands like git, curl or wget as well as many libraries.
So, install them all by running
sudo apt install git curl wget libnewt-dev libssl-dev libncurses5-dev subversion libsqlite3-dev build-essential libjansson-dev libxml2-dev uuid-devNow, with this installed, we can download and install Asterisk.
Install Asterisk on Ubuntu 20.04
To download the LTS version of Asterisk which is recommended in production cases, run
wget http://downloads.asterisk.org/pub/telephony/asterisk/asterisk-18-current.tar.gz
Decompress it, using tar.
tar xvf asterisk-18-current.tar.gzThis will generate a folder with all the source files. Access it.
cd asterisk-18*/As Asterisk needs an MP3 decoder, you have to add it with this command
contrib/scripts/get_mp3_source.sh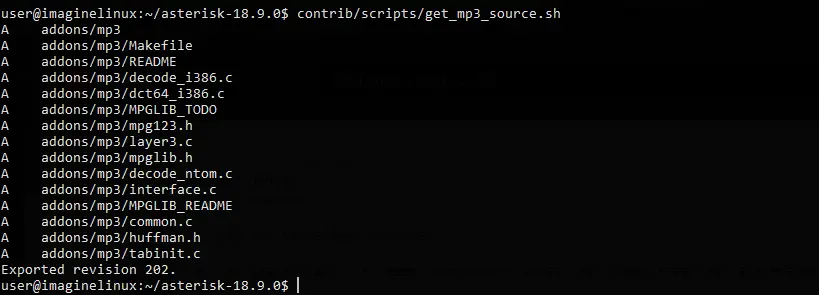
Then you have to install the missing or missing dependencies.
sudo contrib/scripts/install_prereq installYou will notice an output screen like this

Then prepare the code for compilation.
./configure
Now it’s time to choose which Asterisk components to install. To display the menu where we can select, run.
make menuselect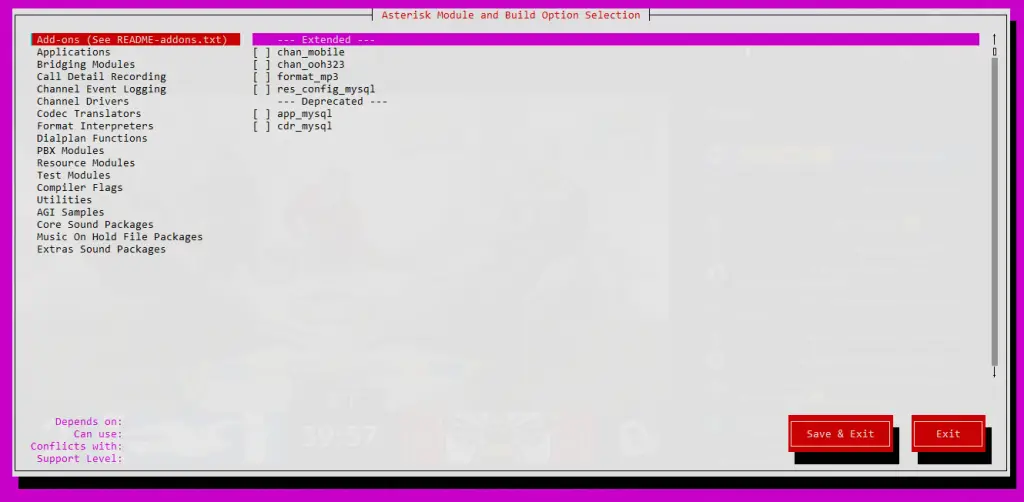
From there you have to scroll with the arrow keys and go section by section indicating what you need to install. For example, Add-ons, Core sound module and more.
When you are ready, run
make
Then, install Asterisk by running
sudo make install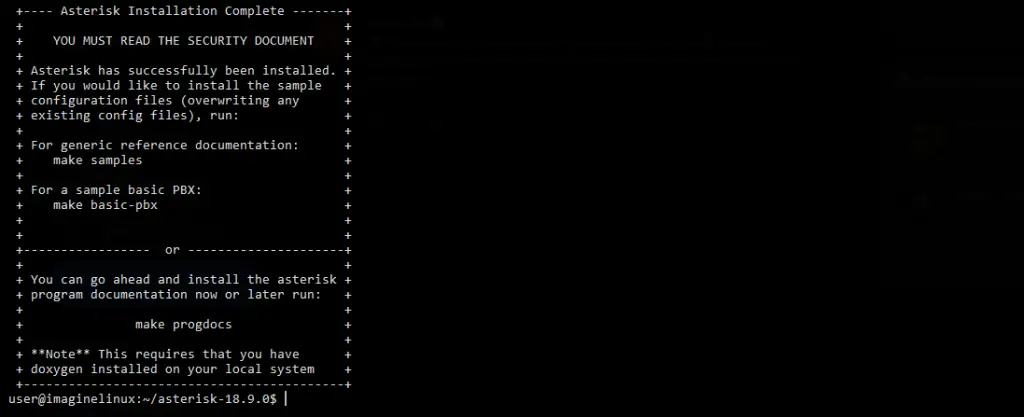
Optionally, you can install the documentation
sudo make progdocsThen install the samples and the configuration
sudo make samples
sudo make config
sudo ldconfig
Configuring Asterisk before using it on Ubuntu 20.04
Before using it, we have to make some configurations. First create a group called asterik and then create a new user who belongs to this group. For simplicity, I have named both the user and the group asterik.
sudo groupadd asterisk
sudo useradd -r -d /var/lib/asterisk -g asterisk asterisk asterisk
Now add the asterik user to the audio and dialout groups.
sudo usermod -aG audio,dialout asteriskMake the user and the asterik group the owner of all directories that the application has created.
sudo chown -R asterisk.asterisk /etc/asterisk
sudo chown -R asterisk.asterisk /var/{lib,log,spool}/asterisk
sudo chown -R asterisk.asterisk /usr/lib/asterisk
Next, in the asterisk configuration file, we need to indicate the user and the group that will use it. In this case, it is asterik.
sudo nano /etc/default/asteriskAnd modify these values
AST_USER="asterisk"
AST_GROUP="asterisk"
Save the changes and close the editor.
Do the same with the /etc/asterisk/asterisk.conf file.
sudo nano /etc/asterisk/asterisk/asterisk.conf
Then, set these values
runuser = asterisk
rungroup = asterisk
Again, save the changes and close the editor.
Now apply the changes by restarting the Asterisk service.
sudo systemctl restart asteriskMake it start with the system
sudo systemctl enable asteriskFinally, check the status of the service.
sudo systemctl status asterisk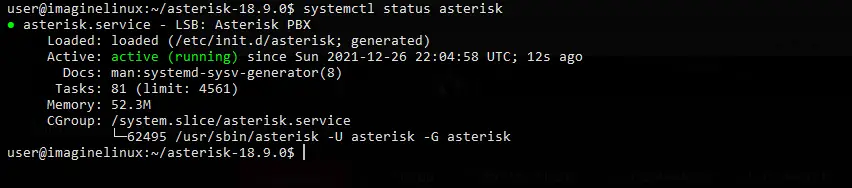
So, Asterisk is running correctly.
Access to the Asterisk console on Ubuntu 20.04
Now you just need to access the Asterisk console.
sudo asterisk -rvv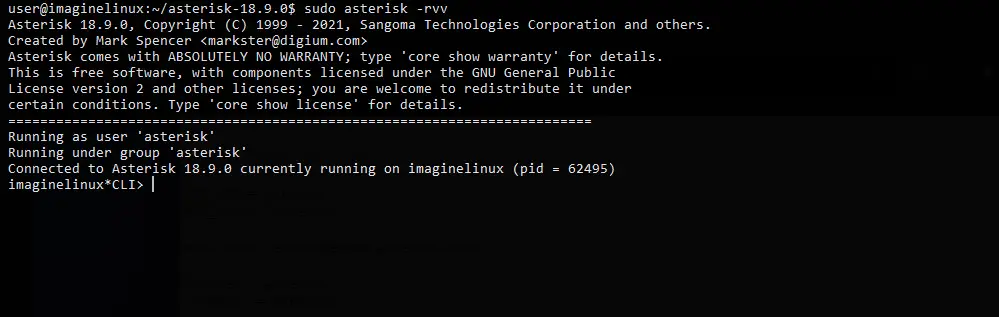
Remember to open port 5060 and 5061 in the firewall.
So, Asterisk is alive. You can now continue with your configurations to get the deployment we need.
Conclusion
In this post, you have learned how to install Asterisk on Ubuntu 20.04 by manually compiling the source code of the application. In this way, we will be able to get a recent and different version from the one included in the official repositories.
Help us to grow by sharing our posts.