OpenSUSE is one of the most popular distributions out there. It is directly sponsored by SUSE, a company that offers professional-level server services. Something like Red Hat and Canonical. This community-based distribution inherits many of the virtues of its parent distribution, SUSE Linux Enterprise. And one of those features is stability. That is why many developers and system administrators take it into account when installing a database manager. So, in this post, I will show you how to install MySQL 8 on OpenSUSE 15.1
MariaDB or MySQL for my OpenSUSE?
As it is well known, MySQL was acquired by Oracle and this has unleashed all kinds of concerns in the open-source community. The main fear was that Oracle would progressively kill MySQL. And that’s where MariaDB was born to go her way.
So MySQL under the support of Oracle went its way of development and now offers professional support to companies.
In fact, MySQL has two versions, the first one is the paid version which includes many features focused on companies with a lot of data to store. Moreover, it also adds professional technical support to this.
On the other hand, there is the community and free version released under GPL that allows being installed on any supported system. This version makes it ideal for various educational projects and for developers to use in their work. But do not be fooled, it is just as powerful as the commercial version.
So the decision is yours. MariaDB is included in the official OpenSUSE repositories. MySQL is not and in this case, you will learn how to install it.
You can also read this article to understand the difference between MySQL and MariaDB.
Installing MySQL 8 on OpenSUSE 15.1
OpenSUSE 15.1 is the latest stable version of this great Linux distribution. In their official repositories, they include MariaDB which as I said before is a MySQL fork.
However, it is possible that for certain reasons, you require MySQL in OpenSUSE 15.1
So the first thing to do is to open a terminal session or make a connection via SSH to your server and update the system.
:~$ sudo zypper up
Thanks to this command, you can have all the security patches available on your system. In addition to this, it will also update critical components of the system and thus be ready for installation.
Once the system update is finished, you have to make sure that the wget tool is installed.
:~$ sudo zypper in wget
Loading repository data...
Reading installed packages...
'wget' is already installed.
No update candidate for 'wget-1.19.5-lp151.4.1.x86_64'. The highest available version is already installed.
Resolving package dependencies...
Nothing to do.
In this case, it is already installed. You probably have it installed too, but it is better to be sure.
MySQL 8 has a special repository for SUSE and OpenSUSE that will serve to install the latest available version of the database manager. So, you have to download it using wget.
:~$ wget https://dev.mysql.com/get/mysql80-community-release-sl15-3.noarch.rpm

This package you have downloaded contains all the instructions for the system to add the MySQL repository. Therefore, you have to install it using the following command:
:~$ sudo rpm -ivh mysql80-community-release-sl15-3.noarch.rpm

Now it is time to add the GPG key to the repository so the system can use it safely.
:~$ sudo rpm --import /etc/RPM-GPG-KEY-mysql
The next step is to refresh all OpenSUSE enabled repositories. Then it will be available for use.
:~$ sudo zypper refresh

As you can see in the image, the MySQL repository is already loaded to the system correctly.
Now we can install MySQL on OpenSUSE 15.1 by running the following command
:~$ sudo zypper install mysql-community-server
Loading repository data...
Reading installed packages...
Resolving package dependencies...
The following 4 NEW packages are going to be installed:
  mysql-community-client mysql-community-common mysql-community-libs mysql-community-server4 new packages to install.
Overall download size: 382,7 MiB. Already cached: 0 B. After the operation, additional 1,9 GiB will be used.
Continue? [y/n/v/...? shows all options] (y):
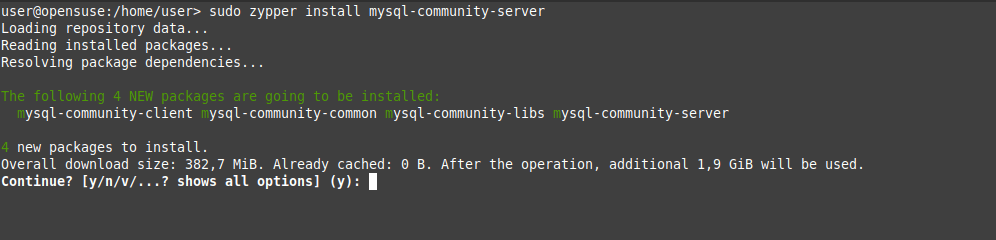
Just press the “y” key and the installation will start.
Configuring MySQL 8 on OpenSUSE before the first use
By default, the client, server, and some common configuration packages are included. It may not look like much, but with this installed, you can deploy your database server without problems.
However, before you can use MySQL on OpenSUSE 15.1 you have to make some small adjustments.
By default, MySQL, when installed on OpenSUSE, generates a temporary root password that you can change later. This security measure makes sure that nobody can break the program even at the beginning.
To find out what the password is, you can run the following command:
:~$ sudo grep 'temporary password' /var/log/mysql/mysqld.log
2020-03-23T15:41:25.798968Z 5 [Note] [MY-010454] [Server] A temporary password is generated for root@localhost: NG5VO#5Pb_n)

There you will have a screen output similar to the one shown in the picture.
In this case “NG5VO#5Pb_n)” is the temporary root password.
Note: Keep in mind that each key is different. So it will not be the same as the one in the tutorial.
Now we can change the password of the root user with the help of the mysql_secure_installation script.
:~$ sudo mysql_secure_installation
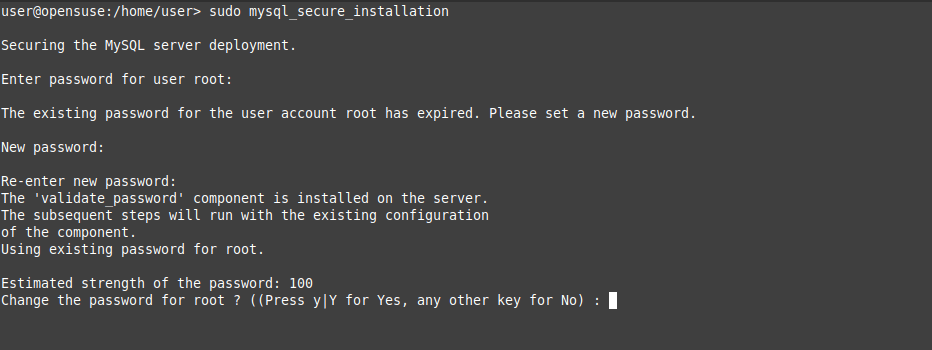
There you will have to choose a strong password because the script will analyze it and give you a result.
When you confirm it, you will be asked some configuration questions that will help to further secure the installation.
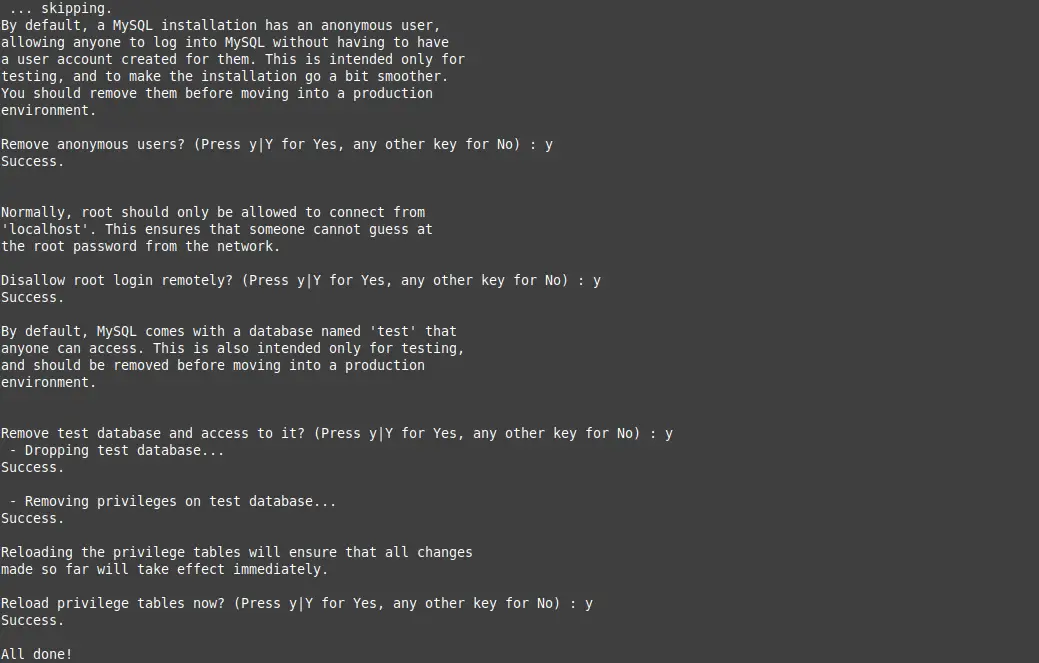
These are the questions you will have to answer.
Remove anonymous users? (Press y|Y for Yes, any other key for No) : y
Disallow root login remotely? (Press y|Y for Yes, any other key for No) : y
Remove test database and access to it? (Press y|Y for Yes, any other key for No) : y
Reload privilege tables now? (Press y|Y for Yes, any other key for No) : y
Now check the installed version with the following command:
:~$ mysql --version
mysql See 8.0.19 for Linux on x86_64 (MySQL Community Server - GPL)
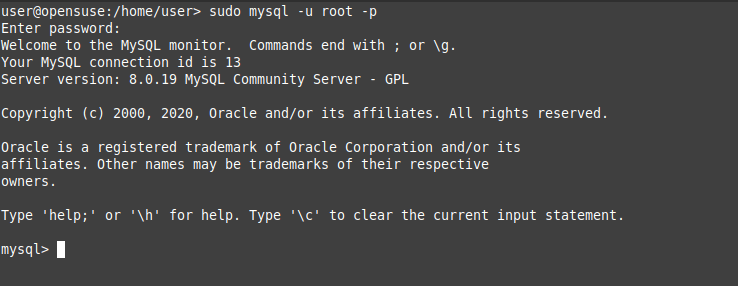
Finally, you can access the MySQL console using the root user and the password you defined. Then you can start working.
:~$ sudo mysql -u root -p
MySQL runs as a system service, so you can use systemctl command to manage it.
So if you want to start it use the following command:
:~$ sudo systemctl start mysql
Or stop it:
:~$ sudo systemctl stop mysql
You can also check the status of the service:
:~$ sudo systemctl status mysql
So, now MySQL is ready for action.
Conclusion
MySQL is a classic in SQL relational database managers. Every day it is improved and enhanced by Oracle. They have even added NoSQL support thus increasing the potential.
By having Oracle you can access a commercial license ideal for large projects. However, it also has a community license that allows everyone to use it without restriction.
Anyway, thanks to this post you have learned step by step how to install MySQL 8 on OpenSUSE 15.1. You can also install Apache and PHP to complete your web stack development environment.