MySQL is a relational, open-source database management system, founded by Michael Widenius and Axmark began and now owned by Oracle Corporation. There are two licenses, a commercial one and another for the community version (GPLv2).
Most of the open-source software like WordPress, Drupal, Joomla, etc uses MySQL as a database. Even for custom web stack development, it is one of the most preferred databases.
MySQL 8 is the latest stable release that incorporates many new features in performance, security and multi-model support.
Install MySQL on Ubuntu
Being a major version that incorporates many changes, it becomes vital for any Ubuntu user to have MySQL on the computer. Especially if you are talking about a data server or a development team that requires new features to be explored.
The good news is that Oracle makes available a repository dedicated to Ubuntu. This means that the installation is simple and that through APT you can always have the application updated.
So the first step is to open a terminal. If this installation will be done in a server, then connect through SSH using Putty. Equally important is that the user has the sudo command enabled.
:~$ ssh [user@host]
Once you are logged into your terminal, download the MySQL DEB package that sets up the repository as shown below.
:~$ wget https://dev.mysql.com/get/mysql-apt-config_0.8.14-1_all.deb
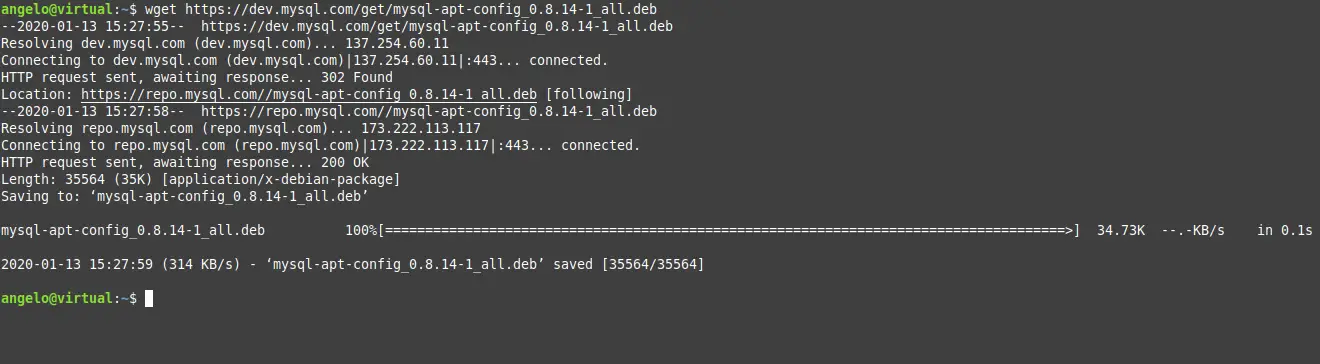
The package is quite small so the download will be fast.
Then you need to install it using the dpkg command. To do this, type the following command:
:~$ sudo dpkg -i mysql-apt-config_0.8.14-1_all.deb
In the package configuration you will see the following image:
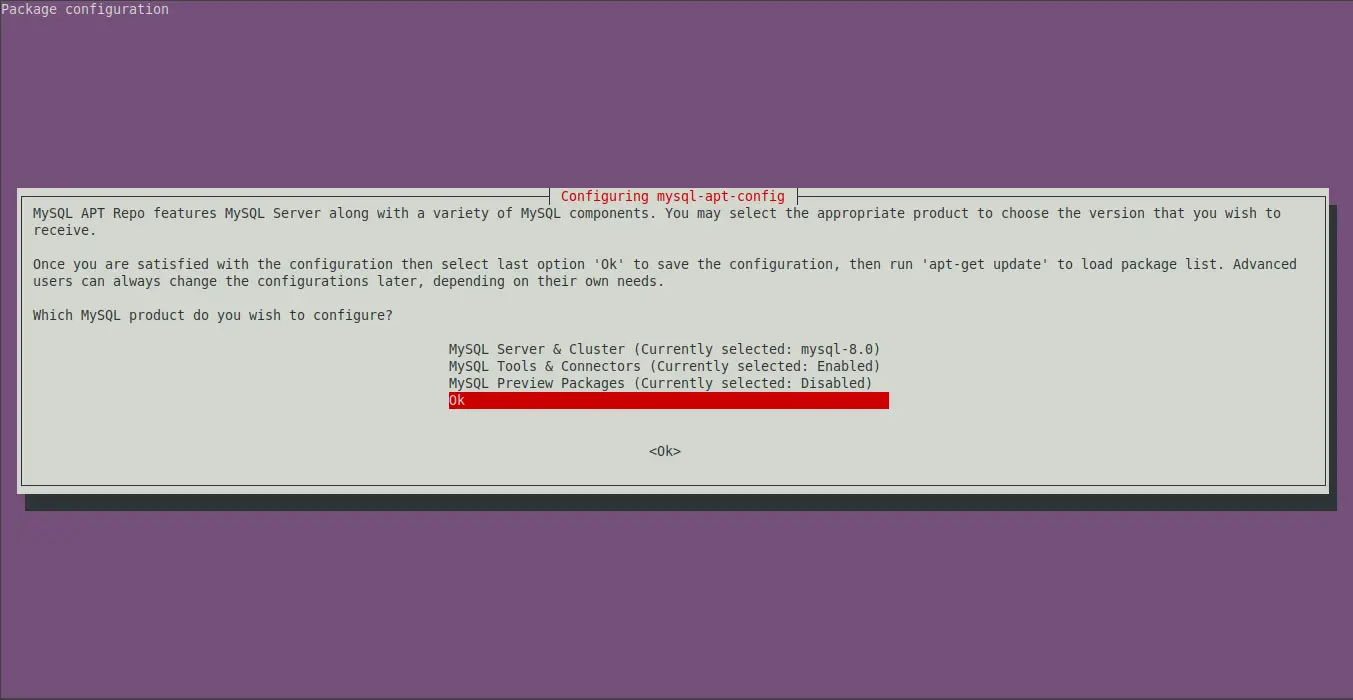
In it, it is reported that the repository incorporates several extra features. For example, the connectors for the different programming languages. In this case, the default configuration is enough, so use the keys on the keyboard to press the OK option.
When you finish the configuration of the repository, refresh the APT cache to apply the changes.
:~$ sudo apt update
Finally, you can install MySQL on Ubuntu with the following command:
:~$ sudo apt install mysql-server
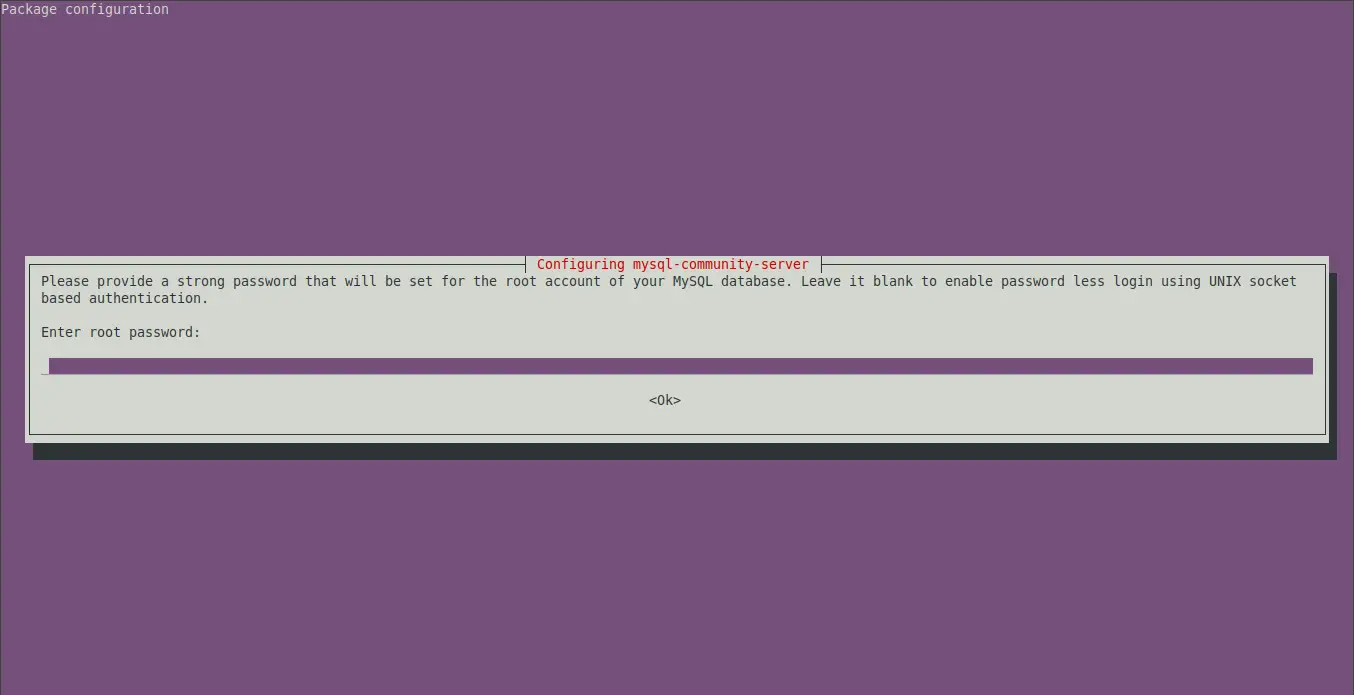
Again during the installation process, some settings will be made. The first is to set a password for the root user.
The root user is the most important one because it has access to the whole program and is the one who creates the users, assigns the different permissions, etc.
So this root password has to be quite strong.
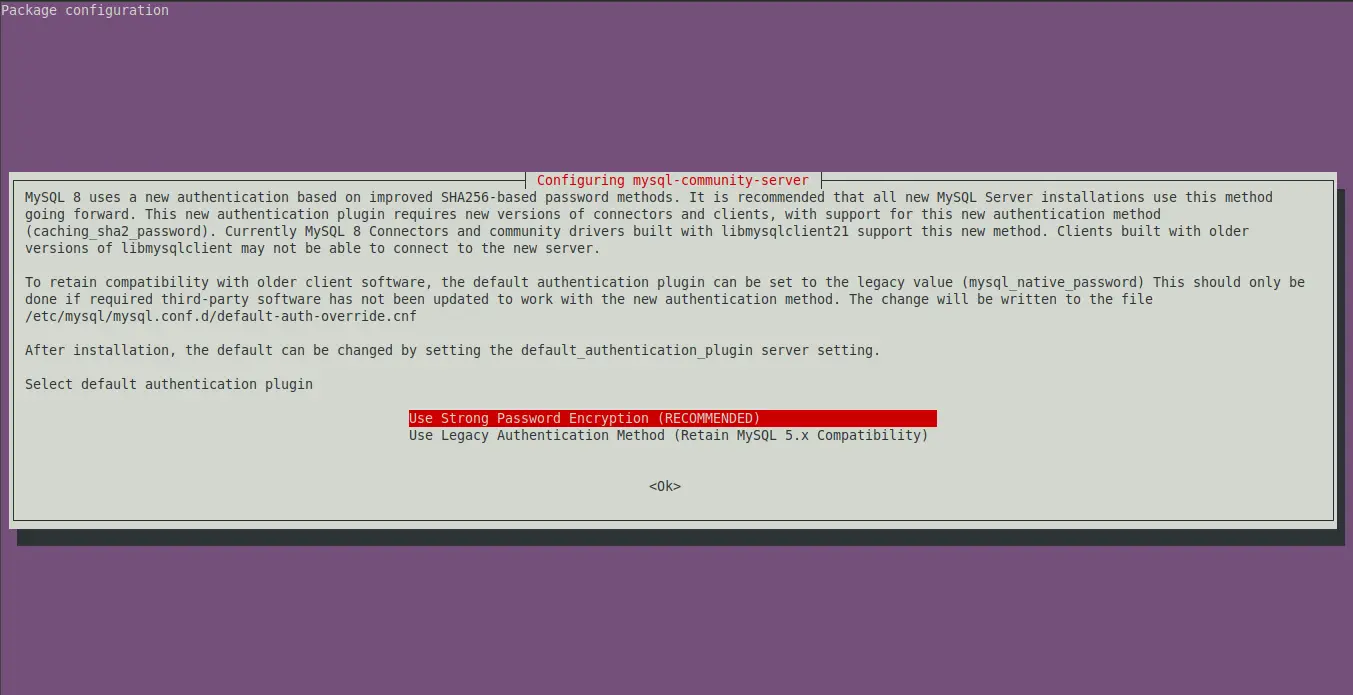
Then, the installer will allow you to choose the default authentication plugin. You have two options, to use the most recent one that is encrypted and more secure, or to use the old version. I think the ideal is more security.
Once the installation is finished, you can verify the operation of the MySQL command by showing, for example, the installed version.
:~$ mysql --version

So, MySQL is properly installed.
Configure MySQL on Ubuntu
By default, the installation of MySQL only makes small configurations, for example, the definition of the password for the root user. However, you can use a script that will help to change this password and add new configurations to improve MySQL security. The script is called mysql_secure_installation.
To launch it, just run this command:
:~$ sudo mysql_secure_installation
First, it will ask you to type in your root password. In this script, you can also change it. Another option that will be shown is to use or not, the plugin “validate password”. It will evaluate the root password and display it on the screen. Then, it will ask you if you want to change it.
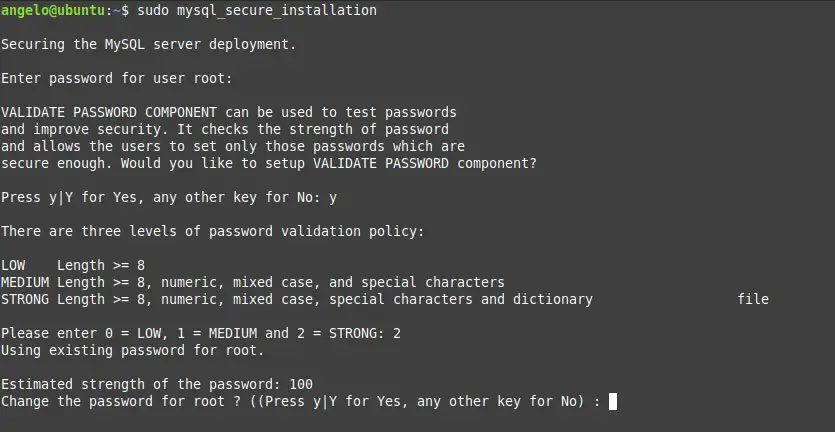
Next, the script will ask you a few configuration questions. You can answer them any way you want, but it is recommended to answer all of them Yes.
The questions are the following:
- Remove anonymous users?
- Disallow root login remotely?
- Remove test database and access to it?
- Reload privilege tables now?
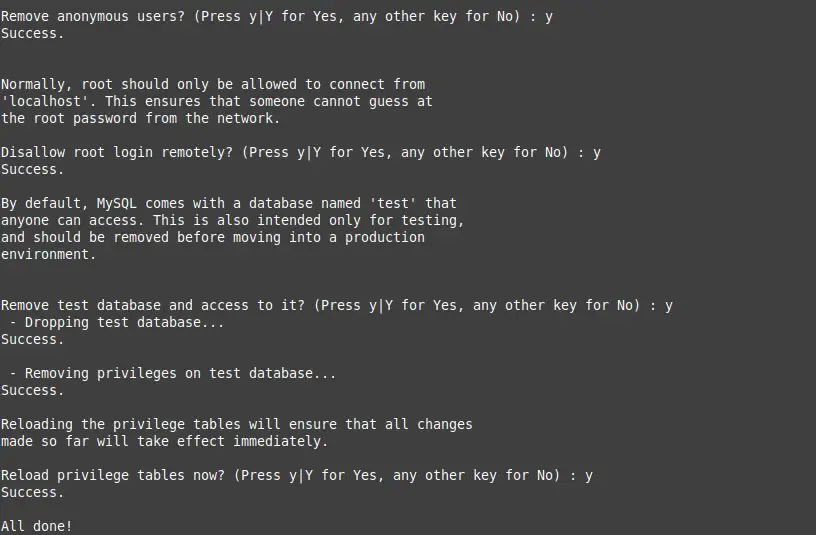
When finished, the installation will be safe.
Creating a new MySQL user
It is never advisable to use the root user for projects and applications. This is almost a universal unwritten rule. So before you start working, you need to create a new user and give them the right permissions.
So, access the MySQL shell with the following command:
:~$ sudo mysql -u root -p
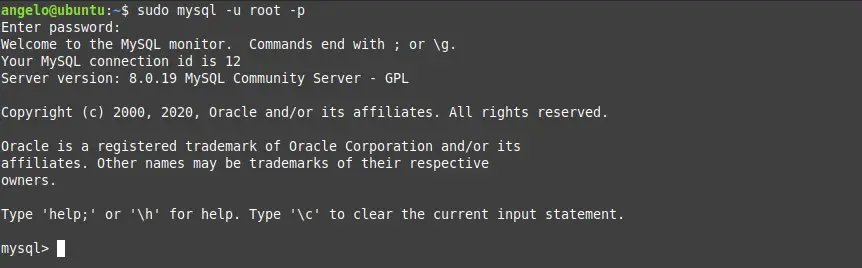
In this case, you are logged in with the root user who is the first user created. Then, introduce the root user’s password and you will already enter the MySQL shell.
To create a new user, just use the following command:
CREATE USER 'newuser'@'localhost' IDENTIFIED BY 'your-password';
Of course, do not forget to change the values of ‘newuser‘ and ‘your-password‘. The password has to be strong and should not be shared. Then press Enter.
However, at this point, the user exists but does not have permission over any database. At this point, if an application would use this user, it could not practically do so. So you have to assign permissions to it.
GRANT ALL PRIVILEGES ON *.* TO 'newuser'@'localhost';

With the previous command, you assign all the permissions on all the databases of the system. This is represented by the asterisks (*). However, it is possible to specify the databases and tables to which the newly created user has permissions. For example, in this case, I only grant permissions to all the tables of a single dummy database called example.
GRANT ALL PRIVILEGES ON example.* TO 'newuser'@'localhost;
Anyway, this topic of permissions is quite extensive. To know it fully, there is nothing better than the official MySQL documentation about it.
Now that new user can access the MySQL shell and has sufficient permissions to use the designated databases.
:~$ sudo mysql -u newuser -p
Assigning permissions to a specific database is a great security measure to keep MySQL stable.
Working with the MySQL service
In Ubuntu and all Linux distributions, MySQL is handled as a system service. This allows you to start, restart and stop MySQL quickly and easily.
After the installation on Ubuntu is complete, the service starts automatically. So first check the status of the service with the systemctl command.
:~$ sudo systemctl status mysql
As you can see, the service is up and running. In case you want to stop it, use this command:
:~$ sudo systemctl stop mysql
And again, check the status of the service:
:~$ sudo systemctl status mysql
In this case, the MySQL service has been stopped. If you want to start it again, just use the following command:
:~$ sudo systemctl start mysql
In case you want, restart the MySQL service, the following command is executed:
:~$ sudo systemctl restart mysql
Also, MySQL in Ubuntu when installed is configured to start with the system, if you want to change this, you can do it with the following command:
:~$ sudo systemctl disable mysql
to reverse the changes use this one:
:~$ sudo systemctl enable mysql
And with this MySQL in Ubuntu is ready for work.
Summary
MySQL has earned the reputation of being one of the best Relational Database Management Systems in the world. Data storage and processing capacity make it the main alternative to other closed tools such as Oracle, DB2 or Microsoft SQL Server.
In this post, you have learned how to install and configure MySQL on Ubuntu. Leaving it ready for the start of the work.