Configuring KVM on Rocky Linux 9 will open the door to virtualization using your favorite operating system. This software integrates with the kernel, making it an efficient and easy to use virtualization platform.
What is KVM?
KVM or Kernel-based Virtual Machine is a Linux program that was incorporated into the operating system since 2007 that integrates with the kernel to make virtual machines efficiently.
In other words, KVM lets you turn Linux into a hypervisor that allows a host machine to run multiple, isolated virtual environments called guests or virtual machines (VMs).
One of the main advantages of KVM is that it allows you to deploy a virtualization platform for free and without licenses. This allows smaller companies to enjoy these advantages at no cost.
Another major advantage of KVM virtualization is the speed and efficiency with which it is done. Especially when creating virtual machines with Linux-like operating systems such as BSD systems.
Installing KVM on Rocky Linux 9 / Alma Linux 9
KVM and all of its components are present in the official Rocky Linux 9 / Alma Linux 9 repositories, so installation should be fairly easy to tackle.
Before you start, open a terminal and make sure that the system is up-to-date
sudo dnf updateVerify if your system supports KVM
Although most current Intel or AMD processors support KVM virtualization, it is a good idea to find out whether you are ready or not.
To achieve this, open a terminal and run this command
cat /proc/cpuinfo | egrep "vmx|svm"This command searches cpuinfo for vmx or svm values that refer to Intel or AMD virtualization, respectively.
An example screen output would look like this
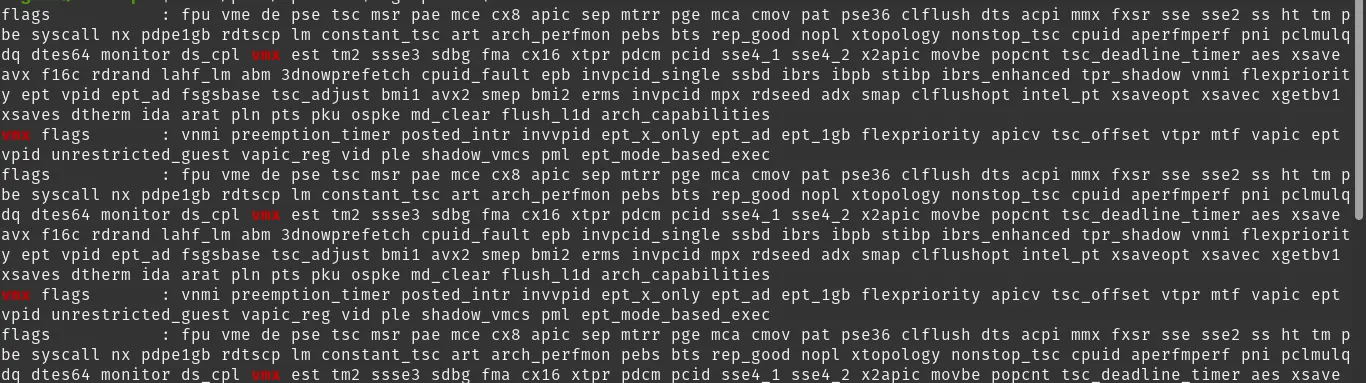
In it, you can see how the vmx value is returned several times, indicating that you are using an Intel processor with KVM virtualization capabilities.
If you don’t like the above comment, you can use this other one to get the same conclusion
lscpu | grep VirtualizationYou will get an on-screen output similar to this one
Virtualization: VT-xThis already indicates that the system supports it, and you will have no problems installing it.
Installing KVM on Rocky Linux 9 / Alma Linux 9
Now that we know that the system supports KVM and its tools, you can install the necessary packages to get it on the system.
To achieve this, run the following command
sudo dnf install qemu-kvm virt-manager libvirt virt-install virt-viewer virt-top bridge-utils bridge-utils virt-top libguestfs-toolsThere are many packages, but they are really light, so you should have no issue installing them quickly.
To check that the installation was successful, you can run
lsmod | grep kvmAnd you will see something similar to this
kvm_intel             499712  0
kvm                  1347584  1 kvm_intel
Now you will need to start the KVM service. It would be a good idea to run it at system startup.
sudo systemctl enable --now libvirtdAnd check the status
sudo systemctl status libvirtd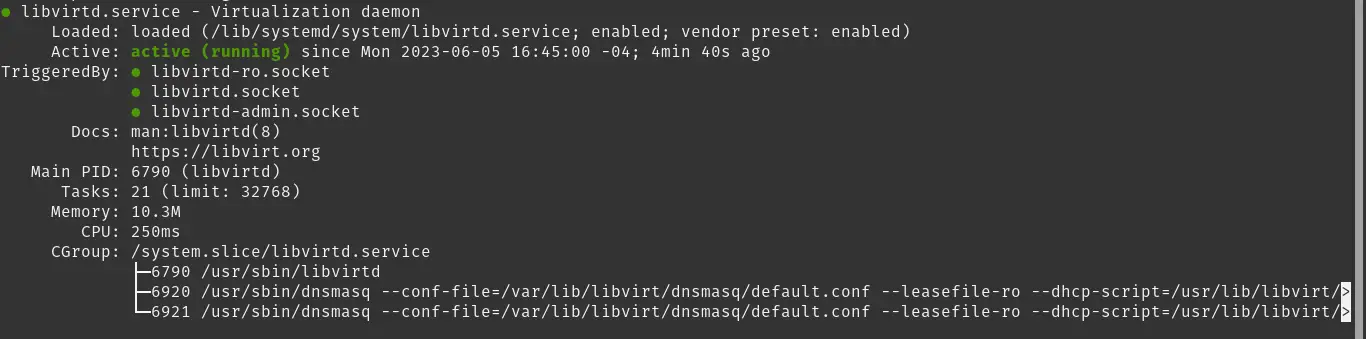
Then everything is fine.
Finally, add your user to the KVM group so that there are no configuration problems
sudo usermod -aG libvirt $USERCreate a bridge connection to KVM
When you create a virtual machine with some system, you will only be able to access it from the host and although this may be enough for many users, it is not ideal.
As soon as you install KVM, a NAT-tied bridge connection will be created which, although it will have access to the internet, you will not be able to access it from outside the host. So check the created bridge.
brctl showNow identify the network interfaces you have on the system. The easiest way to do this is with nmcli.
sudo nmcli connection showYou will get an output per screen like this
NAME       UUID                                  TYPE      DEVICE
virbr0     96cf33e5-a3e6-410e-83f5-ff080bacc630  bridge    virbr0
Profile 1 e608fc5d-1af2-40c6-9044-8a7a86c5e00b ethernet -- 
Since you already know the name of the network interface to use, then you can create the parameters for the bridge. Please take note from this.
BR_NAME="br0"
BR_INT="eth0"
SUBNET_IP="192.168.1.15/24"
GW="192.168.1.1.1"
DNS1="8.8.8.8.8"
DNS2="8.8.4.4.4"
Each element is descriptive, but it starts by giving a name to the interface (BR_NAME), then sets which interface it will be the slave of (eth0), then the IP address assigned within the range of the host interface, gateway and DNS.
Now create the bridge connection
sudo nmcli connection add type bridge autoconnect yes con-name [BR_NAME] ifname [BR_NAME]
Connection 'br0' (3df37dcd-7638-43e7-a4eb-197888e9cecc) successfully added.
As such, the connection has been created, but you have to add the network parameters to it.
sudo nmcli connection modify [BR_NAME] ipv4.addresses [SUBNET_IP] ipv4.method manual
sudo nmcli connection modify [BR_NAME] ipv4.gateway [GW] sudo nmcli connection modify [BR_NAME] ipv4.gateway [GW]
sudo nmcli connection modify [BR_NAME] ipv4.dns [DNS1] +ipv4.dns [DNS2]
Remember to replace in the commands the given values.
Slave the new bridge to the real connection.
sudo nmcli connection delete [BR_INT]
sudo nmcli connection add type bridge-slave autoconnect yes con-name [BR_INT] ifname [BR_INT] master [BR_NAME]
Now bring the connection up, so you can use it.
sudo nmcli connection up br0Sample output
Connection successfully activated (master waiting for slaves) (D-Bus active path: /org/freedesktop/NetworkManager/ActiveConnection/4)Finally for the machine to use it, you have to edit the configuration file
sudo vim /etc/qemu-kvm/bridge.confAnd add the following line
allow all
Save the changes and close the editor. Also make sure there are no permission problems reading from the disk-
sudo chown -R $USER:libvirt /var/lib/libvirt/Restart KVM to apply the changes you made
sudo systemctl restart libvirtdCreating a virtual machine with KVM on Rocky Linux 9 / Alma Linux 9
In this step, we need to create a virtual machine with KVM. To achieve this, you can use the terminal or a graphical application to help you with the process.
If you are a desktop user, it would be normal to use a graphical interface to help improve the time and settings.
GNOME has a tool called Boxes that is effortless to use and accomplishes its purpose without further ado. You can install it either using Flatpak or from the standard repositories.
sudo dnf install gnome-boxes
Another tool is virt-manager which provides more options when creating virtual machines with KVM.
sudo dnf install virt-manager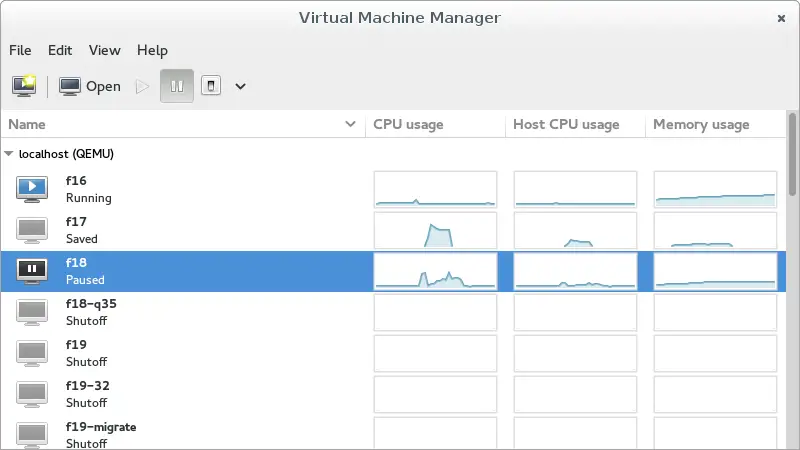
With these tools you will be able to quickly create, administer and manage the different virtual machines that you can create.
Using the terminal is a bit more complex, but if you get the hang of it, it can be quite beneficial, especially on servers.
An example of how to create a virtual machine using the command line is:
virt-install \
--name Ubuntu \
--ram 2048 \
--vcpus 1
--disk path=/var/lib/libvirt/images/ubuntu-22.04.img,size=15 \
--os-variant ubuntu22.04 \
--network bridge=br0,model=virtio \
--graphics vnc,listen=0.0.0.0.0 \
--console pty,target_type=serial \
--cdrom /home/user/Downloads/ubuntu-22.04.1-desktop-amd64.iso
This will automatically bring up the virtual machine. The options are also descriptive, such as the name of the machine, the amount of RAM and processors allocated, the path where the disk will be created and its size; as well as the location of the ISO image.
If you have a graphical interface installed then a window with the virtual machine will be displayed. Otherwise, you will have to access it via SSH.
Conclusion
KVM is a wonderful technology that Linux users can quickly use to create virtual machines integrated with the system and with full support.
I hope you liked this post and can share it with the rest of your friends.