GNOME is one of the most important desktop environments that exist today. One of its main advantages is that it has many series tools to cover the most significant number of needs. Today, we will take a look at Seahorse (GNOME Keyring) to explain its functions.
According to GNOME:
Seahorse is a GNOME application for managing encryption keys and passwords in the GNOME Keyring.
Seahorse centralizes the following functions in a single graphical user interface:
- Password management
- Certificate store
- GnuPG keystore
- OpenSSH key store
Therefore, although this is not its main function, Seahorse can also be used as a simple and functional password manager, which will not compete with more sophisticated solutions, but will still meet your needs.
However, these are not the only features it offers, since you can also:
- Add an image in any GDK supported format as an OpenGPG photo ID.
- Create SSH keys, configure them, cache them.
- Synchronize your keys and your keyring with key servers.
Being a tool of the GNOME project, it is open source and packaged for the vast majority of existing Linux distributions. So, the installation is easy to do.
Installing Seahorse (GNOME Keyring) on Linux
Method 1: Install Seahorse using the package manager
Seahorse is present in the official repositories of many Linux distirbutions as it is part of GNOME. So, this method is one of the safest we can find out there.
Debian-based distributions such as Ubuntu and derivatives
In this case, just open a terminal and run
sudo apt install seahorseFedora
Fedora also includes Seahorse in its repositories, so it will be enough to run
sudo dnf install seahorseFor openSUSE
In the case of openSUSE, you can run this command
sudo zypper in seahorseFor Arch Linux and Manjaro based distributions
For Arch Linux, it all boils down to
sudo pacman -S seahorseAs you can see, it is present in the official repositories of many distributions.
Method 2: Using Flatpak to get the latest version
Getting Seahorse from the official repositories is probably the easiest and most efficient method. However, you will not always get the latest stable version of Seahorse and you will miss out on many of its new features.
To solve this dilemma, you can use Flatpak. Flatpak is an innovative packaging system that allows the developer to incorporate all the dependencies of your software in a single package, making it more accessible to get the latest stable versions.
Install Flatpak on Linux
Flatpak also comes standard on some distributions such as Linux Mint, Manjaro, Elementary OS, Pop!_OS, and Fedora Workstation.
In the case of Debian, you can install it by running in the terminal:
sudo apt install flatpakBut in the case of Ubuntu and derivatives, it is convenient to add a PPA to always have the base package updated and install it from there.
sudo add-apt-repository ppa:flatpak/stable
sudo apt update
sudo apt install flatpak
Installing Flatpak on Arch Linux or Manjaro is possible by running
sudo pacman -S flatpakOn openSUSE, it would be enough with
sudo zypper in flatpakOr on Rocky Linux 9 / Alma Linux 9
sudo dnf install flatpakAdding the Flathub repository to install Seahorse
The next step is to add the Flathub repository to the system, since that is where the Seahorse project is hosted.
flatpak remote-add --if-not-exists flathub https://flathub.org/repo/flathub.flatpakrepoNow all that remains is to run
flatpak install flathub org.gnome.seahorse.ApplicationThen run it from the main menu or with the command
flatpak run org.gnome.seahorse.ApplicationUsing Seahorse on Linux
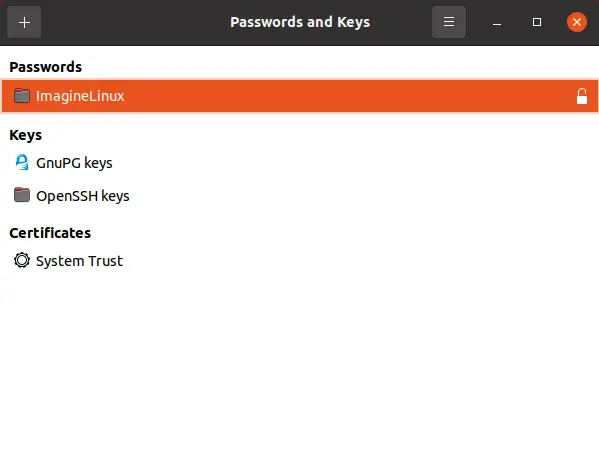
As soon as you open the tool, you will have this interface
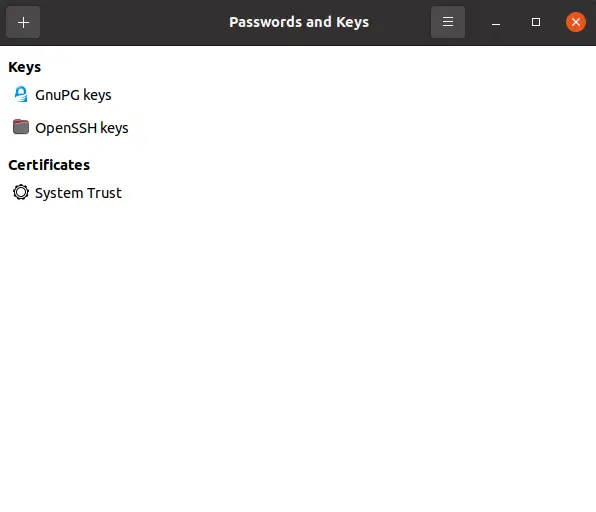
You will probably be surprised not to see a section dedicated to passwords. This is because there is no repository as such.
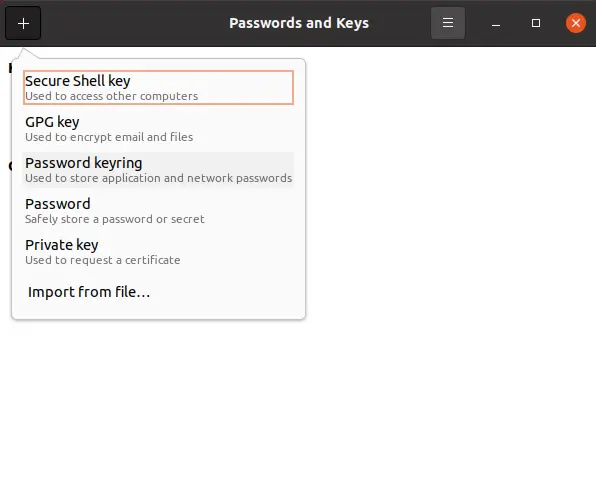
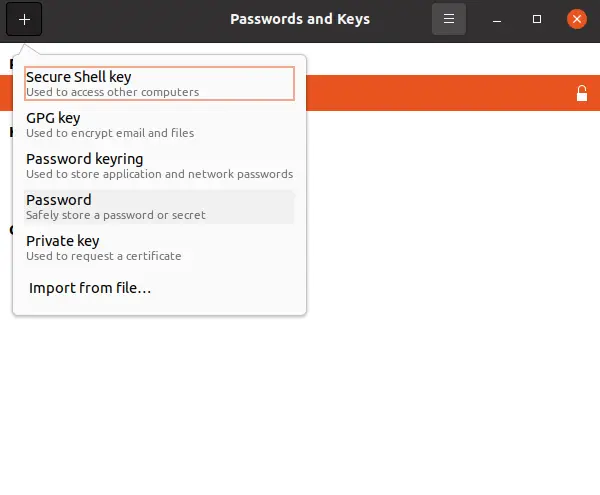
So, the first step is to create it from the + button by selecting the Password Keyring option.
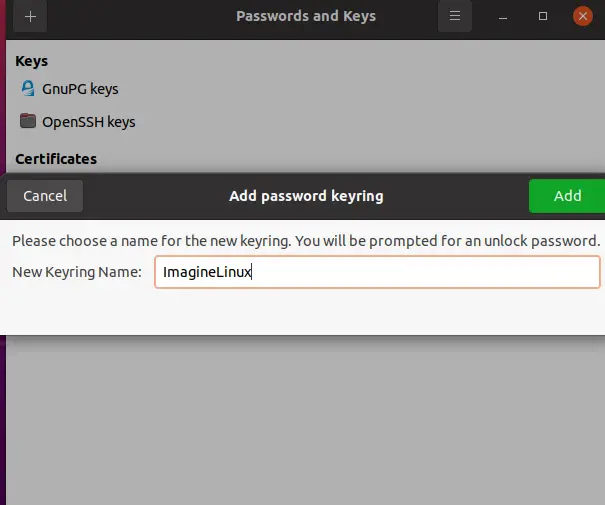
You will be asked to enter the name of this new deposit,
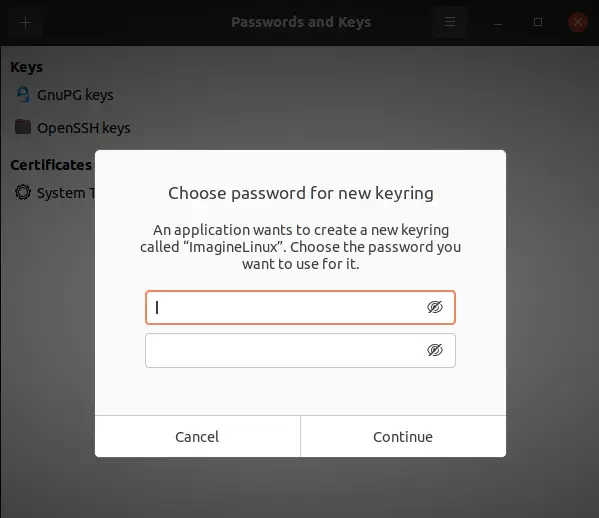
And then the password that will protect it.
Now you will see the password section.
As it is empty, it is normal to start adding passwords you use.
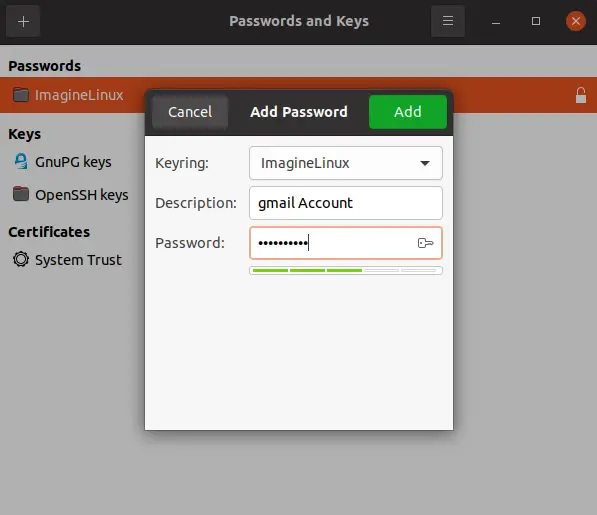
Again, click on the + button, but this time choose the Password option.
In the window that will appear, select the Keyring to use (yes, you can create several), a description and the password. Then, press Add.
Now you will see it added to the system.
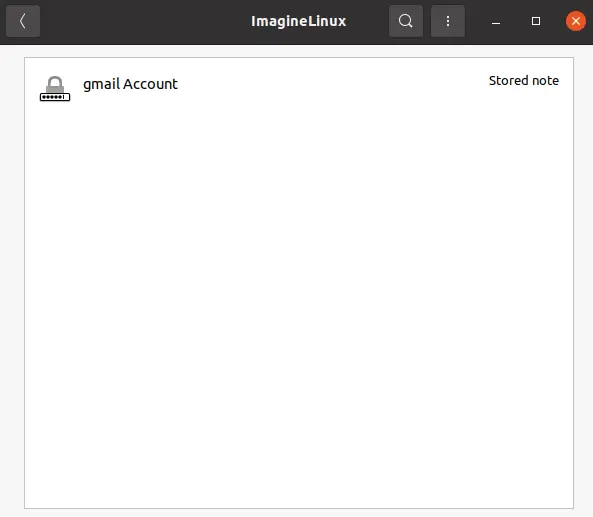
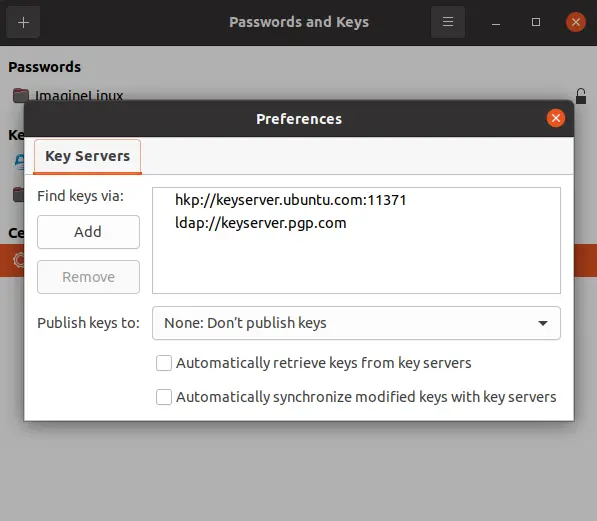
And so on… with the rest of the passwords. Finally, take a look at the tool preferences.
Uninstall Seahorse from the system
If you no longer want to use it, the normal thing to do is to remove it from the system to save some disk space.
If you installed it using your distribution’s package manager, then this same package manager will be used for uninstallation.
For Debian, Ubuntu and derivatives
sudo apt remove seahorseFedora users can run
sudo dnf remove seahorseFor openSUSE run
sudo zypper rm seahorseFinally, for Arch Linux and derelicts like Manjaro or Parabola
sudo pacman -R seahorseBut if you used Flatpak to install Seahorse, then everything is simpler, since you only have to run
flatpak uninstall org.gnome.seahorse.ApplicationThen there will be no more traces of Seahorse.
Conclusion
Seahorse is an important GNOME member in managing not only passwords, but also the system keyring. In this post, I helped you to install it, but also to take the first steps with it.