Odoo is a Business Management Software with Belgian origin focused on offering an intuitive, full-featured, fully integrated, and easily upgradeable solution. That is why it is very popular among sysadmins who see it as the ideal solution to solve problems in their companies. Today you will learn how to install Odoo 14 on CentOS 8 with this step-by-step post.
Install Odoo 14 on CentOS 8
The installation of Odoo is not very complex but it does require some steps that we have to take care of. So each of them we have to do it carefully
Install some necessary packages
Before starting the installation process, we have to install some necessary packages like git or the text editor nano that will help us with file editing. Also, we have to install some Python compiler tools.
To do this, connect to your server and update it.
sudo dnf update
So, install the necessary packages by running the following command:
sudo dnf install python3 python3-devel nano git gcc redhat-rpm-config libxslt-devel bzip2-devel openldap-devel libjpeg-devel freetype-devel
Once the process is finished, we can proceed to the next step.
Install PostgreSQL on CentOS 8
Odoo works with PostgreSQL which for many is the best OpenSource database manager. To install it on CentOS 8 we only have to execute the following command:
sudo dnf install @postgresql:12
After that, we have to start the default database.
sudo postgresql-setup initdb
And then, start and enable the service. This way, it will start together with the system. This way, when you restart the server, PostgreSQL will start automatically.
Then, you should create a new user for Odoo in PostgreSQL. This is to avoid using the root user.
sudo su - postgres -c "createuser -s odoouser"
Replace odoouser with the user name you prefer.
Now PostgreSQL will be ready for Odoo installation.
Install wkhtmltopdf
wkhtmltopdf is a tool that allows us to transform HTML sites into PDF but it is used by Odoo for the generation of various reports. So it is convenient to install.
The whole process is summarized by executing the following command:
sudo dnf install https://github.com/wkhtmltopdf/wkhtmltopdf/releases/download/0.12.5/wkhtmltox-0.12.5-1.centos8.x86_64.rpm
In this way, the wkhtmltopdf package is downloaded and installed.
Creating a new system user
It is recommended not to work with a regular system user. So we will have to create a new one and set /opt/odoouser as its home directory. Of course, you can define another location.
sudo useradd -m -U -r -d /opt/odoouser -s /bin/bash odoouser
Remember also that you can change the name odoouser to whatever you prefer.
You can assign a password if you consider necessary
sudo passwd odoouser
Now that the user is created, use the su command to change the session to this created user.
sudo su - odoouser
Install Odoo on CentOS 8
Now it is time to install Odoo. To do this, download it using git in the home directory of the created user.
git clone https://www.github.com/odoo/odoo --depth 1 --branch 14.0 /opt/odoouser/odoo
Access the created folder and create a Python virtual environment
cd /opt/odoouser
python3 -m venv venv
Activate the virtual environment by running:
source venv/bin/activate
And install Odoo:
pip3 install -r odoo/requirements.txt
At the end of the process, deactivate the virtual environment.
deactivate
Now create a folder where the custom addons will be located.
mkdir /opt/odoouser/odoo-custom-addons
Now log back to your regular user.
exit
Configuring Odoo on CentOS 8
With Odoo installed, now it remains to make the configurations so that we can use it. In short, the first configuration we have to do is the connection to the database.
So, in the odoo14.conf file
sudo nano /etc/odoo14.conf
Add the following content:
[options]
admin_passwd = superadmin_passwd
db_host = False
db_port = False
db_user = odoouser
db_password = False
addons_path = /opt/odoo14/odoo/addons, /opt/odoo14/odoo-custom-addons
There we set the admin password in PostgreSQL and the user. The parameters with values false indicate that we will add them through the web interface. And in the addons_path field add the path to the custom add-ons we created earlier.
Save the changes and close the file.
The next step is to create a service to correctly manage Odoo. So the processes of starting, restarting, or stopping will be like any other service in the system.
To do this, create the file odoo14.service in the systemd services directory.
sudo nano /etc/systemd/system/odoo14.service
And add the following content
[Unit]
Description=Odoo14
Requires=postgresql.service
After=network.target postgresql.service

[Service]
Type=simple
SyslogIdentifier=odoo14
PermissionsStartOnly=true
User=odoouser
Group=odoouser
ExecStart=/opt/odoouser/venv/bin/python3 /opt/odoouser/odoo/odoo-bin -c /etc/odoo14.conf
StandardOutput=journal+console

[Install]
WantedBy=multi-user.target
Pay close attention to the user, group, and ExecStart values where you have to indicate the user name created.
Again, save the changes and close the editor.
Then, refresh the list of services
sudo systemctl daemon-reload
Now start and enable Odoo so that together with the system it starts up.
sudo systemctl enable --now odoo14
And you can check the status of the service by running:
sudo systemctl status odoo14
Optional: Configure Nginx as Reverse Proxy and secure it with SSL
At this point of the tutorial, you can now access from a web browser to http://your-server:8069 and access the installation screen. Of course, this port and port 8072 have to be open in the firewall, but it is convenient to create a Reverse Proxy for easy access and to enable HTTPS. For this, you need to have a domain available.
So, install Nginx
sudo dnf install nginx
To generate SSL certificates we have to install Certbot. To do this enable the Epel repository.
sudo dnf install epel-release
Now install the snapd package.
sudo dnf install snapd
Start the service and make it run at startup:
sudo systemctl enable --now snapd.socket
Make a symbolic link of the snapd libraries to the system.
sudo ln -s /var/lib/snapd/snapd/snapd/snap /snap
Use snap to install core and then certbot.
sudo snap install core
sudo snap install --classic certbot
Create a symbolic link of the Certbot binary to the system so we can use it without problems:
sudo ln -s /snap/bin/certbot /usr/bin/certbot
Now yes, get the certificate:
sudo certbot --redirect --hsts --staple-ocsp --agree-tos --email youremail --nginx -d yourdomain
Replace youremail and yourdomain with your correct data. When finished, you should have the certificates.
The next step is to create an nginx configuration file for odoo.
sudo nano /etc/nginx/conf.d/domain.com
Replace domain.com with your domain and add the following content
upstream odoo {
 server 127.0.0.1:8069;
}

upstream odoochat {
 server 127.0.0.1:8072;
}

server {
    listen 80;
    server_name www.domain.com domain.com;

    include snippets/letsencrypt.conf;
    return 301 https://domain.com$request_uri;
}

server {
    listen 443 ssl http2;
    server_name www.domain.com;

    ssl_certificate /etc/letsencrypt/live/domain.com/fullchain.pem;
    ssl_certificate_key /etc/letsencrypt/live/domain.com/privkey.pem;
    ssl_trusted_certificate /etc/letsencrypt/live/domain.com/chain.pem;
    include snippets/ssl.conf;

    return 301 https://domain.com$request_uri;
}

server {
    listen 443 ssl http2;
    server_name domain.com;

    proxy_read_timeout 720s;
    proxy_connect_timeout 720s;
    proxy_send_timeout 720s;

    proxy_set_header X-Forwarded-Host $host;
    proxy_set_header X-Forwarded-For $proxy_add_x_forwarded_for;
    proxy_set_header X-Forwarded-Proto $scheme;
    proxy_set_header X-Real-IP $remote_addr;

    ssl_certificate /etc/letsencrypt/live/domain.com/fullchain.pem;
    ssl_certificate_key /etc/letsencrypt/live/domain.com/privkey.pem;
    ssl_trusted_certificate /etc/letsencrypt/live/domain.com/chain.pem;
    include snippets/ssl.conf;
    include snippets/letsencrypt.conf;

    access_log /var/log/nginx/odoo.access.log;
    error_log /var/log/nginx/odoo.error.log;

    location /longpolling {
        proxy_pass http://odoochat;
    }

    location / {
       proxy_redirect off;
       proxy_pass http://odoo;
    }

    location ~* /web/static/ {
        proxy_cache_valid 200 90m;
        proxy_buffering on;
        expires 864000;
        proxy_pass http://odoo;
    }

    gzip_types text/css text/less text/plain text/xml application/xml application/json application/javascript;
    gzip on;
}
Do not forget to replace domain.com with your domain name.
Save the changes and close the editor.
Finally, start and enable nginx.
sudo systemctl enable --now nginx.socket
For this to work, you need to add a detail in the odoo configuration. Open the configuration file:
sudo nano /etc/odoo14.conf
And add the following line:
proxy_mode = True
Exit the editor saving the changes and apply them by restarting the Odoo service.
sudo systemctl restart odoo14
Installing Odoo using the web interface
Now you can open your web browser and go to https://your-domain and configure Odoo. In this screen, you have to add the respective configuration information such as the database name, language, email, and two passwords, the master and the PostgreSQL password.
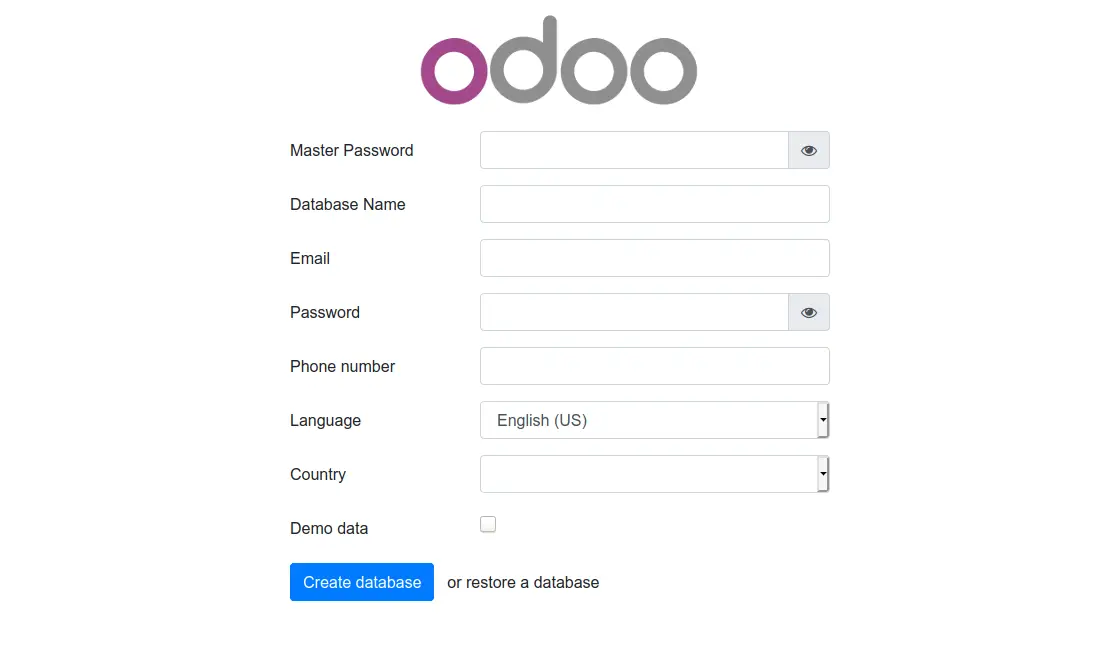
With this Oddo will be up and running.
Conclusion
Odoo is one of the most important CRMs out there and learning how to install it on a CentOS 8 server is not as difficult a task as you might think. However, it does take a little time to get it up and running on your system.