There are many different Linux distributions and oriented to many things. In the server field, Red Hat Enterprise Linux and CentOS are some of the most popular. But the detail with RHEL is that it is paid but CentOS is not. There are differences between them? few really because CentOS is a binary level clone of RHEL. So it’s like having an enterprise system but for free.
So it’s good to know how to install it if you plan to have a home server. And this post will help you how to install CentOS on a computer.
1. Chose installation options
The CentOS 8 ISO image is available from the project website. Once you download it, create a USB drive and connect it to your computer to start the process.
When you plug it in, you will see the following screen:

You can either check the integrity of the installation disk or directly start the process. In this case, choose the first option.
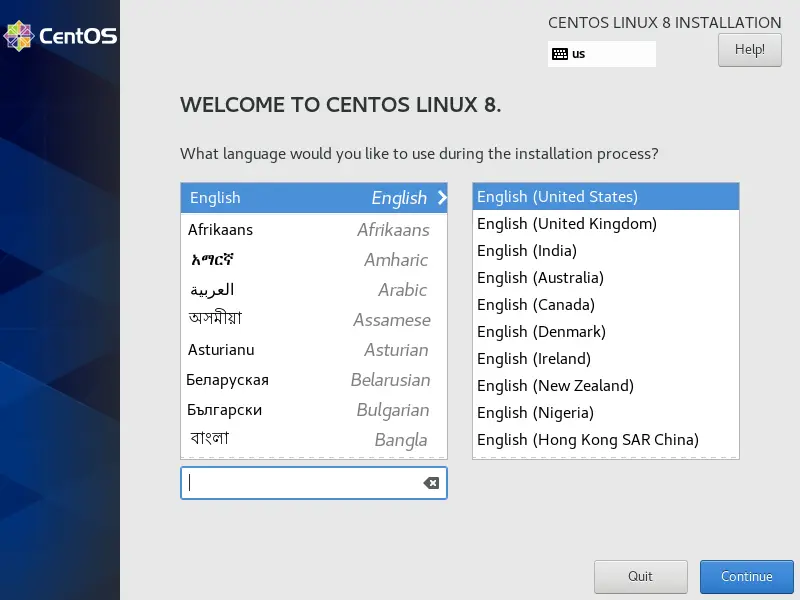
2. Select Language
Then, you will see the welcome screen where you have to select the language of the installation and the system. CentOS is translated into many languages so you will have no problem finding yours. Select it and click Continue.
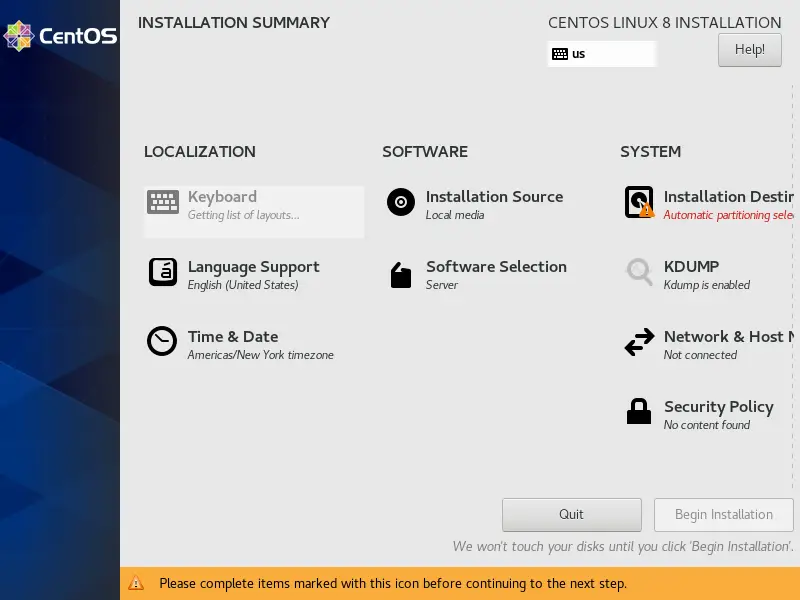
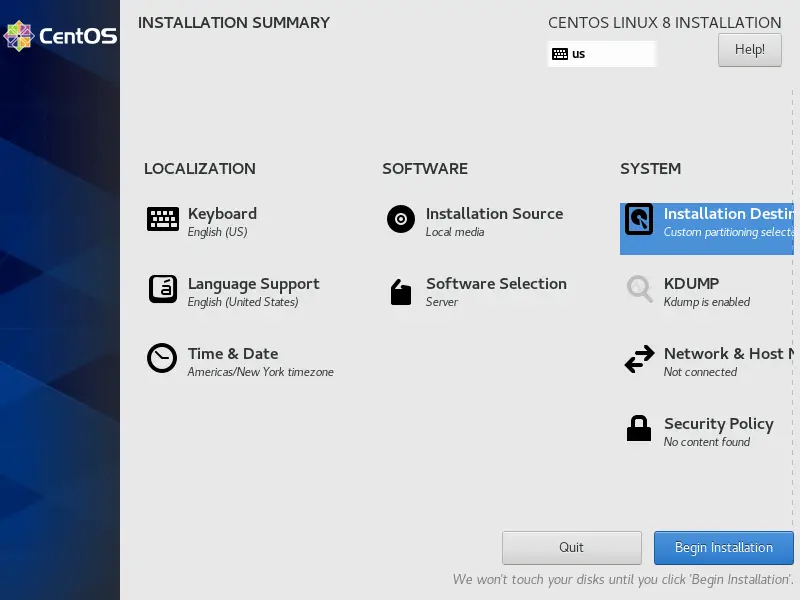
3. Installation Summary
Then, you will see a screen with many options. You should review the most important ones.
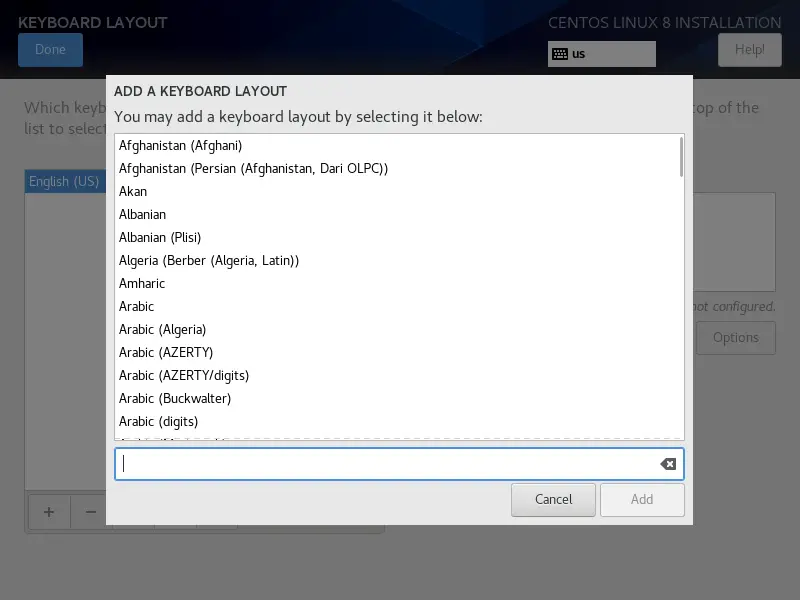
4. Choose Keyboard Layout
First, choose the Keyboard layout that as with the language there are many available.
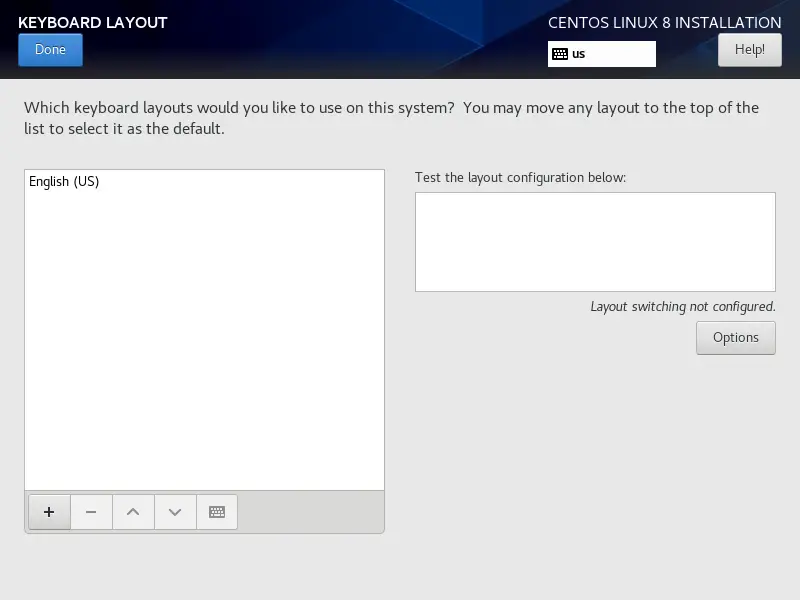
By default, it is English, but to change it click on the + button and choose yours. Then, remove the English.
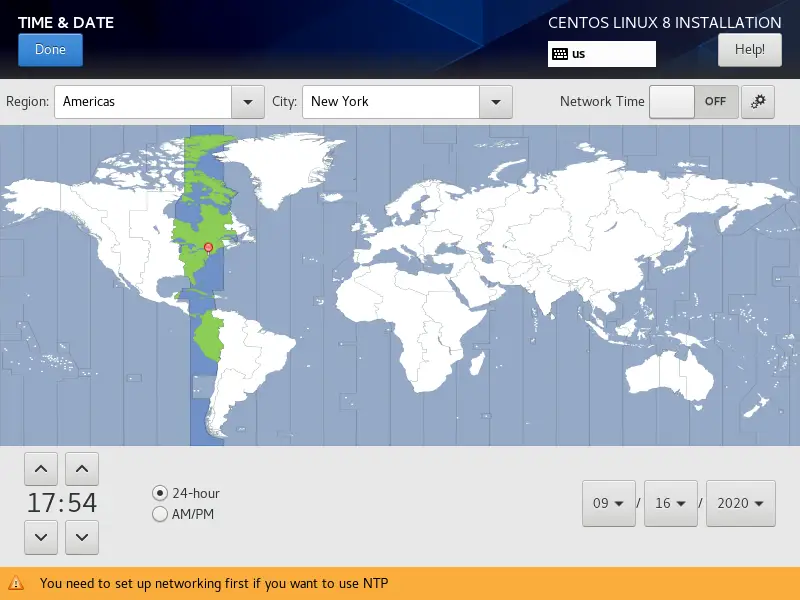
5. Select TimeZone
The next thing we have to do is define a time zone and the system time and date.
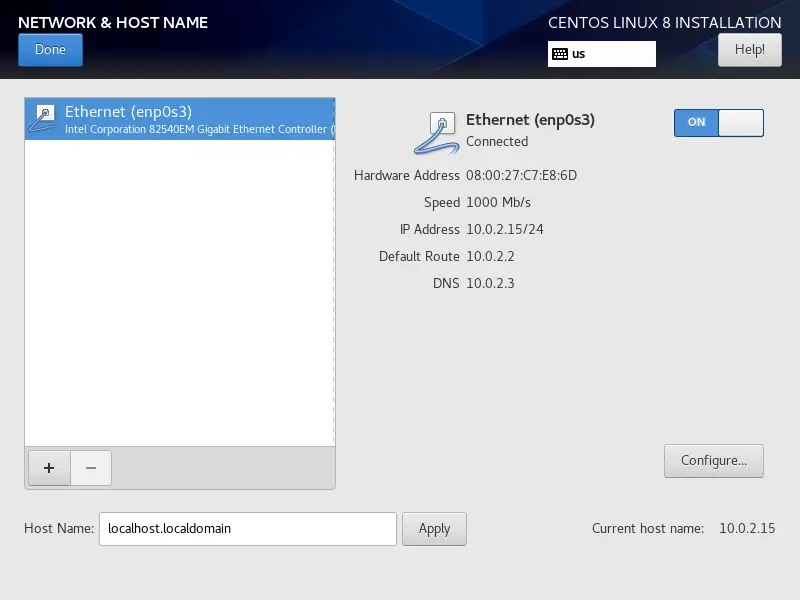
6. Network and Host Name
Now you have to activate the network, to do so, click on the Network section.
7. Installation Source
Choose the Installation Source and since I’m using a minimal image, the following screen will appear.
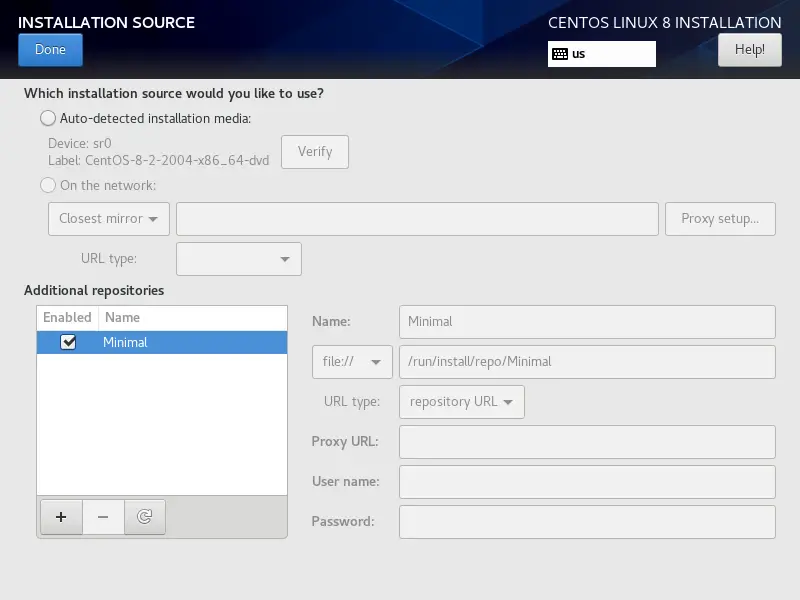
But to have a fully functional system for a normal user, we must also use a mirror.
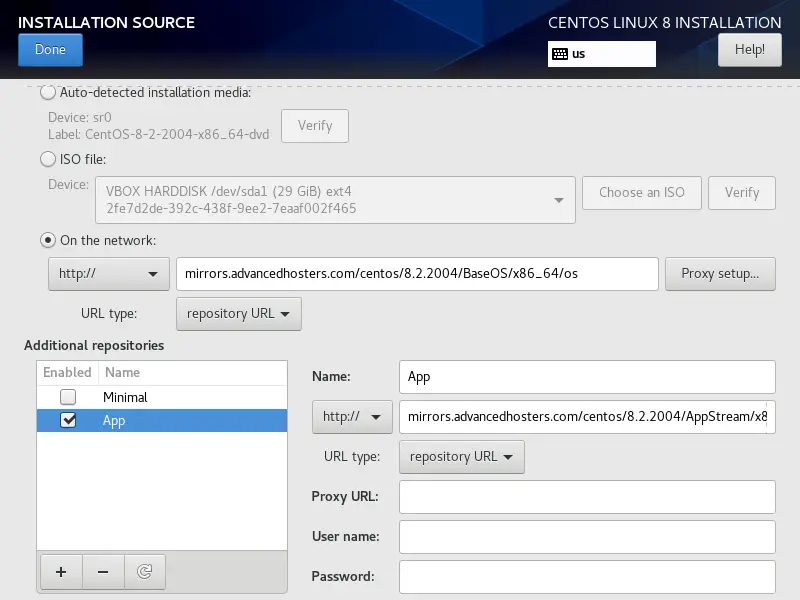
So, choose the On the Network option and add a mirror. In my case, the “advanced hosters” mirror works well. To add it, choose http and Repository URL and the URL is:
http://mirrors.advancedhosters.com/centos/8.2.2004/BaseOS/x86_64/os
Also, it is convenient to add another repository for the rest of the applications. In the Additional Repositories section click on the + button and assign a name to it, and add this address:
http://mirrors.advancedhosters.com/centos/8.2.2004/AppStream/x86_64/os
To guide you better see the image:
There are many mirrors available. One alternative is to choose the option of the nearest one. On this site, you will find the list of CentOS mirrors.
Then click on Done.
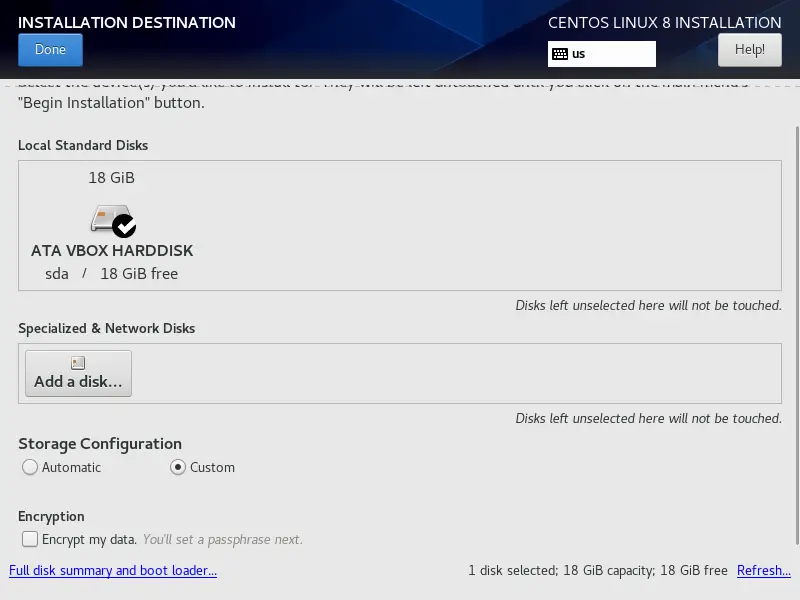
8. Installation Destination
Now comes the important part, which is to define the partitioning scheme. In this case, I am using an empty disk.
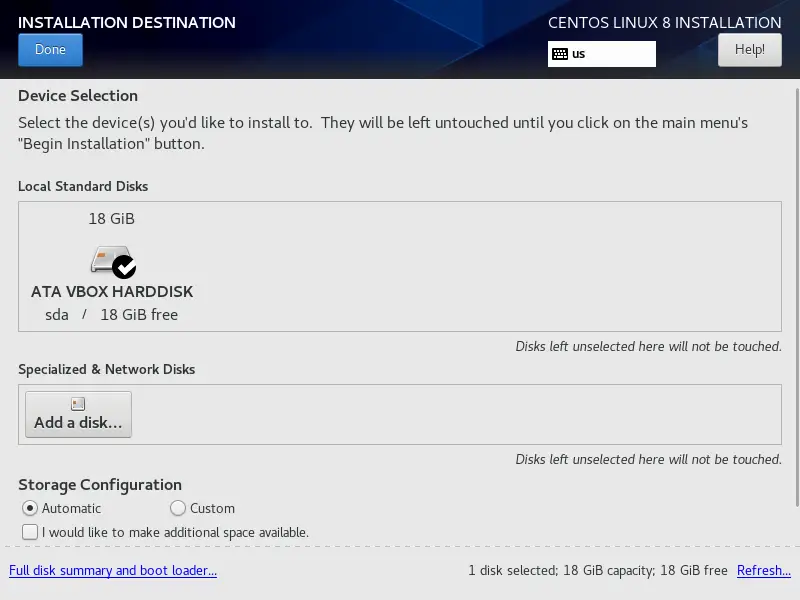
In this screen, the disks that the system has, are shown. In this case, it’s only one 18Gib. Below is the Storage Configuration section where you can choose the installer to do the whole process or you can do it manually. To do this, choose the Custom option and click on Done.
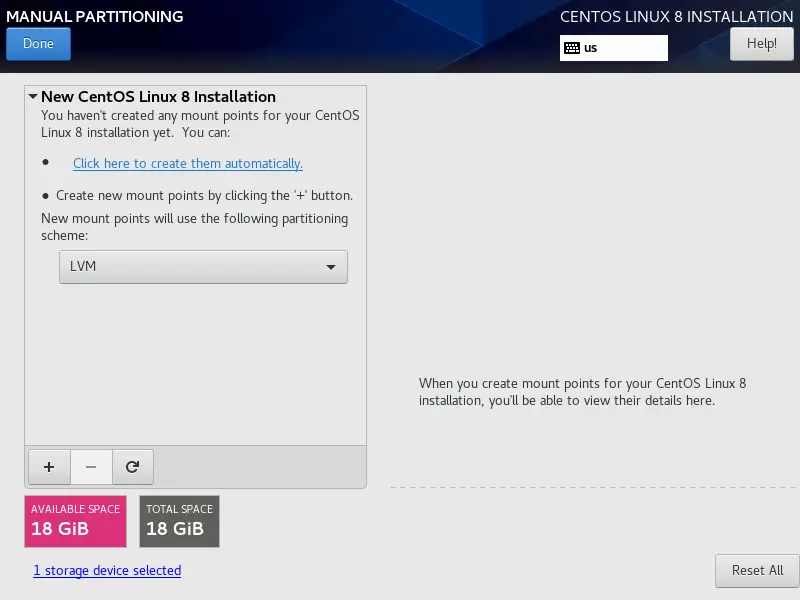
9. Create Partition
Now you will see the options to create a new partition. You even have another chance to create them automatically. Also, you can choose the partitioning scheme. In my case, I will choose Standard Partition and to create the new partition click on the + button
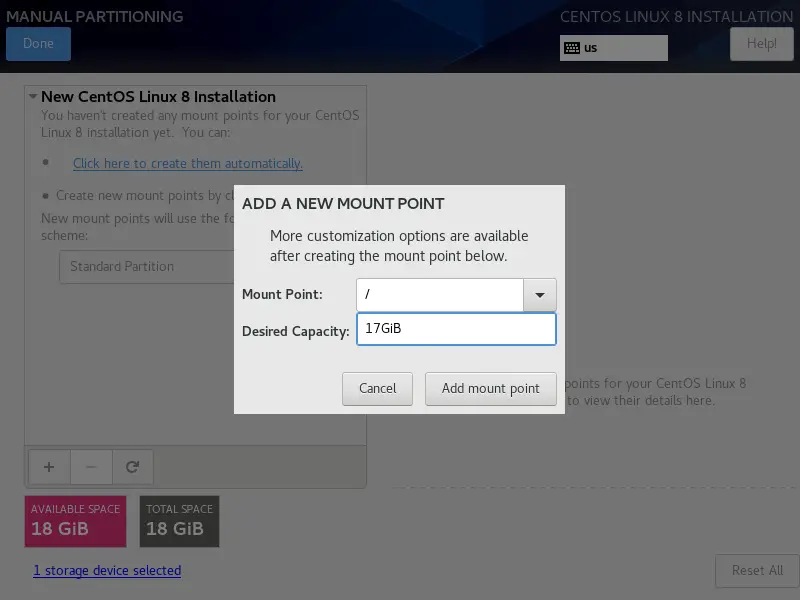
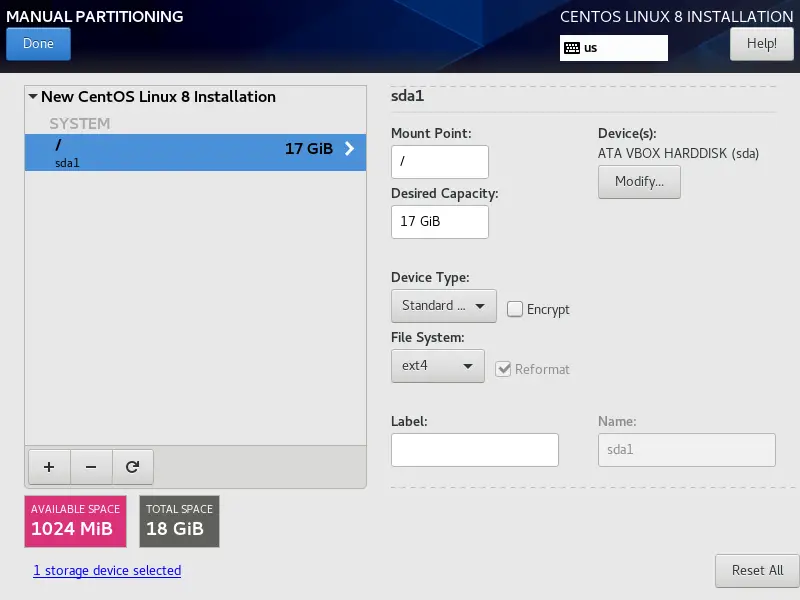
You will see a fairly simple screen where you will have to define the mounting point and size. In my case, I will make the mount point / and size 17 GiB. Click on Add Mount point.
Now on the same screen, you will see more options to modify the partition.

Among them the choice of the file system. In CentOS 8 is xfs, you can leave it or change it by one more known like ext4.
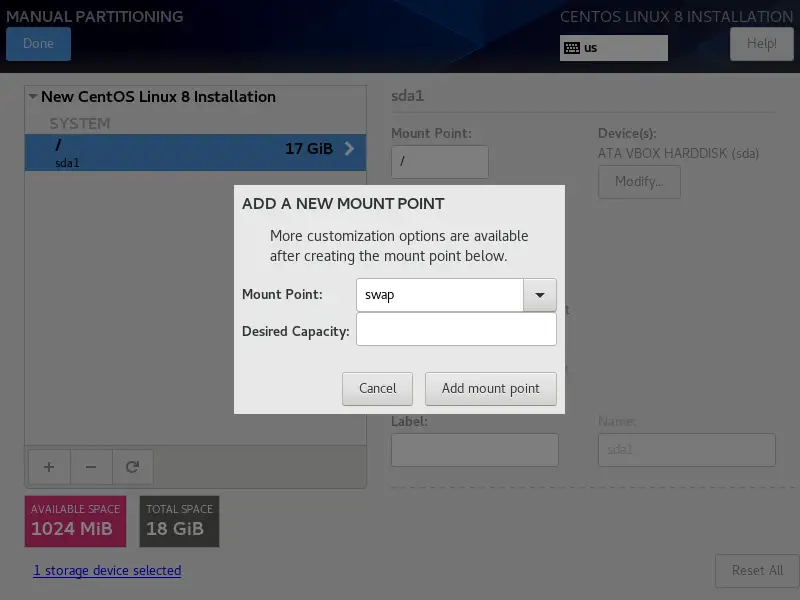
Now create another partition for Swap by clicking the + button and choose as Mount Point swap and set the remaining size. When you are ready, click Add mount Point.
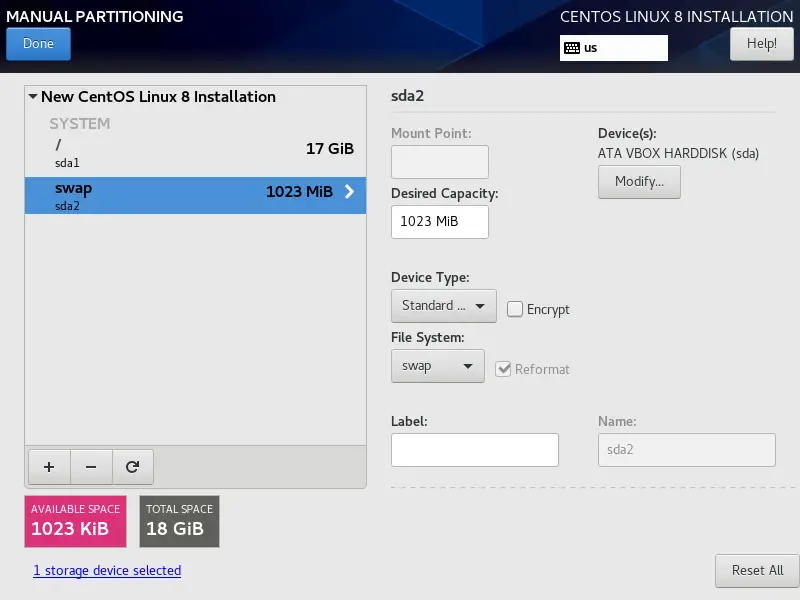
The partitioning scheme will look like this
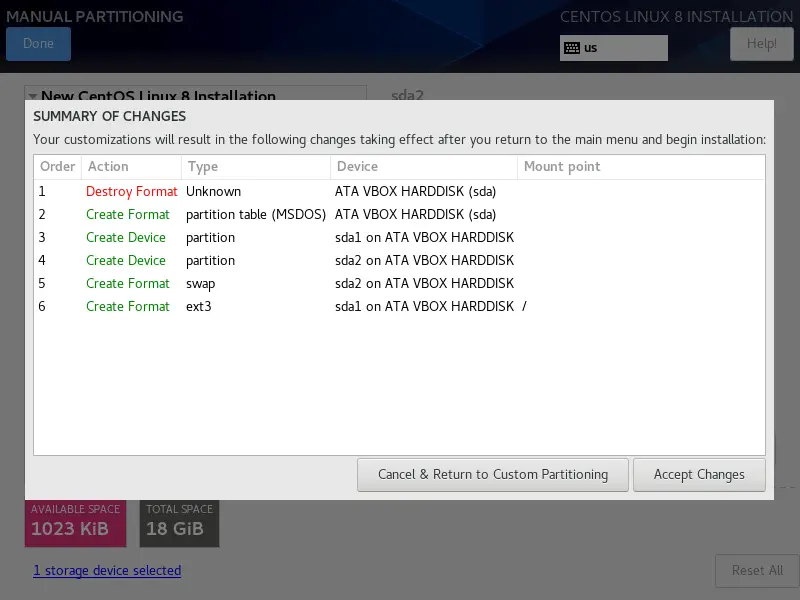
If you are satisfied, click Done which will show all the changes the installer will make to the disk.
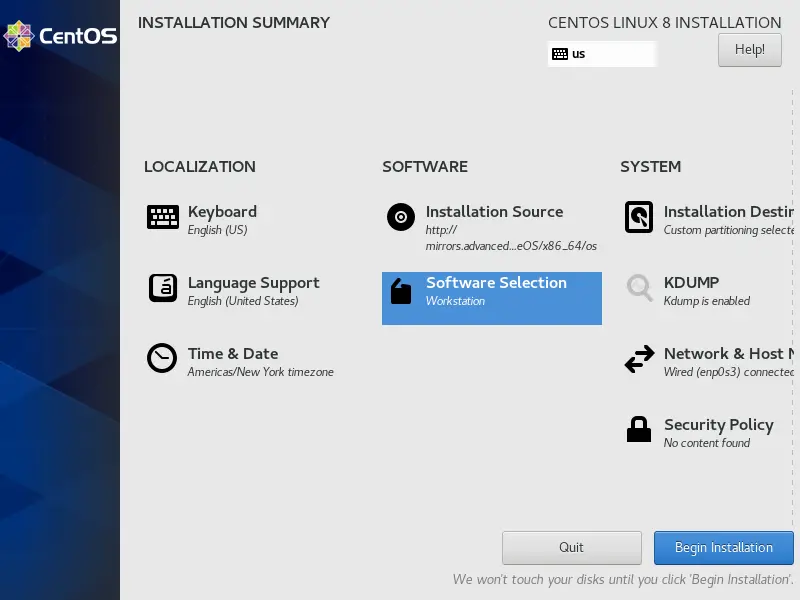
10. Final Installation Summary
Then you’ll see the Installation Summary screen ready to begin the installation.
Before you begin, you should review the Software Selection section.
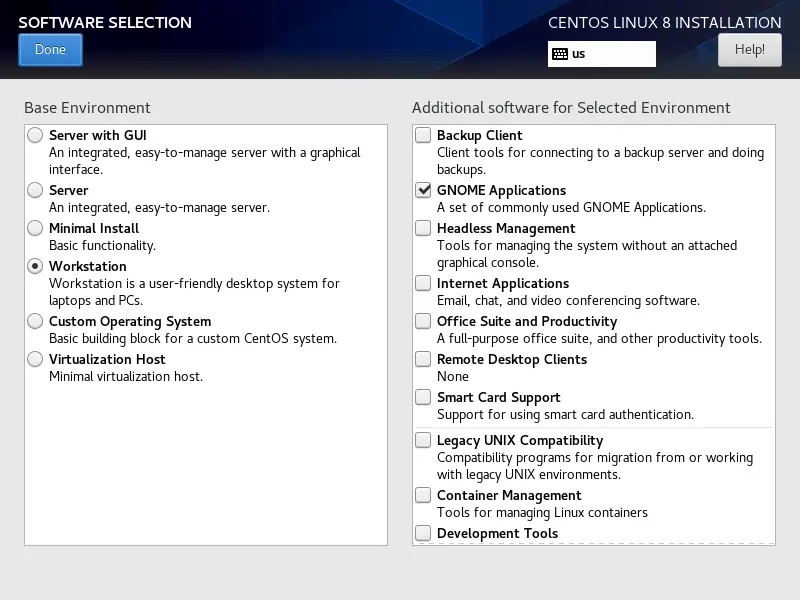
11. Software Selection
Now comes the Software selection. Choose Workstation to have a system with a functional GNOME graphical interface. Additionally, you can add other packages you want by checking the options on the right side.
Then, you will see the installation screen again.
Now click on Begin Installation and the process will start.
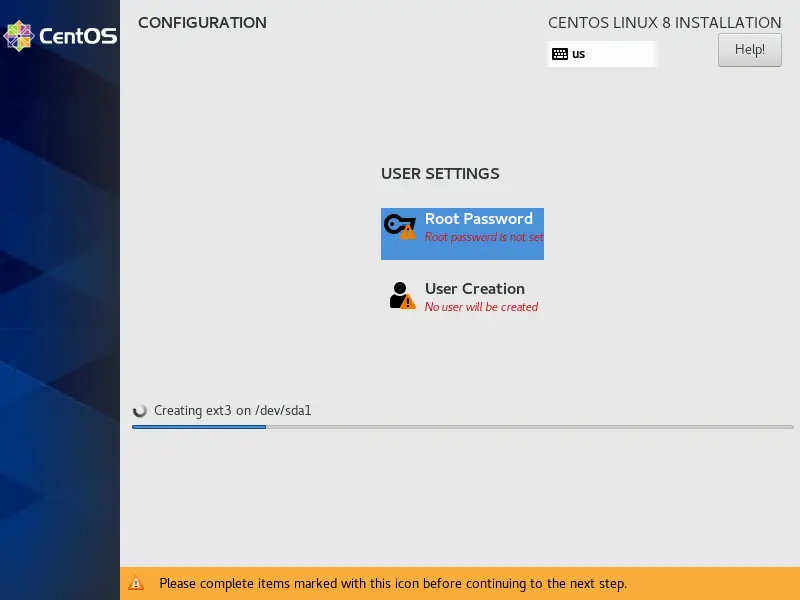
12. Create Root Password
The system is already installed, but you have to create the root password.
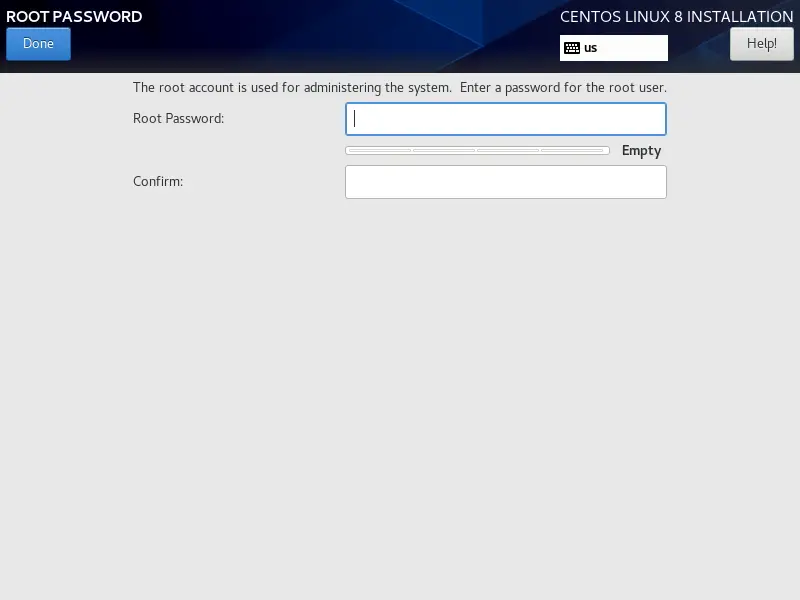
Create it and click on Done.
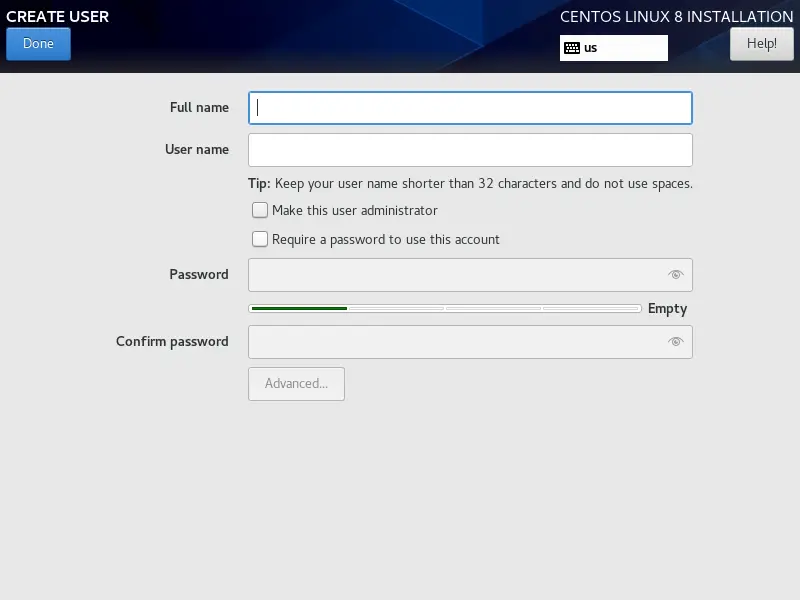
13. Create User
Then, create a new user. Fill in the fields and set a password and click on Done.
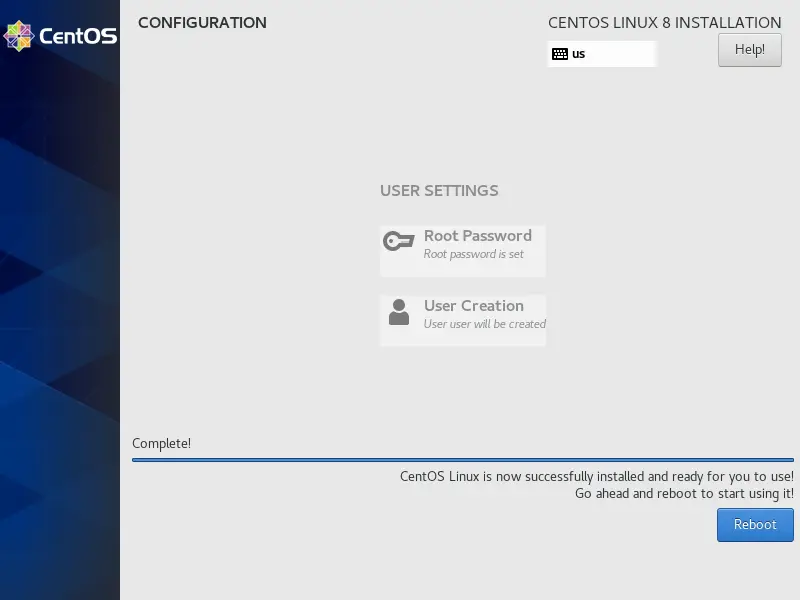
The process will now continue smoothly to the end.

When it’s done, you’ll see a screen like this informing you that you can reboot the system to enjoy it.
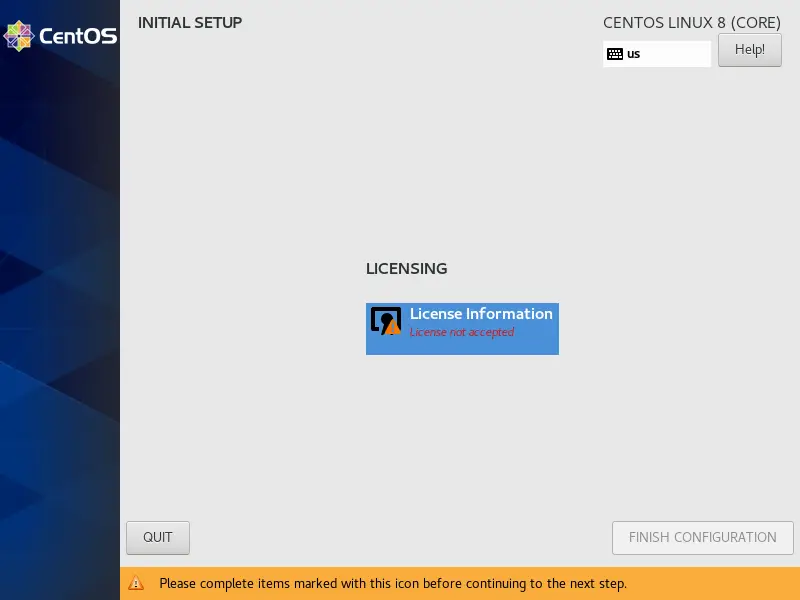
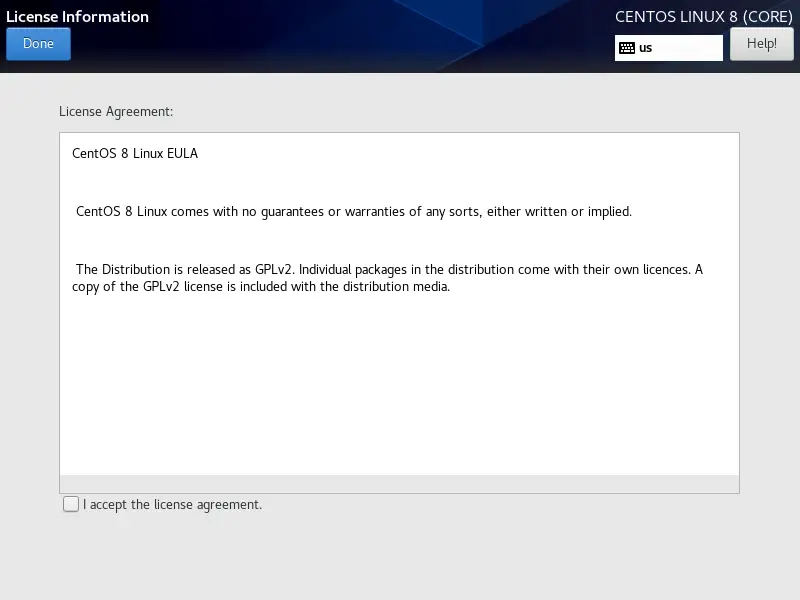
14. License Information
When you restart the computer, you will be shown on this screen where you will be informed that you have not accepted the license terms. Click on License Information.
Now you will see the CentOS license terms. Accept them to continue.
15. Login
Then, it will load the login screen.
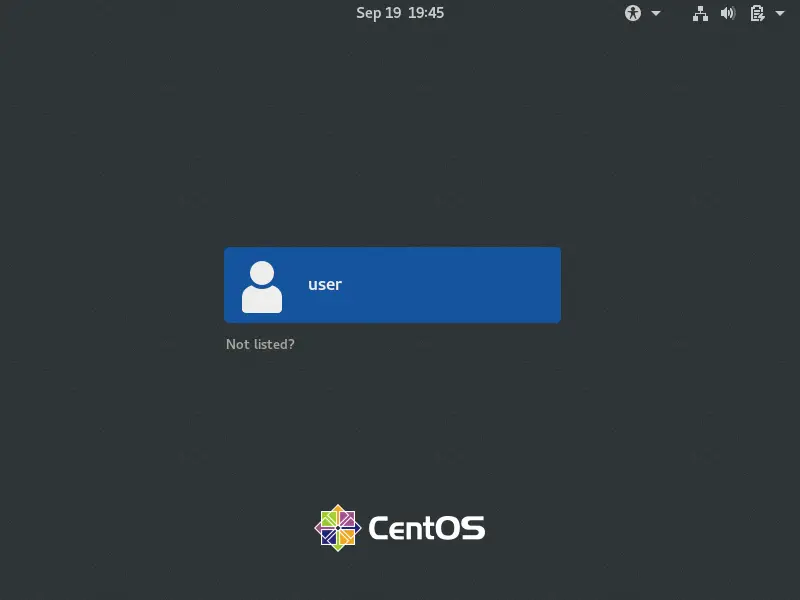
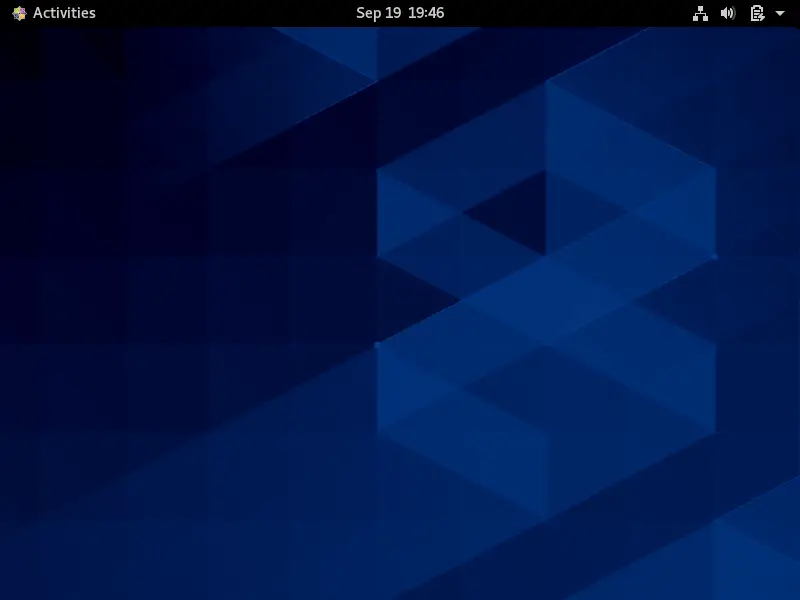
Once you enter your credentials created in the installation, you will see the CentOS desktop.
Now you have seen the process and you can try it on your computer or virtual machine.
Conclusion
CentOS is a very important Linux distribution in the field of servers. Therefore, it is possible to believe that it is complicated to install, but the truth is that it is quite easy. Despite this, it is convenient to first see the process before applying it and that is what we have presented in this post.
Leave us a comment, have you used CentOS? What do you think? Please share this post.