One of the most popular frameworks in web development is AngularJS. This is one of the best and it has earned it. This framework has a CLI tool that complements each other perfectly and allows you to create projects quickly. So, in this post, you will learn how to install AngularCLI on Ubuntu 20.04 quickly and accurately.
Introducing to AngularCLI
Angular CLI is one of the essential tools for developing with Angular. Thanks to it, you will be able to create projects in a very fast way and keeping all the necessary protocols.
According to the official Angular documentation
The Angular CLI is a command-line interface tool that you use to initialize, develop, scaffold, and maintain Angular applications directly from a command shell.
So as you can see, if you use Angular in your projects, then you need this tool created with NodeJS.
So, let’s get started with the task
Install AngularCLI on Ubuntu 20.04
Since this is a tool created with NodeJS, it is necessary to install it first.
However, before you start, make sure your system is fully up to date.
sudo apt update
sudo apt upgrade
Once it’s up to date, it’s then a good idea to install a recent version of NodeJS. In this case, I have chosen version 14.x.
So, add the repository for this version.
curl -sL https://deb.nodesource.com/setup_14.x | sudo -E bash -
This way, the repository is added and loaded to the system automatically thanks to the script.
Now you can install NodeJS using this command:
sudo apt install nodejs
That’s how fast you can install it.
Along with NodeJS you install npm which is the package manager for NodeJS. This npm is necessary for the installation of AngularCLI and we should update it to the latest stable version.
sudo npm install npm@latest -g
Now with NodeJS and npm installed, we will be able to install AngularCLI
sudo npm install -g @angular/cli
Sample Output:
added 235 packages, and audited 236 packages in 14s

23 packages are looking for funding
  run `npm fund` for details

found 0 vulnerabilities
So, AngularCLI is installed.
Testing AngularCLI on Ubuntu 20.04
Now we need to test it to see if the process has been successful. The best way to do this is to create a new project.
To do this, just run the following command:
ng new [project_name]
In this case, I will create a project called example but you have to change it to yours.
ng new example
Now, go to the project folder and you can try it out.
cd example
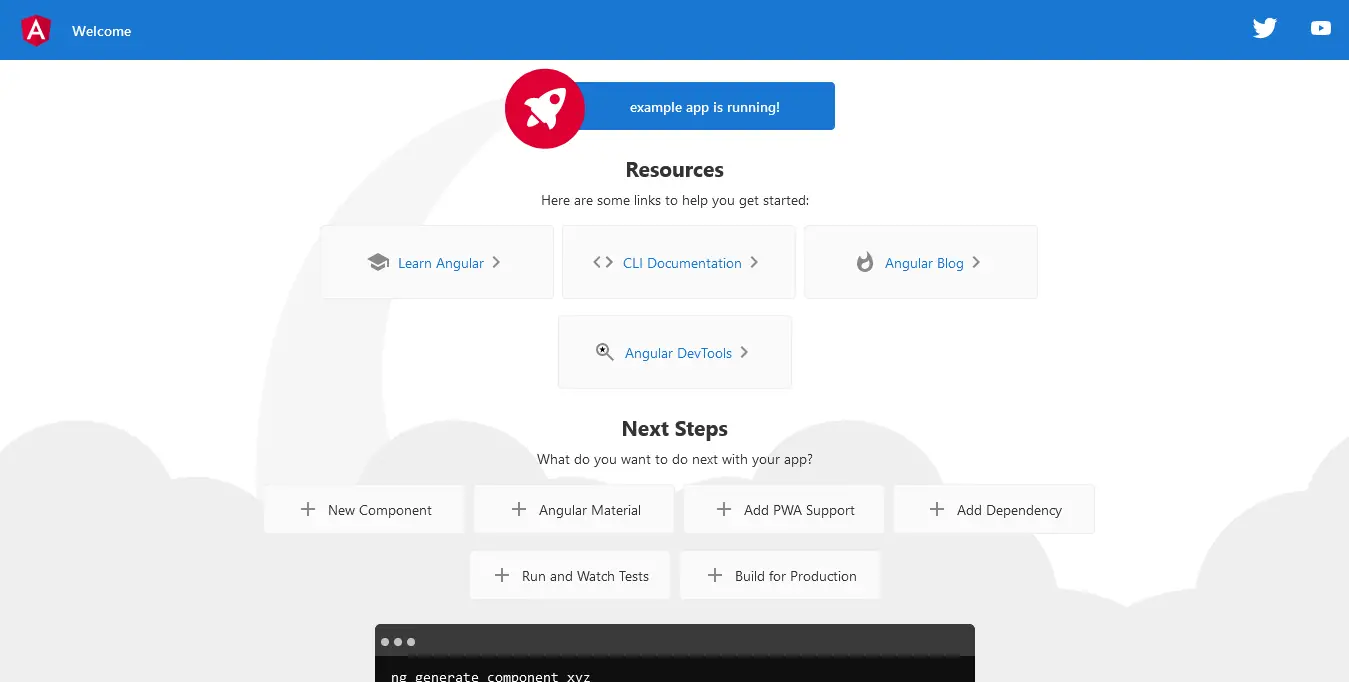
ng serve
This will generate an output screen similar to this.
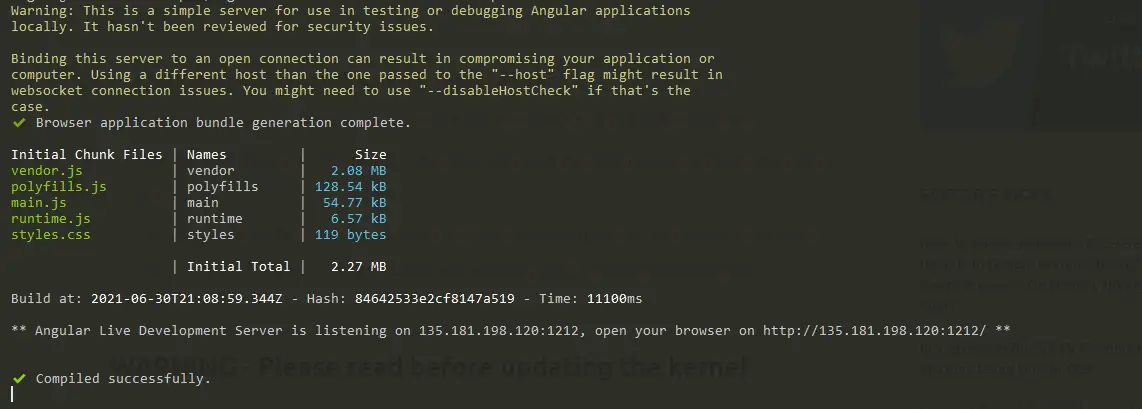
Now just open your favorite web browser and go to http://localhost:4200 to visit the test page. To stop the execution, press the CTRL + C keys.
In case you have done this installation on a remote server, then you can specify both a host and a specific port. To do so, follow this structure.
ng serve --host [host_ip] --port [port]
This way you can install, and manage Angular projects easily.
Removing AngularCLI on Ubuntu 20.04
To remove AngularCLI from the system we will have to use npm again. So the process is as follows.
npm uninstall @angular/cli
This way you can quickly say goodbye to the tool without leaving any traces in the system.
Conclusion
In this post, you have learned how to install AngularCLI on Ubuntu 20.04 following the official and recommended method. With this, you will be able to manage your projects better without the need for so many headaches.
Help us to grow by sharing our posts on social networks and leaving a comment.