A CMS is a web application capable of managing the content on a website. This makes it possible for us to deploy blogs and websites quickly. Today, you will learn how to install MicroweberCMS on Debian 11.
MicroWeber Introduction
MicroweberCMS is a Laravel-based CMS that allows us to deploy websites, blogs, and stores quickly. In addition, it includes tools to manage each of these sites.
One of the main differences with other CMS is that its cache management is excellent, highlighting its integration with Memcached.
Another important aspect is that we can create a website with Drag-and-drop technology, so even the most novice can do it quickly.
There are many other advantages that Microweber has but suffice it to say that it is fast, secure, with many plugins available and with exceptional resource management.
Let’s install it.
Installing LAMP on Debian 11
To get and run MicroweberCMS you need to have a working web server. That is to say, we need a web server like Nginx or HTTP, a database manager like MariaDB and PHP. In short, to have the LAMP stack.
To achieve this, we have to run the following command, which will install all the necessary packages. It will also install PHP modules that are dependencies of MicroweberCMS.
So, open a terminal or connect via SSH to the server and update it.
sudo apt update
sudo apt upgrade
If your user does not have sudo access, then you will have to run the commands as root user.
So install everything you need by running
sudo apt install php apache2 mariadb-server libapache2-mod-php php-common php-mbstring php-xmlrpc php-soap php-mysql php-gd php-xml php-cli php-zip php-curl php-xml php-cli php-zip php-curl
And also these two packages
sudo apt install unzip wget
With this, we are ready with the dependencies.
Create a new database for MicroweberCMS
Now it’s time to configure MariaDB. To achieve this, run the mysql_secure_installation script.
sudo mysql_secure_installation
You will be asked for a password that will be empty if it is not configured.
Enter current password for root (enter for none):
After fine the security protocol for authentication
If You already have your root account protected, so you can safely answer 'n'
Switch to unix_socket authentication [Y/n]
And now you can set the new root password.
Change the root password? [Y/n] Y
New password:
Re-enter new password:
Password updated successfully!
Reloading privilege tables...
... Success!
Then you will see some security questions that you should answer AND.
Remove anonymous users? [Y/n] Y
Disallow root login remotely? [Y/n] Y
Remove test database and access to it? [Y/n] Y
Reload privilege tables now? [Y/n] Y
Now MariaDB is ready for battle.
With MariaDB ready, we can create a new database and a new user for MicroweberCMS.
Access the console
sudo mysql -u root -p
And now proceed to create the database, and the user. You can set the names and passwords to whatever you want.
CREATE DATABASE mwdb;
GRANT ALL PRIVILEGES ON mwdb.* TO 'mwuser'@'localhost' IDENTIFIED BY 'mwpss';
FLUSH PRIVILEGES;
exit;
We can continue.
Download MicroWeberCMS on Debian 11
Now from the folder /tmp/ you can download the latest stable version
cd /tmp/
wget https://microweber.com/download.php -O microweber-latest.zip
Then create a new folder inside the Apache directory where the Microweber files will be.
sudo mkdir /var/www/html/microweber
Unzip the archive
sudo unzip microweber-latest.zip -d /var/www/html/microweber
Make extra settings for MicroweberCMS
Now it is necessary to make some configurations before using it.
First, give proper permissions to the folder.
sudo chown -R www-data:www-data /var/www/html/microweber/
sudo chmod -R 755 /var/www/html/microweber/
The next step is to create a new VirtualHost for Microweber.
sudo nano /etc/apache2/sites-available/microweber.conf
Add the following to the contents of the file
 <Virtualhost *:80>
  ServerName domain
  DocumentRoot /var/www/html/microweber/

  <Directory />
    Options FollowSymLinks
    AllowOverride All
  </Directory>

  <Directory /var/www/html/microweber>
    Options FollowSymLinks MultiViews
    AllowOverride All
    Order allow,deny
    allow from all
  </Directory>

  ErrorLog ${APACHE_LOG_DIR}/microweber_error.log
  CustomLog ${APACHE_LOG_DIR}/microweber_access.log combined
</Virtualhost>
In ServerName type the name of your domain.
After saving the changes and closing the editor, you have to enable the new site, the rewrite module and restart apache.
sudo a2ensite microweber
sudo a2enmod rewrite
sudo systemctl restart apache2
Install MicroweberCMS on Debian 11
Now with a web browser access http://your-domain to start the installation.
In this screen, you will see that you have to enter the database values.

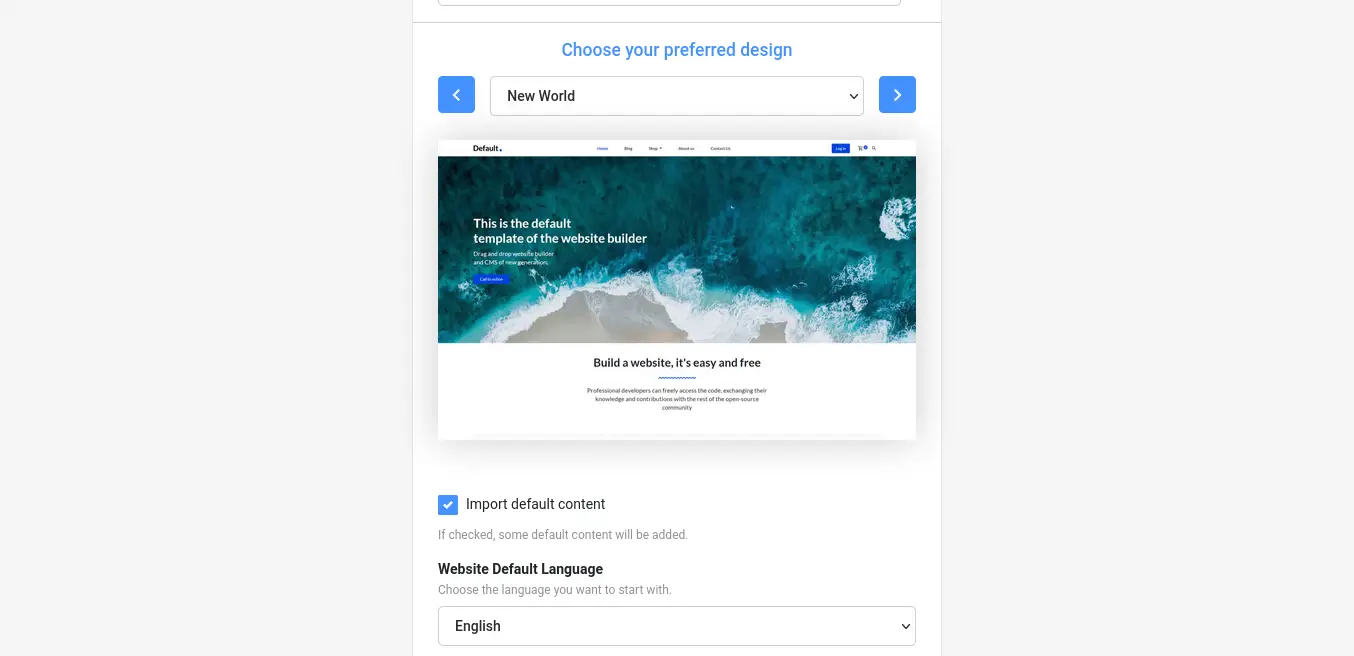
Further down, you will be able to define some options about the site, like the language and the template.
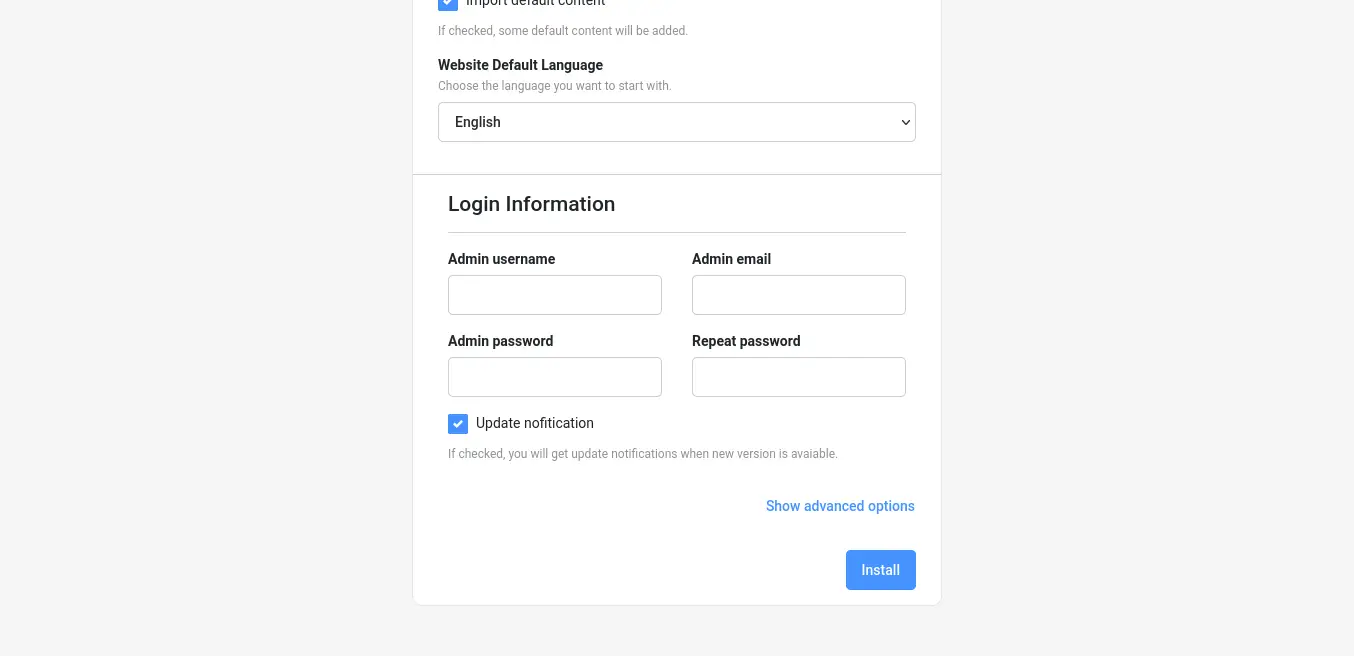
Further down, you will have to configure the admin account.
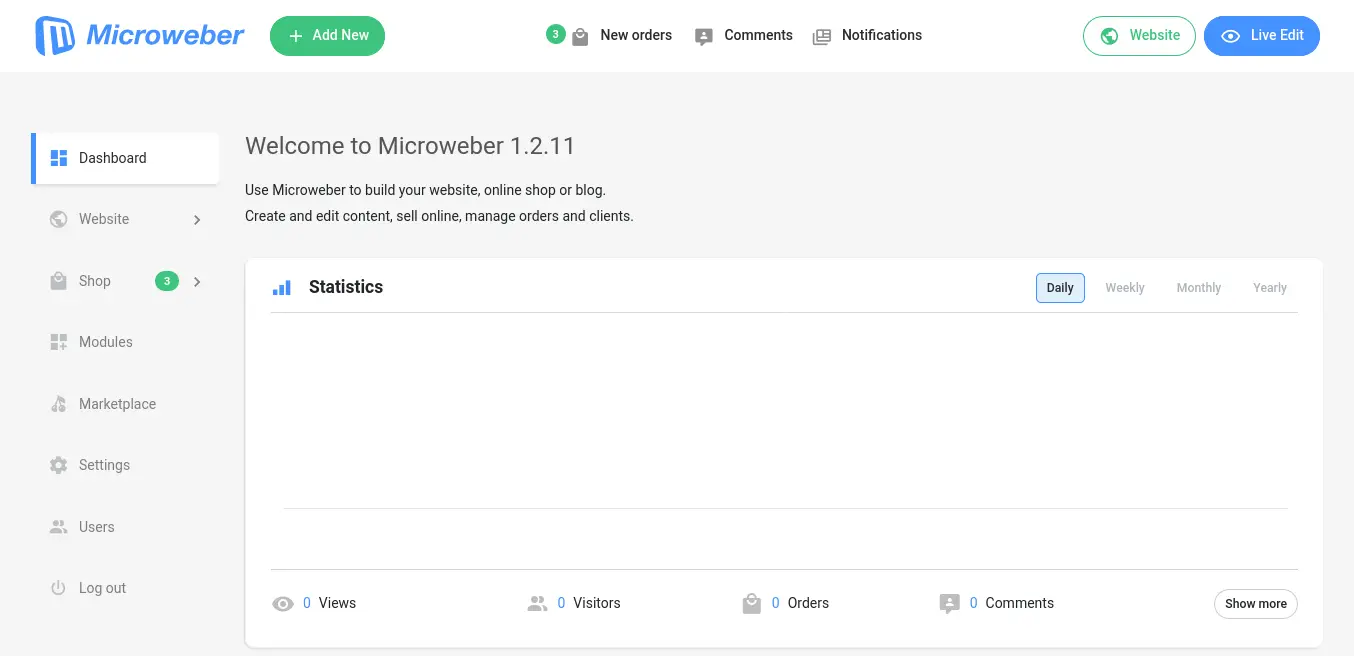
Finally, you will see the Microweber dashboard, and you will be able to use it.
Conclusion
In the market, there are many CMS, but Microweber attempts to make a place for itself with new features like drag-and-drop and being very fast in cache.