Although KeePassXC has become popular and widely used, it is true that it offers limited possibilities compared to Bitwarden. Bitwarden not only has a desktop application but also allows you to create your own instance, ideal for enterprise environments.
Bitwarden is a password management system whose main advantage is that it is cross-platform and multi-device. So, you will find clients for Linux, Windows, and macOS but also on mobile for iOS and Android, in addition to having a web version.
This means that you can access your passwords from any device, enjoying a completely secure synchronization.
Although Bitwarden is open source, it has payment plans so that you can take advantage of it in different organizations or work teams.
With Bitwarden, you can expect everything a password manager can do: Create, groups and entries, password generation, autocompletion through plugins and all this with strong point-to-point encryption protocols.
But one of the best things about Bitwarden is that you can request an installation key and create your own instance. This is interesting in enterprise environments or work teams because you will be yourself responsible for the information there.
Let’s get started.
Installing your instance of Bitwarden on Debian 11
The most recommended and secure method to install Bitwarden is to do it using Docker. So, this will be the first step.
Install Docker on Debian 11
Before you start, open a terminal and as root user, completely update the operating system
apt update
apt upgrade
The next step is to install some packages that are necessary to add the Docker repository to the system.
apt install apt-transport-https ca-certificates curl gnupg-agent software-properties-commonNext, download and add the GPG key from the repository to the system
curl -fsSL https://download.docker.com/linux/debian/gpg | gpg --dearmor -o /usr/share/keyrings/docker-archive-keyring.gpgThen add the repository:
echo "deb [arch=amd64 signed-by=/usr/share/keyrings/docker-archive-keyring.gpg] https://download.docker.com/linux/debian $(lsb_release -cs) stable" | tee /etc/apt/sources.list.d/docker.listWhile it is true that Docker is present in the official repositories, it is also true that using the latest stable version provides an extra layer of security.
Refresh the system repositories:
apt updateNow install Docker and the packages associated with it:
apt install docker-ce docker-ce-cli containerd.io
Reading package lists... Done
Building dependency tree... Done
Reading state information... Done
Suggested packages:
  aufs-tools cgroupfs-mount | cgroup-lite
Recommended packages:
  apparmor docker-ce-rootless-extras git libltdl7 pigz docker-buildx-plugin docker-compose-plugin docker-scan-plugin
The following NEW packages will be installed:
  containerd.io docker-ce docker-ce-cli
0 upgraded, 3 newly installed, 0 to remove and 1 not upgraded.
Need to get 63.4 MB of archives.
After this operation, 251 MB of additional disk space will be used.
Check the installed version with the command line:
docker --version
Docker version 23.0.2, build 569dd73
And at once, the status of the service of the same one
systemctl status docker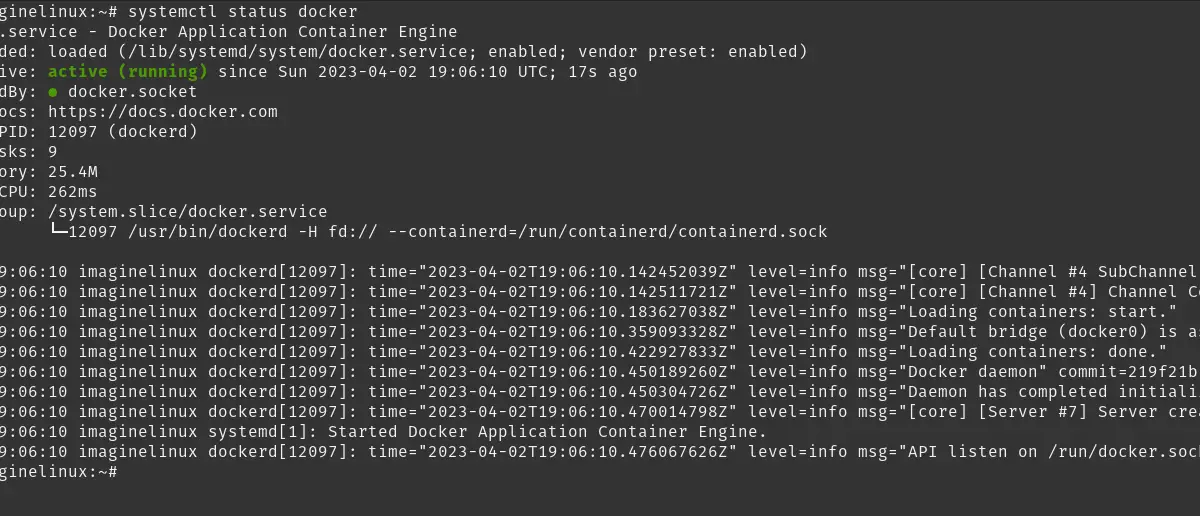
So, Docker is ready.
Installing the latest stable version of Docker Compose
Now it is the turn of Docker Compose. To achieve this, you will have to do a manual download. First, check which is the latest version available at this link.
So, at the time of writing this post, the latest stable version is 2.17.2 and to download it, execute this command
wget https://github.com/docker/compose/releases/download/v2.17.2/docker-compose-linux-x86_64Now move it to a directory inside the system PATH like /usr/bin/
mv docker-compose-linux-x86_64 /usr/bin/docker-composeAssign it appropriate permissions so that it can run
chmod 755 /usr/bin/docker-composeBoth Docker and Docker Compose are ready.
Obtain an Installation ID and Key for Bitwarden
The next step is to get an Installation ID and Key for Bitwarden. This can be obtained from the Bitwarden website or directly from this link. You need a valid email to do it.
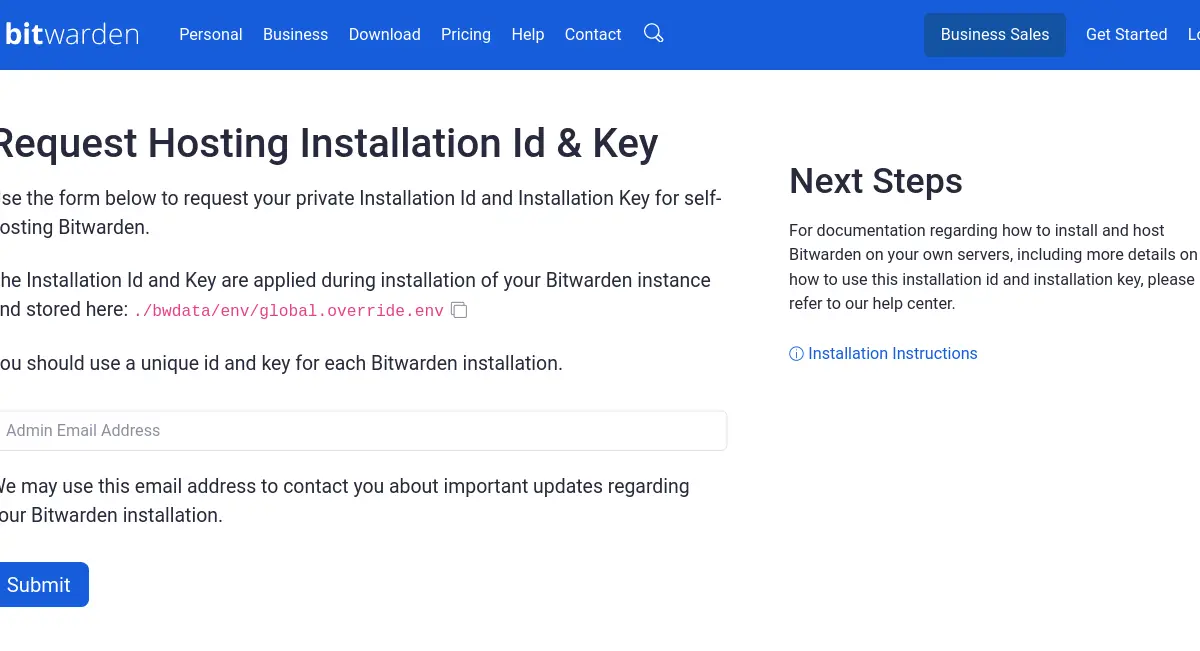
Once you have the ID and Key, you should copy it to a safe place, as you will need it later,
Install Bitwarden on Debian 11
With everything ready for installation, you can download the script that performs the process quickly and safely.
curl -Lso bitwarden.sh https://go.btwrdn.co/bw-shAssign it run permissions
chmod +x bitwarden.shAnd run it, to start the process:
./bitwarden.sh installDuring the installation process, you will be asked some configuration questions like
(!) Enter the domain name for your Bitwarden instance (ex. bitwarden.example.com):
(!) Do you want to use Let's Encrypt to generate a free SSL certificate? (y/n):
(!) Enter the database name for your Bitwarden instance (ex. vault)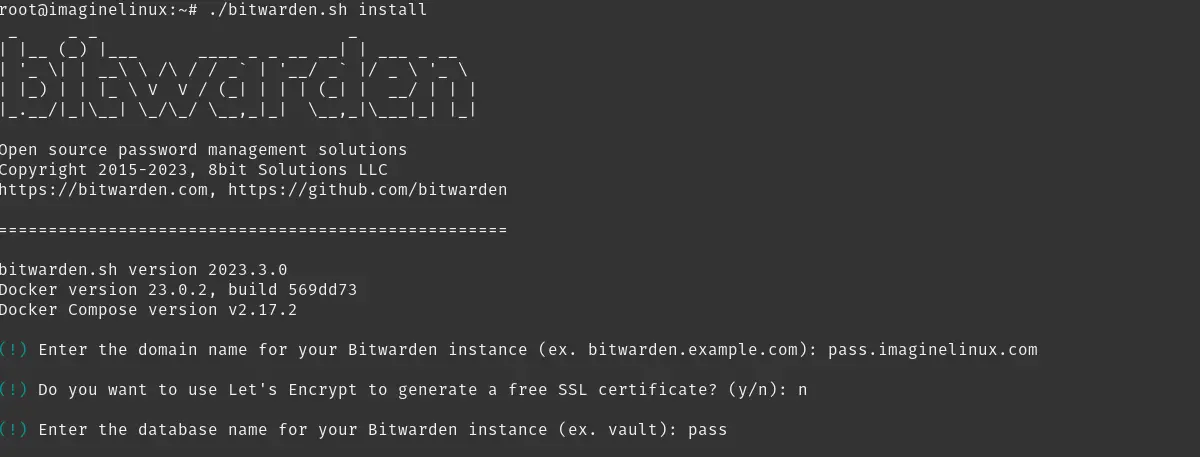
It is important to keep in mind that if your instance will be hosted on the internet, it is good to use trusted certificates such as Let’s Encrypt or others. You can also use one of your own.
Then, you will be able to enter the key and ID obtained previously
(!) Enter your installation id (get at https://bitwarden.com/host):
(!) Enter your installation key:jNIy6W4KX8ivitbsWKNF
(!) Do you have a SSL certificate to use? (y/n): n
(!) Do you want to generate a self-signed SSL certificate? (y/n): Y
As you can see, you can also choose to create your own certificate in case you don’t have one.
If all the process was successful, you will see a screen like this:
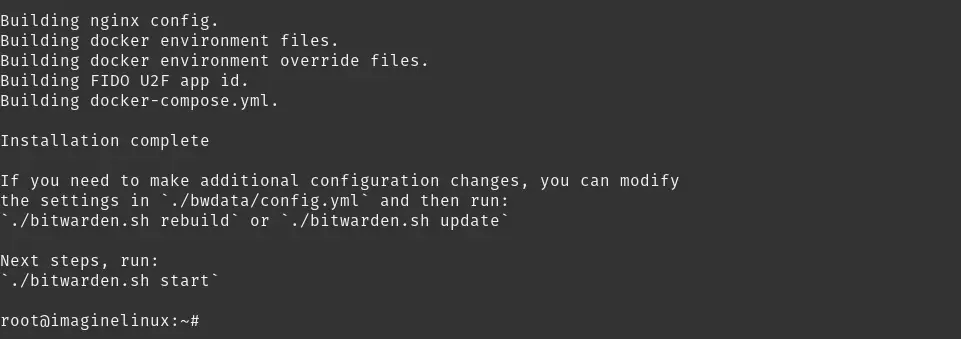
Next, just run
./bitwarden.sh startThe script will start the instance. After that, you can visit Bitwarden.

So all that remains is to access your Bitwarden instance.
Accessing the Bitwarden instance
Open a web browser and go to https://your-server and you will see a login screen.
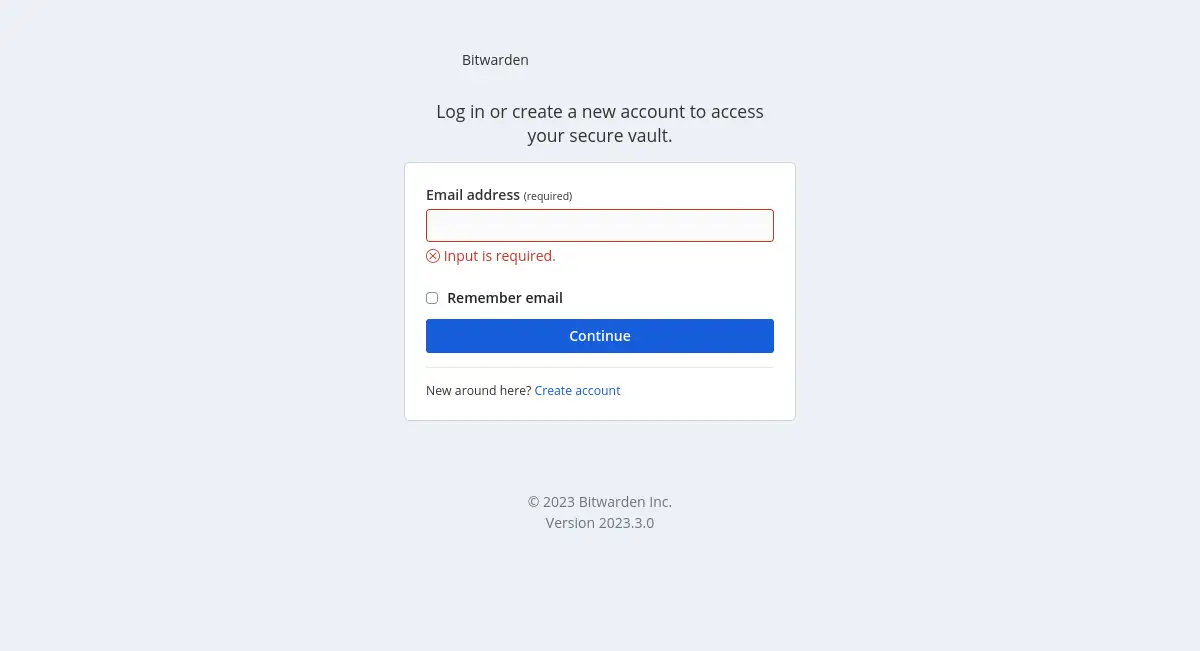
Use your created account to log in or from there click on Create account.
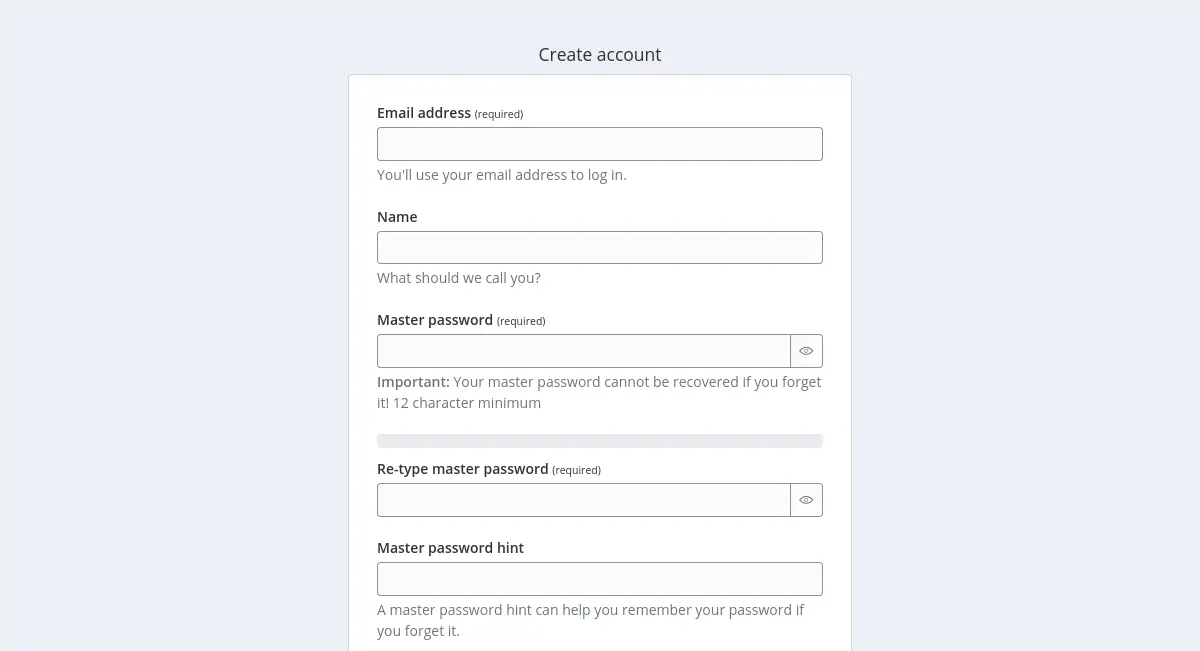
Just create your username and password and then go back to the login page, and you will be able to use it.
Bonus: Install the Bitwarden Desktop Client
Bitwarden has a desktop client for Linux in AppImage format, so installing it is simple.
Just click on the Linux option and the download will start.

When it finishes, right-click on the file and go to properties and assign permissions to it.
In the terminal it is something like:
cd Downloads
chmod +x Bitwarden-2023.3.1-x86_64.AppImage
The last step is to execute it, by giving double click on the file or executing
./Bitwarden-2023.3.1-x86_64.AppImage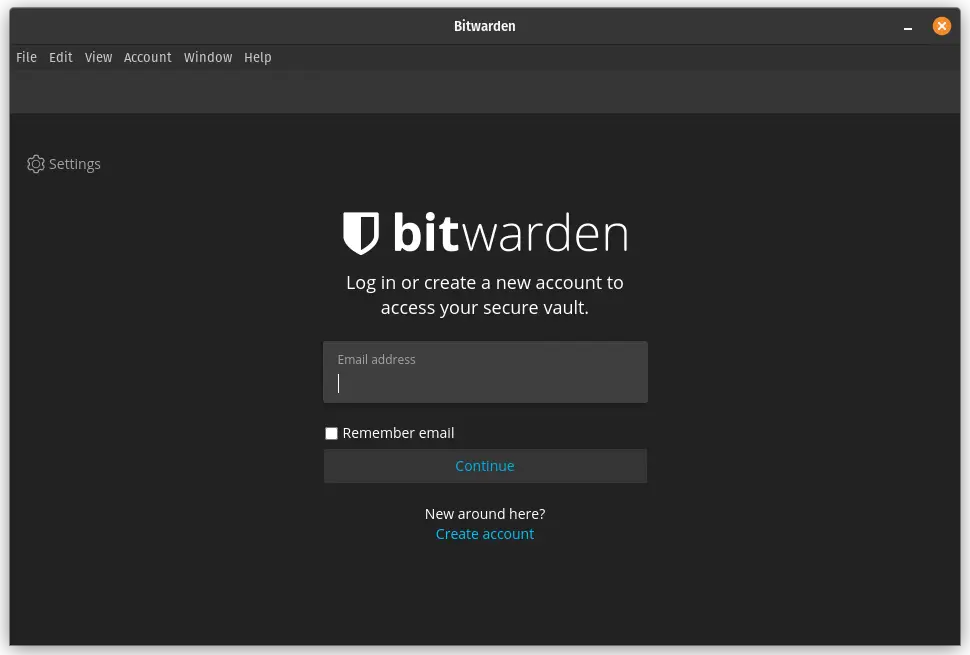
From there, you can log in or create an account.
Conclusion
Bitwarden is a pretty complete solution for password management on Linux and other systems. I hope you liked this post, and you can share it with your friends.