In the previous post, we have learned that it is a package manager that helps us to install, uninstall and do many operations with packages. Although these programs are relatively easy to use, they have to be invoked from the console. So, if you are a novice user coming from Windows or macOS, maybe the impact is bigger and some introduction is needed.
So, to save time and ease the transition to Linux for newbies, the community has developed programs that act as front-ends for these package managers. Of these programs, some are developed by the distribution itself but others are developed by third parties.
With these graphical package managers we can do the same operations as in the terminal but of course all from a comfortable graphical interface. Even if you are a novice or an experienced user, you should know these tools because you will be able to save time on the system.
So, let’s go for it.
1. Synaptic – A terrific graphical package manager
Whenever we talk about Ubuntu we always associate it with easy management for the novice user and part of that is thanks to Synaptic. Although it is not installed by default in Ubuntu (but it is in Linux Mint), for many it has become essential.
Synaptic is a package manager, a visual program manager, that is to say, it has an interface and we install with a click instead of typing as we do in the terminal. It is a graphical interface to apt, the package management system for Debian-based systems. It combines the simplicity of the graphical user interface with the power of the APT command-line tool.
So, to install it on Debian or Ubuntu systems you have to run it in a terminal
sudo apt update
sudo apt install synaptic
Then you can run it from the main menu of the distribution.
Using Synaptic a grpahical package manager for Debian and Ubuntu
When you run it you will see the following screen.

The menu bar is full of different options ranging from repository management to other less important options.
On the left side are the package display filters. By default, it shows the sections; but you can also view them by status, origin, and so on. As you can see, it’s very useful.
The other big screen is where you can see the list of packages. Column S is for status, package name, installed version, available version, and a short description.
Before doing anything else, it is necessary to refresh the repositories with the Reload button.
If you want to search for a package, just click on the Search icon.
Once you know which package you want to install, you can right-click on it and see the available options. To install it, choose the Mark for Installation option and then click on the Apply button to start the procedure.
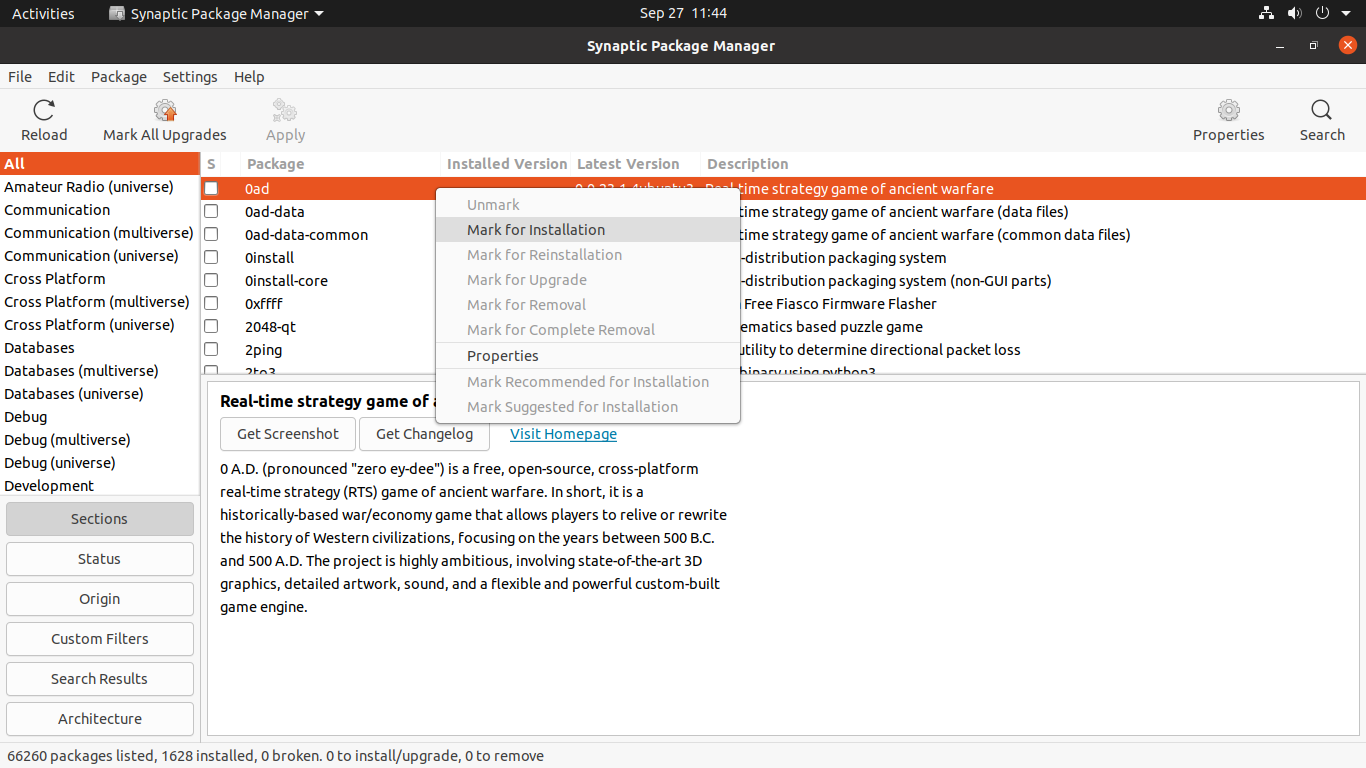
In the context menu above, you can click on Properties to get more information about the package.
If a package is installed and has a new version available, you can upgrade it by right-clicking on it and choosing Mark For upgrade.
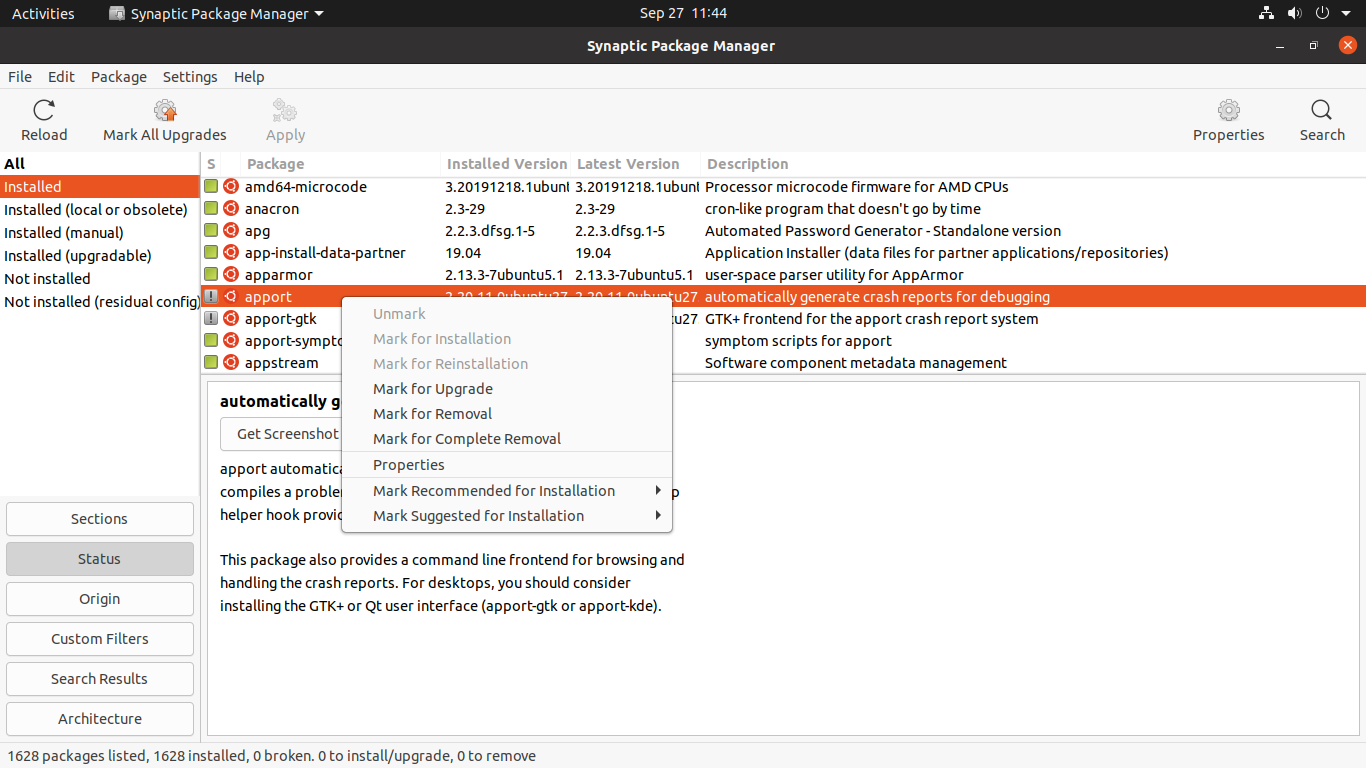
As you can see in the same menu you have the option to uninstall it and its dependencies.
Also, you can simply click on the Mark All Upgrades button.
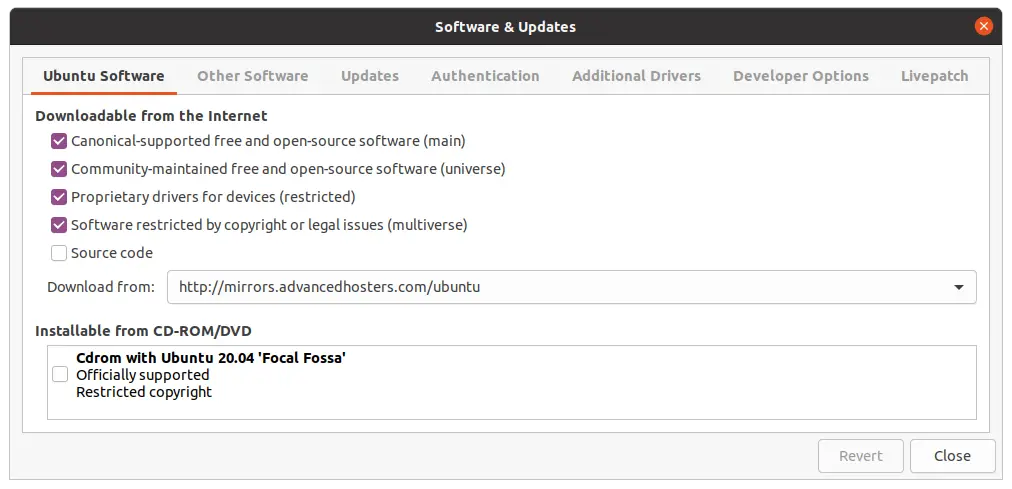
Finally from the main menu go to the repository management window Settings > Repositories and you will see this screen where you can quickly and easily enable or disable repositories.
These are the basic operations of Synaptic.
2. Gnome Software – A graphical agnostic package manager
Recently, GNOME decided to create a program that allows you to manage packages regardless of distribution or package type. Because in effect, GNOME Software allows you to manage DEB packages, RPM packages, and via plugins supports Flatpak and snap.
Also, from this program, you can perform firmware updates. For the programs, there are ratings and reviews so that before installing a package you can know what it is.
GNOME Software is an agile, fast, and efficient program whose main advantage lies in the fact that we can use it on various distributions such as Fedora, RHEL, Linux Mint, Debian, and all without problems.
As powerful as it is, it is very simple to use. So you should have no problem with it.
So, on distributions like Debian, Ubuntu, Linux Mint and derivatives, you can install it from the terminal by running
sudo apt install gnome-software-*
In the case of Fedora, RHEL, OpenSUSE, ArchLinux or some derivative GNOME Software should be installed automatically if you have chosen the GNOME environment.
Using GNOME Software
So, when it is installed, you can run it from the main menu of the distribution.
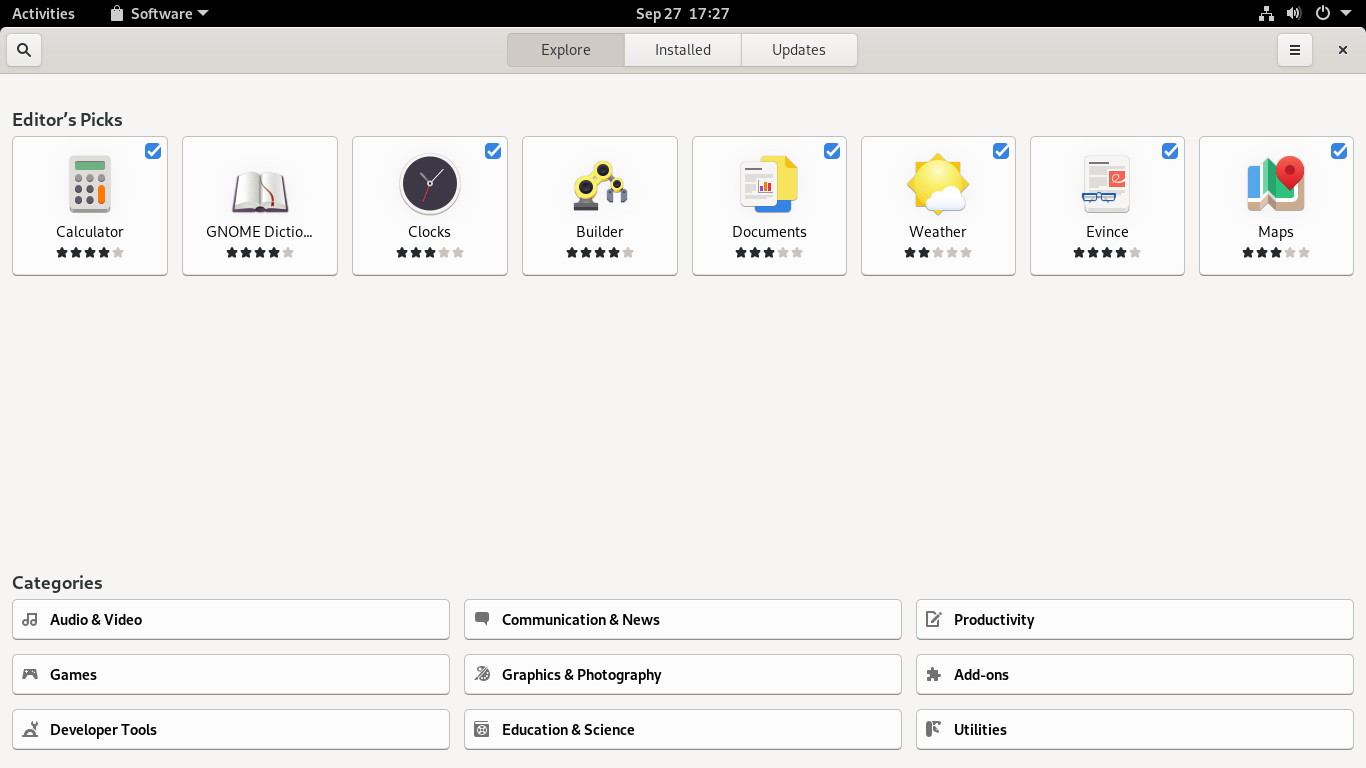
You will then see the main GNOME Software screen which has 3 main tabs. In the first one called Explore you will be able to discover new packages and programs as if it were a shop.
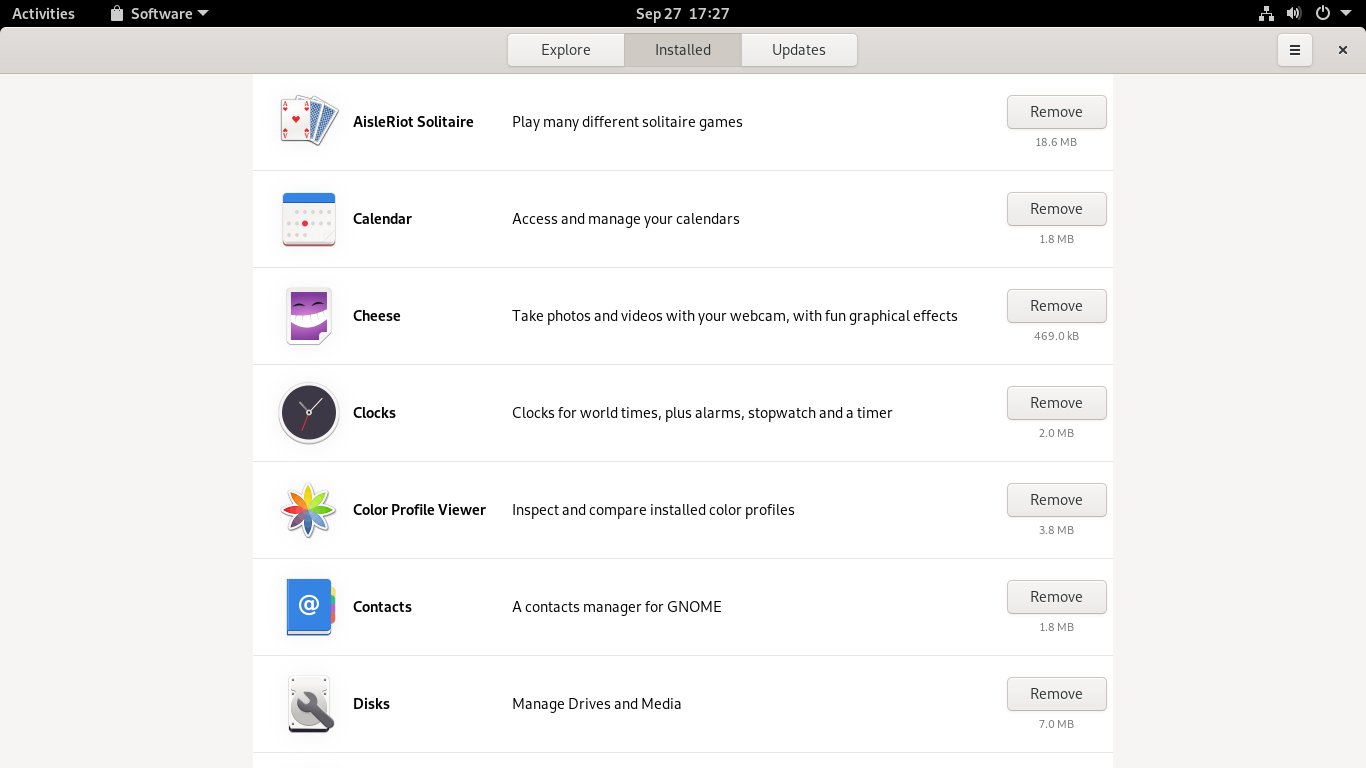
In the second tab called Installed you can see a list of all installed programs. If you want to remove any of them, click on the Remove button.
Finally in the Updates tab you will see a list of available updates to install.
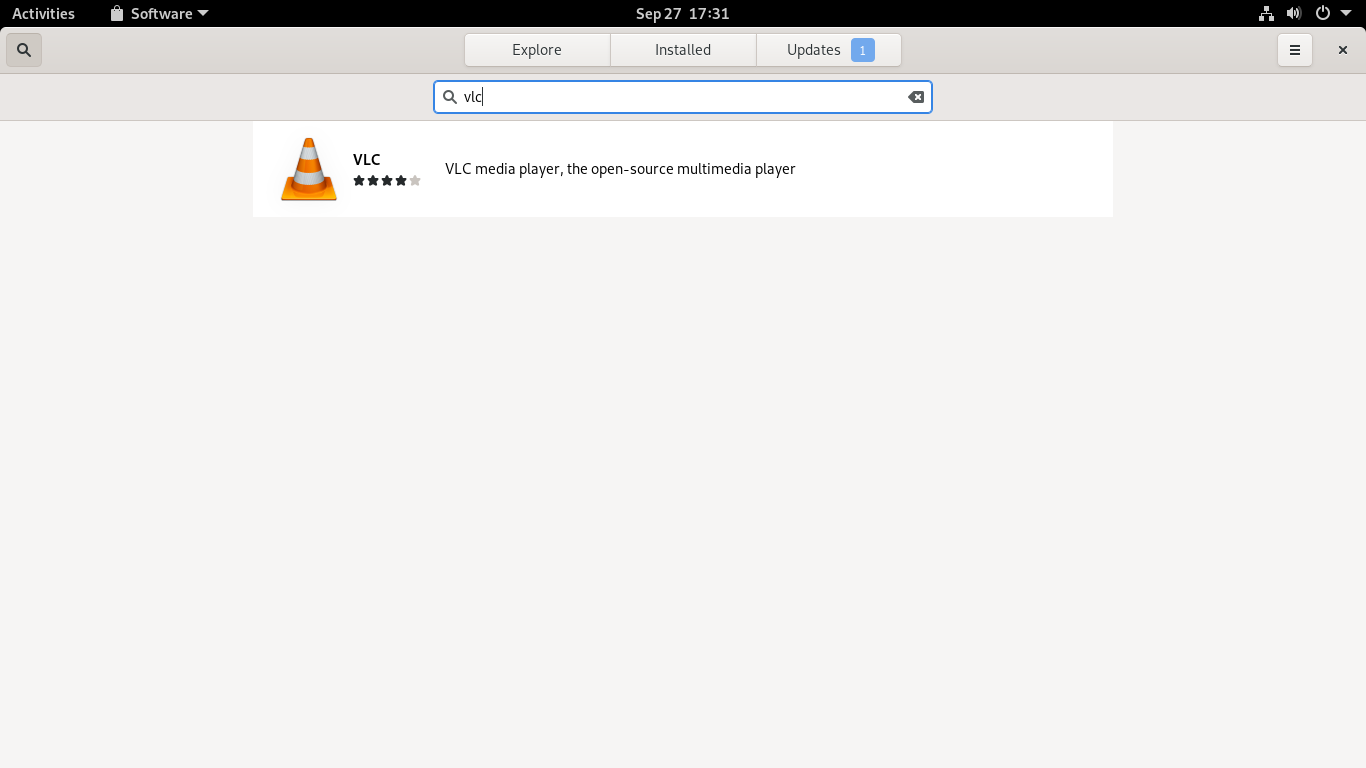
On the left side you will see a magnifying glass that refers to the search button. Clicking on it will bring up a search bar for you to enter text. In the image you can see how by searching for the word vlc you can find VLC.
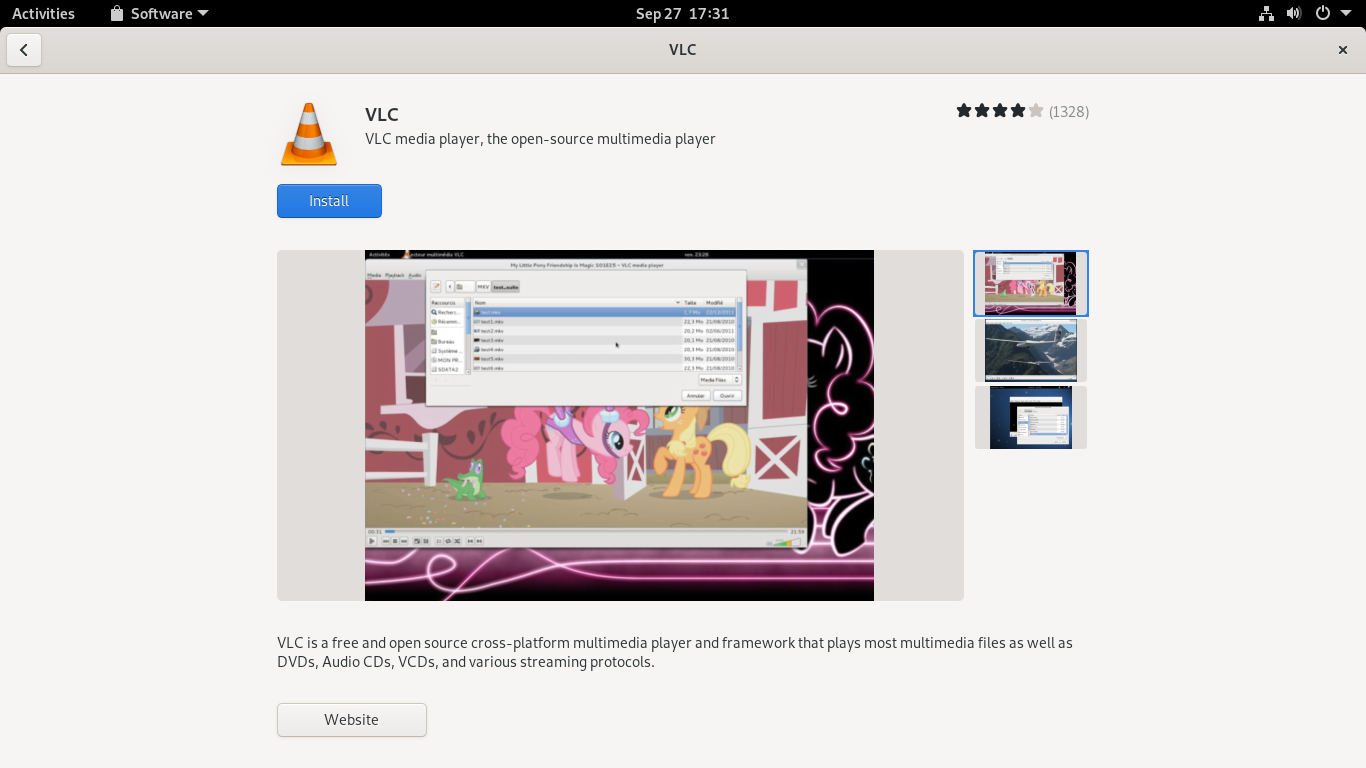
If you click on the result, you will then be able to see information about the program. Some screenshots and underneath information like weight and a description. If you are going to install it, just click on the Install button.
On the other hand, if you click on an already installed application, you will have the package information but a button in addition to the Remove button and that is Launch.

As we can see, with GNOME Software we can manage programs and packages in many different distributions and formats.
3. Octopi – a powerful graphical packages manager for ArchLinux and derivatives
According to the project website:
Octopi is a graphical user interface for the Arch Linux package management tool pacman. It is written in C++ using the Qt version 5.
So Octopi is a package manager that focuses on Arch Linux and derivatives like Manjaro, Parabola GNU / Linu or KaOS. It is remarkable how fast it is in tasks like installing or uninstalling packages.
Octopi consists of a package browser, sudo helper, notifier, cache cleaner and repository editor. Through the browser you can search for packages from main and foreign repositories. Besides this, in this part of Octopi you can easily install, uninstall and search for packages.
On the other hand, Notifier shows latest repository changes at the interval you choose as well as enabling you to install them. While Cache cleaner helps you clean the cache of packages created by this never ending download from the repositories, so your disk space can be relieved.
And finally the repository editor helps you add, enable, disable and remove a pacman repository.
Using Octopi
Octopi does not normally come installed on Arch Linux, Manjaro, KaOS or derivatives. This is because it is a community project but has earned its reputation. So to install it, run in a terminal
sudo pacman -S octopi
Then you can run it from the main menu like any other application.
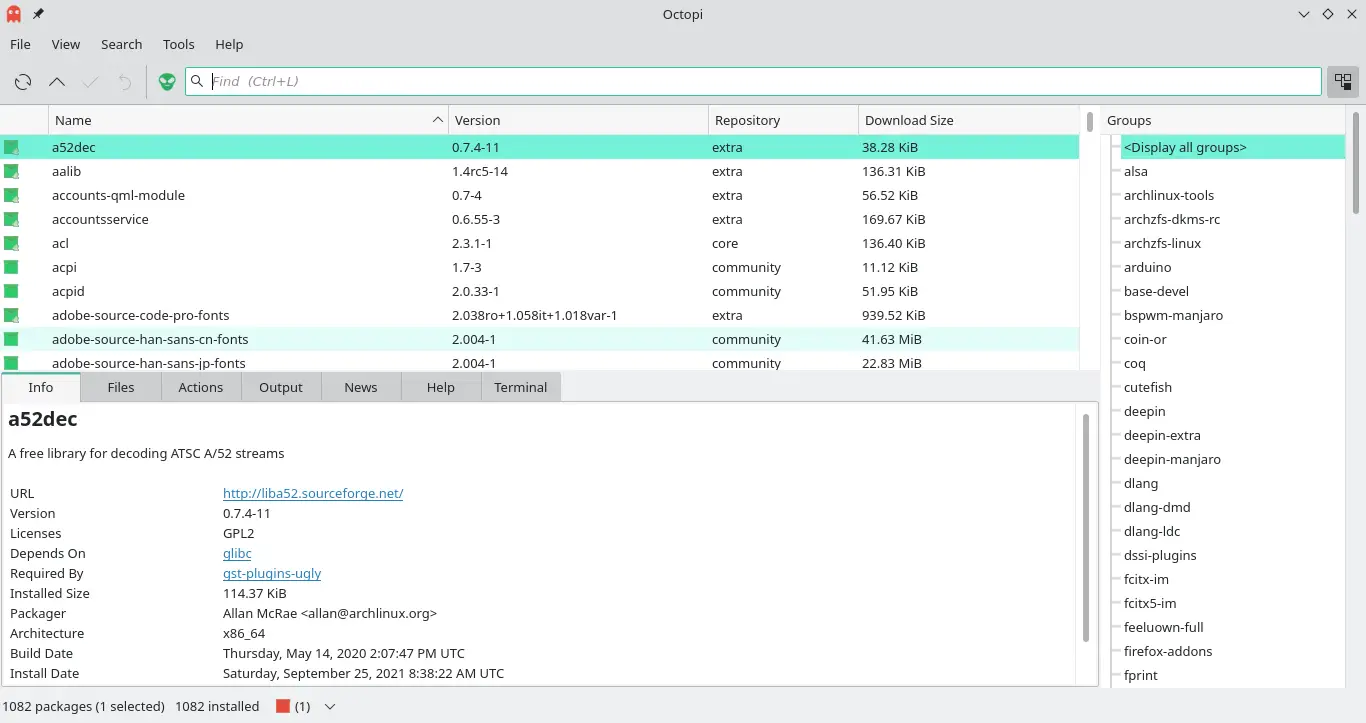
Octopi’s graphical interface is quite simple but straight to the point.
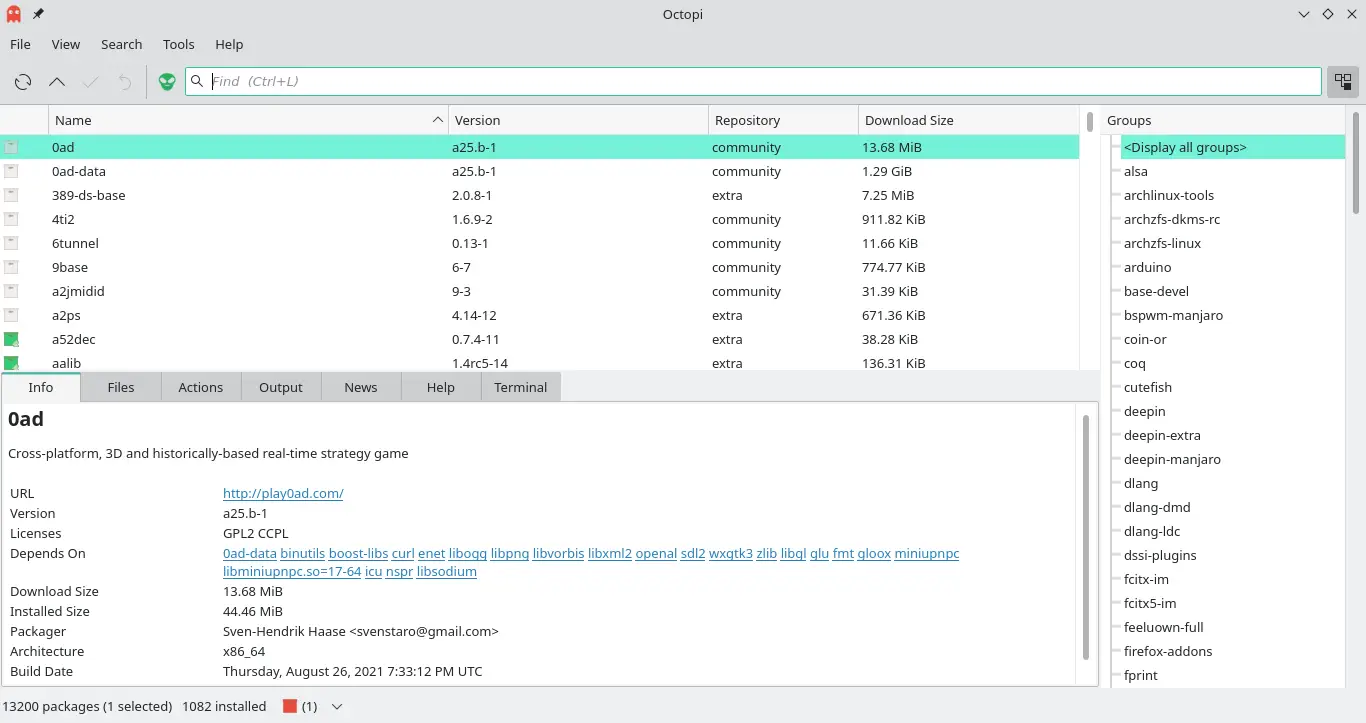
With a search bar in the center of the screen, you can quickly search for a package from the total list of packages in the system.
If you click on one of them, you can see relevant information in the bottom panel.
Also, on the right side, you will have the different package sections to help you filter them.
If you go to menu View > Installed Octopi will only show installed packages. Also, from there you can show them all again in All or the available ones.
Searching for a package will show you the results. In this case, I searched for VLC.
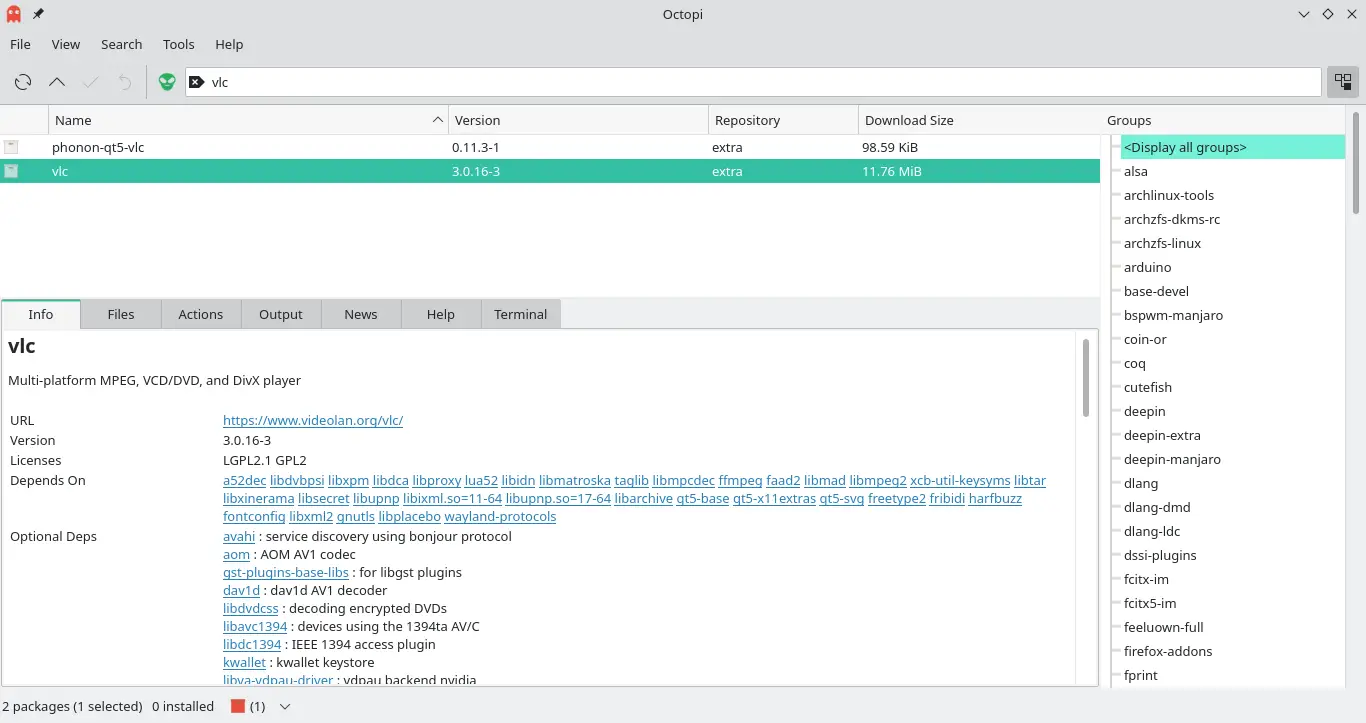
To install it, just click on it to select it and then right-click and Install to see the necessary dependencies.
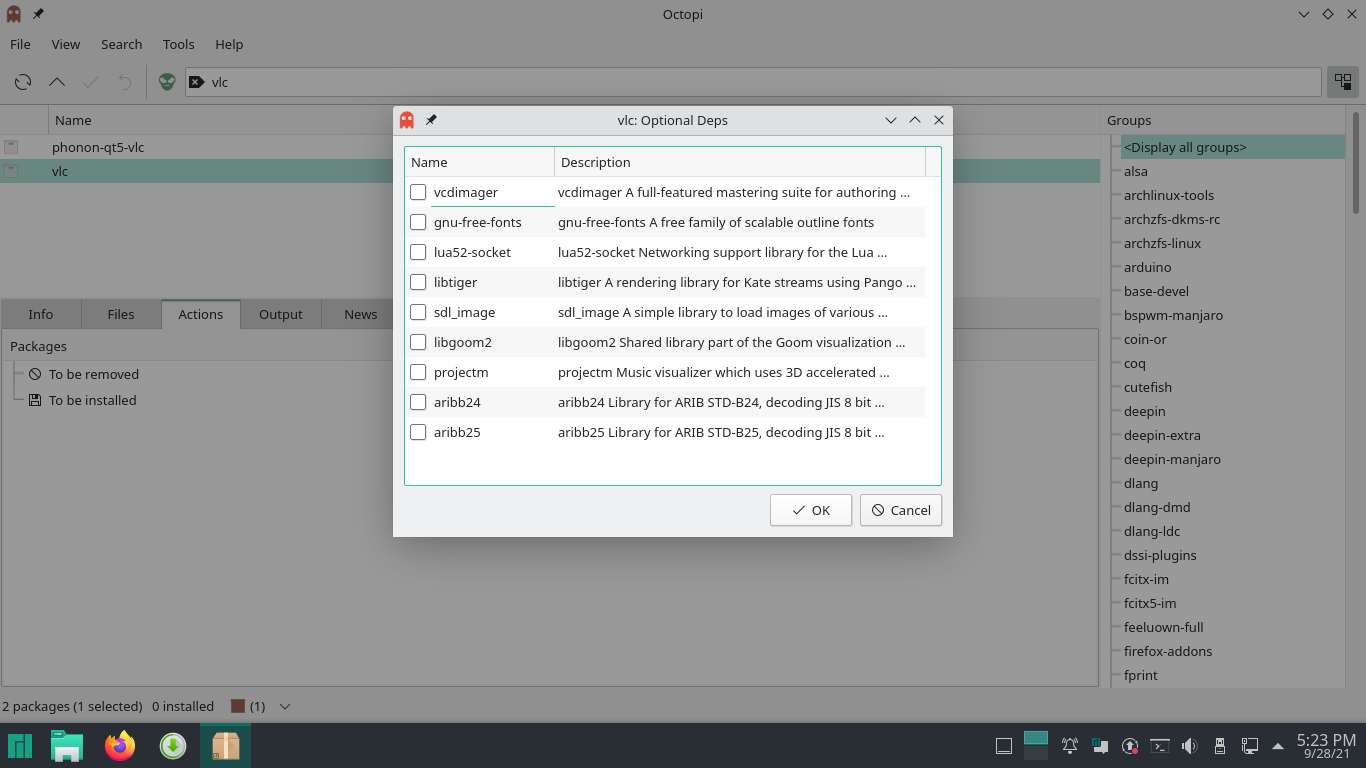
When you accept them, the process will start.
Similarly, when you right-click on an installed program, then you will have the option Remove available to remove it from the system.
A great Octopi tool is the Cache Cleaner which you can invoke from the Tools menu.
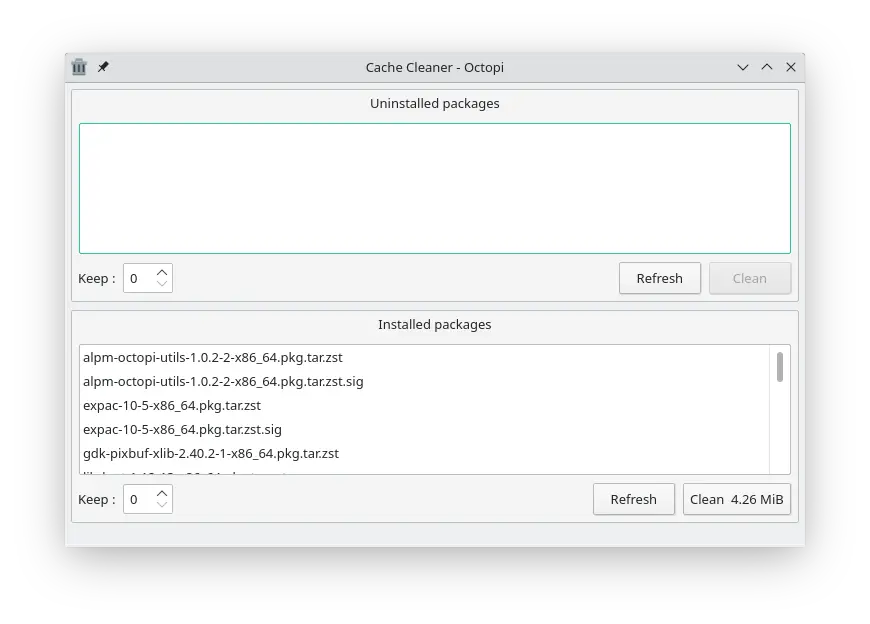
From this convenient interface, you can save disk space quickly and easily. You can also define how long installed and uninstalled packages will be kept.
4. Discover – The reliable alternative in KDE Plasma
As we all know KDE Plasma is one of the most legendary desktop environments in Linux. It is highly customisable and has the most powerful applications in Linux. So, there needs to be a graphical package manager that fully integrates with this environment and that is Discover.
Discover helps you find and install applications, games, and tools. You can search or browse by category, and look at screenshots and read reviews to help you pick the perfect app.
One of the best things about Discover is that it includes support for Flatpak and Snap packages so you can have almost all of the available packages in one place.
Finally, Discover also allows you to find, install, and manage add-ons for Plasma and all your favorite KDE apps! So we can take advantage of the interaction with the desktop environment. All from a single application.
As is often the case with GNOME-software, this application can be used on many different operating systems. However, to get the most out of it you should use Plasma as your desktop environment.
So, let’s go for it.
Install Discover on Linux
Depending on the Linux distribution you are using, you will have to use one or another command.
In the case of Debian 11 /10, Ubuntu 20.04 / Linux Mint 20.x and derivatives of them, you can open a terminal and run
sudo apt update
sudo apt install plasma-discover
In the case of Fedora, CentOS 8, RHEL, and derivatives thereof
sudo dnf install plasma-discover
For Arch Linux, Manjaro, KaOS and derivatives
sudo pacman -S discover
Finally for OpenSUSE
sudo zypper in discover
Once it is installed on your system, you can run it from the main menu of your distribution.
Using Discover on Linux
The way Discover works is not much different from GNOME Software because they basically do the same thing but this one is focused on Plasma.
So, once you have it installed on your system, you can run it from the main menu.
The graphical interface is very simple with a central panel where you will have a selection of recommended packages and programs for your daily use.
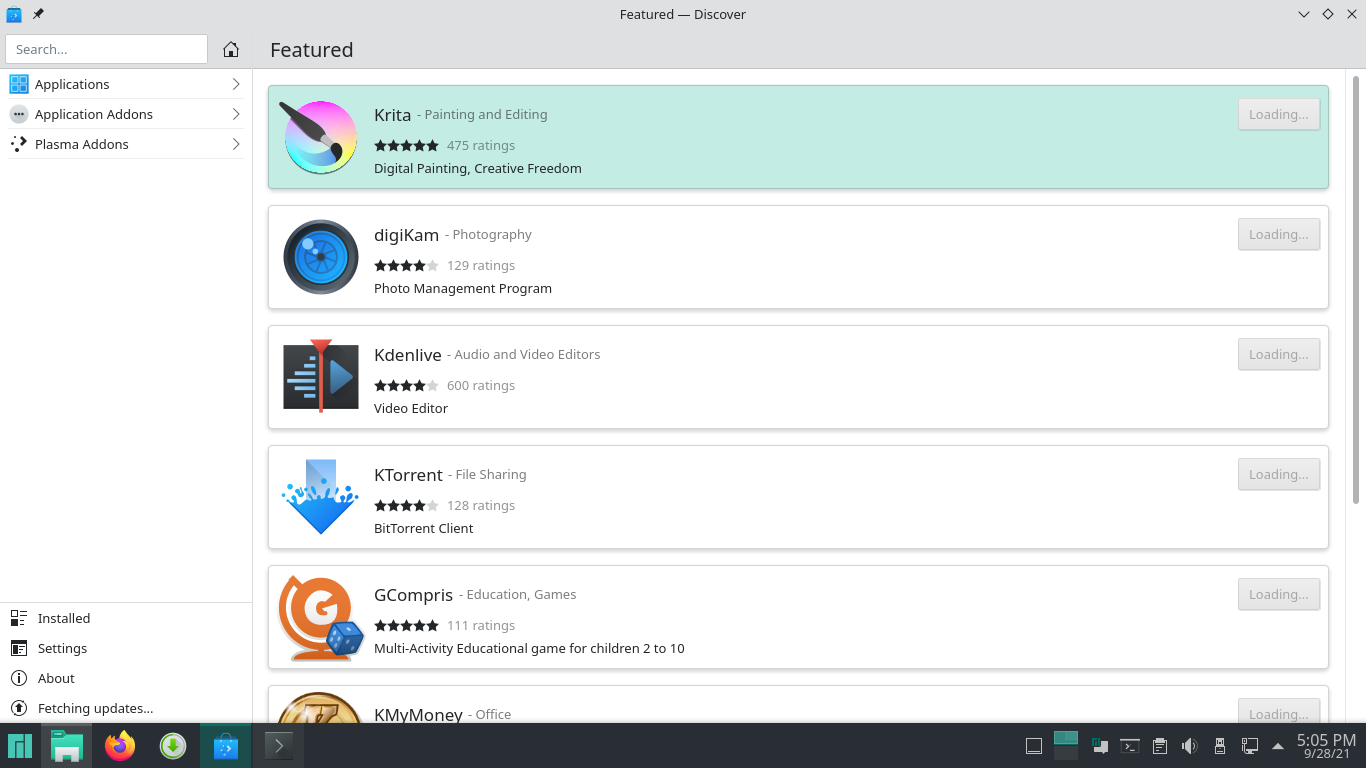
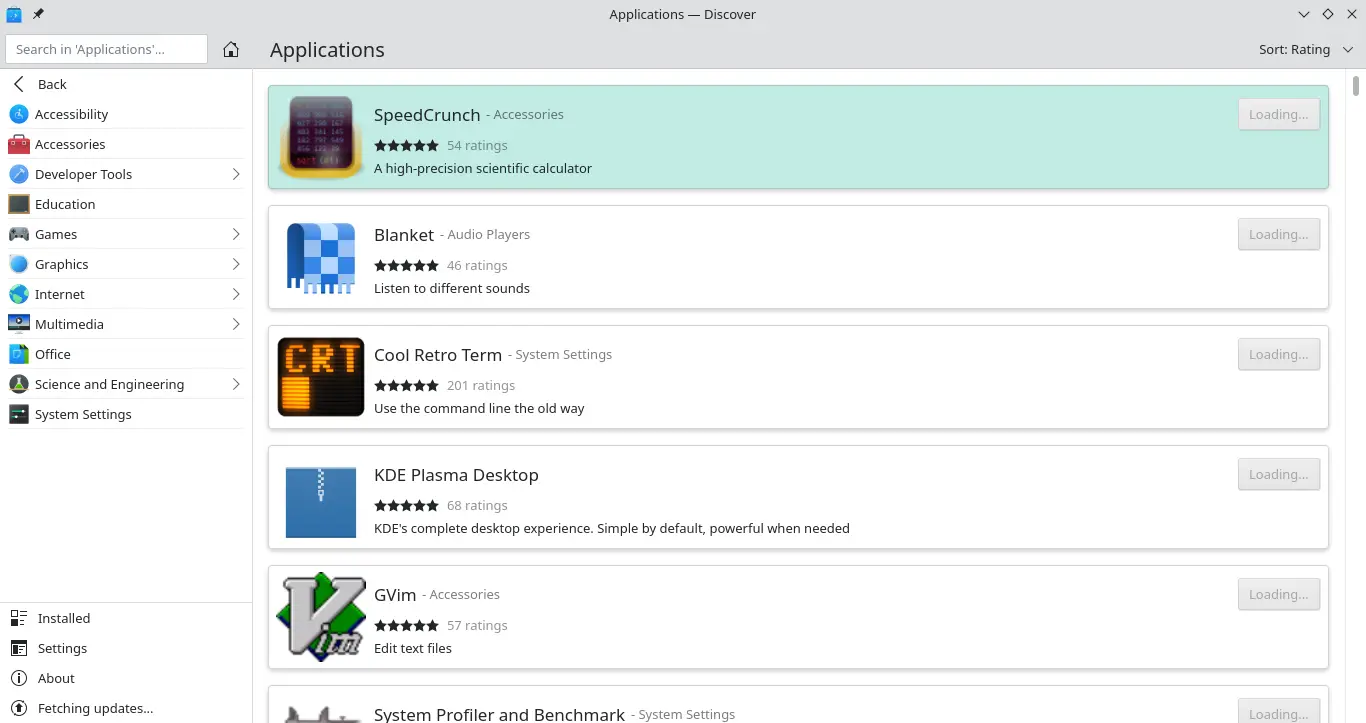
On the left side, you will see a section with different display options. For example, thanks to this section you can navigate through the different application sections.
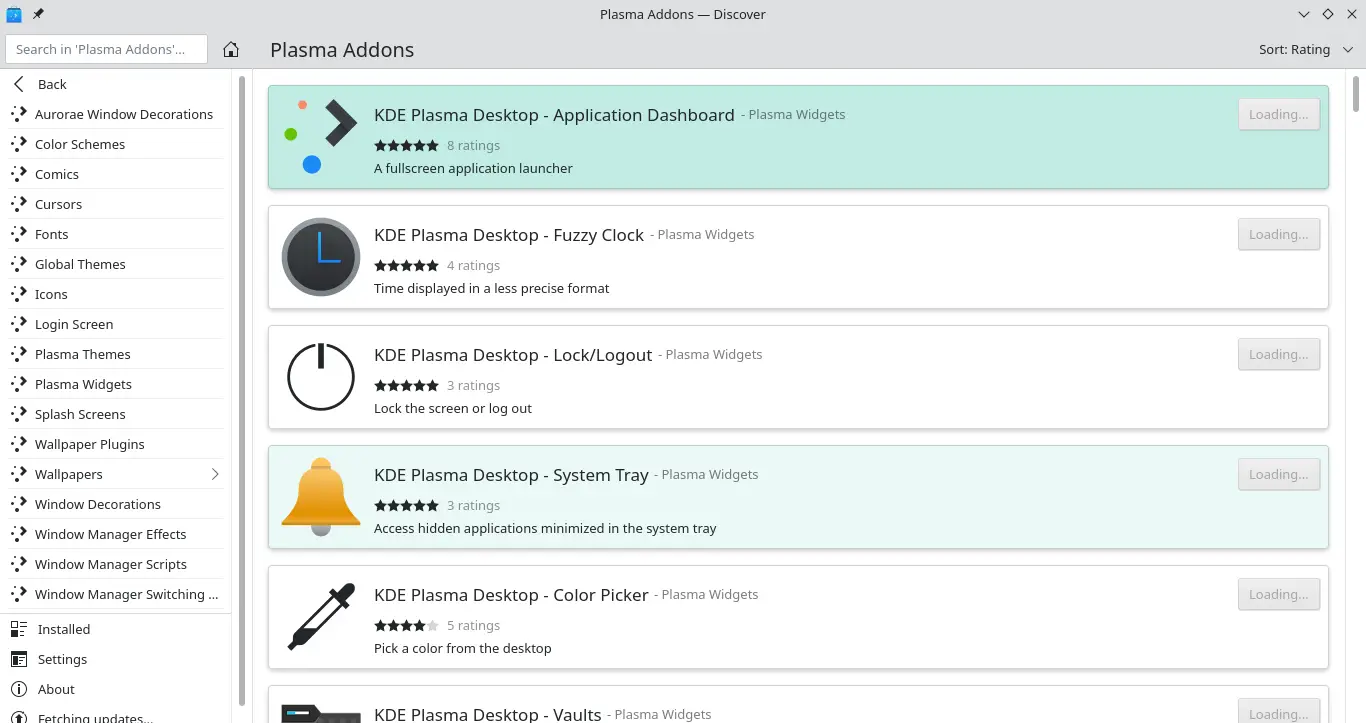
Also, you can install Plasma Addons by simply selecting them and clicking on the Install button.
Also, when a program or Addons is installed, instead of Install you will see the Remove button with which you can uninstall it from the system.
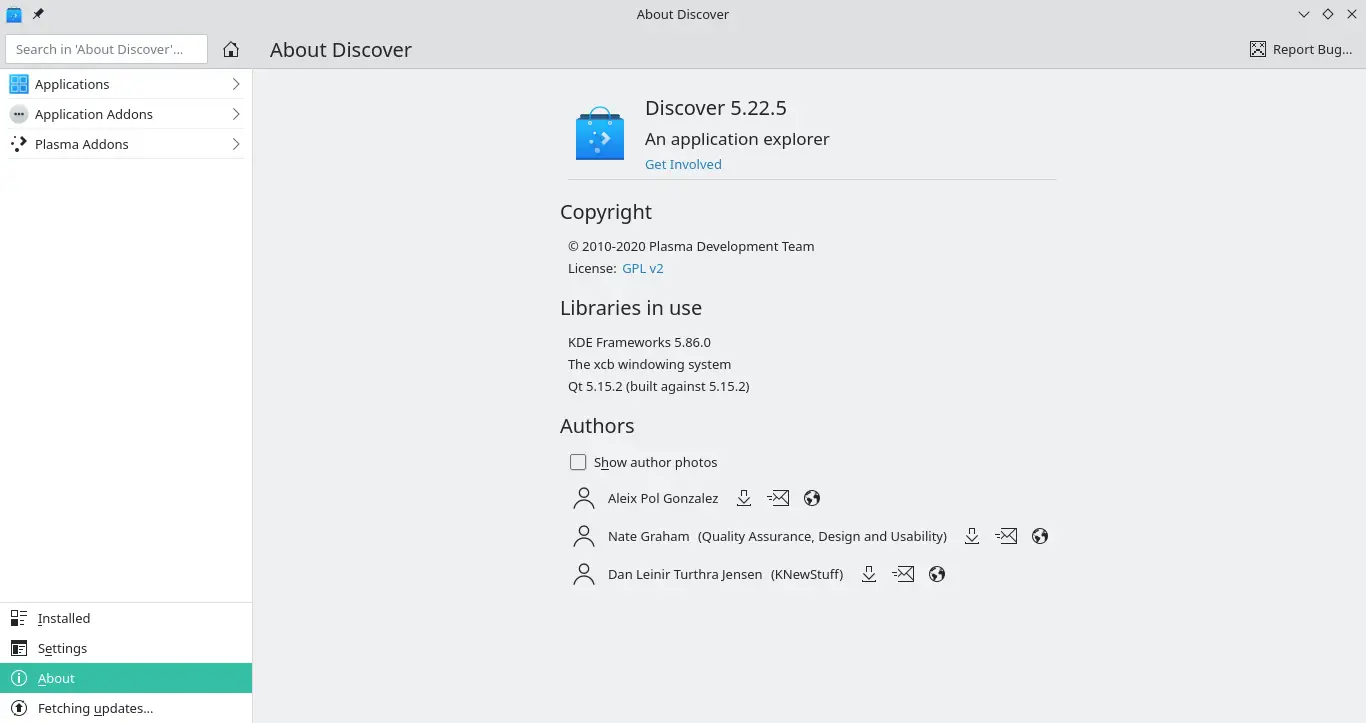
Finally, you can consult the information of the application by clicking on About.
Discover is one of the easiest to use graphical package managers and this will be appreciated by a novice user who doesn’t want any complications.
Conclusion
Although the terminal is easy to use for installing packages, many people prefer something graphical. That’s why in this post, we’ve walked you through the main graphical package managers out there. Each of them is intended to be a near-standard according to the distribution and development environment used.
So, I hope this post has helped you and allowed you to move forward on your Linux journey. Share this post and help us grow.